
MacTalk
August 2022

Apple Brings Mail Merge Back to Pages
After nearly a decade, Apple has finally brought mail merge back to Pages. Apple removed the feature from the iWork suite as part of the fundamental rewrite of Pages, Numbers, and Keynote in 2013. A concept dating back at least four decades, mail merge lets you insert placeholders in a template document that are replaced with entries in a column of data in a spreadsheet or similar tabular format. It’s commonly used to generate form letters, address labels, and name tags.
Microsoft Word has always had mail merge, but it’s far more complicated than the last time I used it. I recently wrestled with Word to produce shipping labels for a Kickstarter project’s rewards, and every step was painful, despite its built-in templates for Avery labels. (Avery is a major producer of printable labels in all varieties.) What I remember as a quick set of clicks and formatting in the 1990s and 2000s took hours of fiddling to produce something that still didn’t look exactly like I wanted.
Other options have disappeared. I used BeLight’s Labels & Addresses app for years, but the company opted not to upgrade it to 64-bit compatibility, so it died with macOS 10.15 Catalina. To its credit, BeLight gave users a free license to Swift Publisher, its desktop publishing software, which has some rudimentary tools for mail merge. But despite the effort BeLight put into the feature, I found it more painful than Word to use when merging from spreadsheet data. It’s easier if you only want to merge from Contacts.
Apple’s revived mail merge in Pages 12.1 is utter bliss, both on its own and by comparison to Word and Swift Publisher. That’s good news because many people don’t have a license for either of those apps.
The bad news? You can merge “letters, cards, and envelopes,” according to Apple. That is, page-based documents. Pages doesn’t yet handle labels or any blocks of placeholders that would require inserting multiple records on a single page that fill with the next item from the data source.
My ultimate solution for printing labels after many, many hours of testing was Avery’s Design & Print service (free account required), which is clever but limited. If you’re printing entries only from your contacts, Apple’s Contacts app offers built-in label printing with selectable Avery and DYMO templates. However, if you have page-based documents to merge, Pages has become your best option.
Getting Started
Start with mail merge in Pages by opening an existing document or creating a blank one. Keep the document in word-processing mode; if you choose File > Convert to Page Layout, mail merge becomes unavailable.
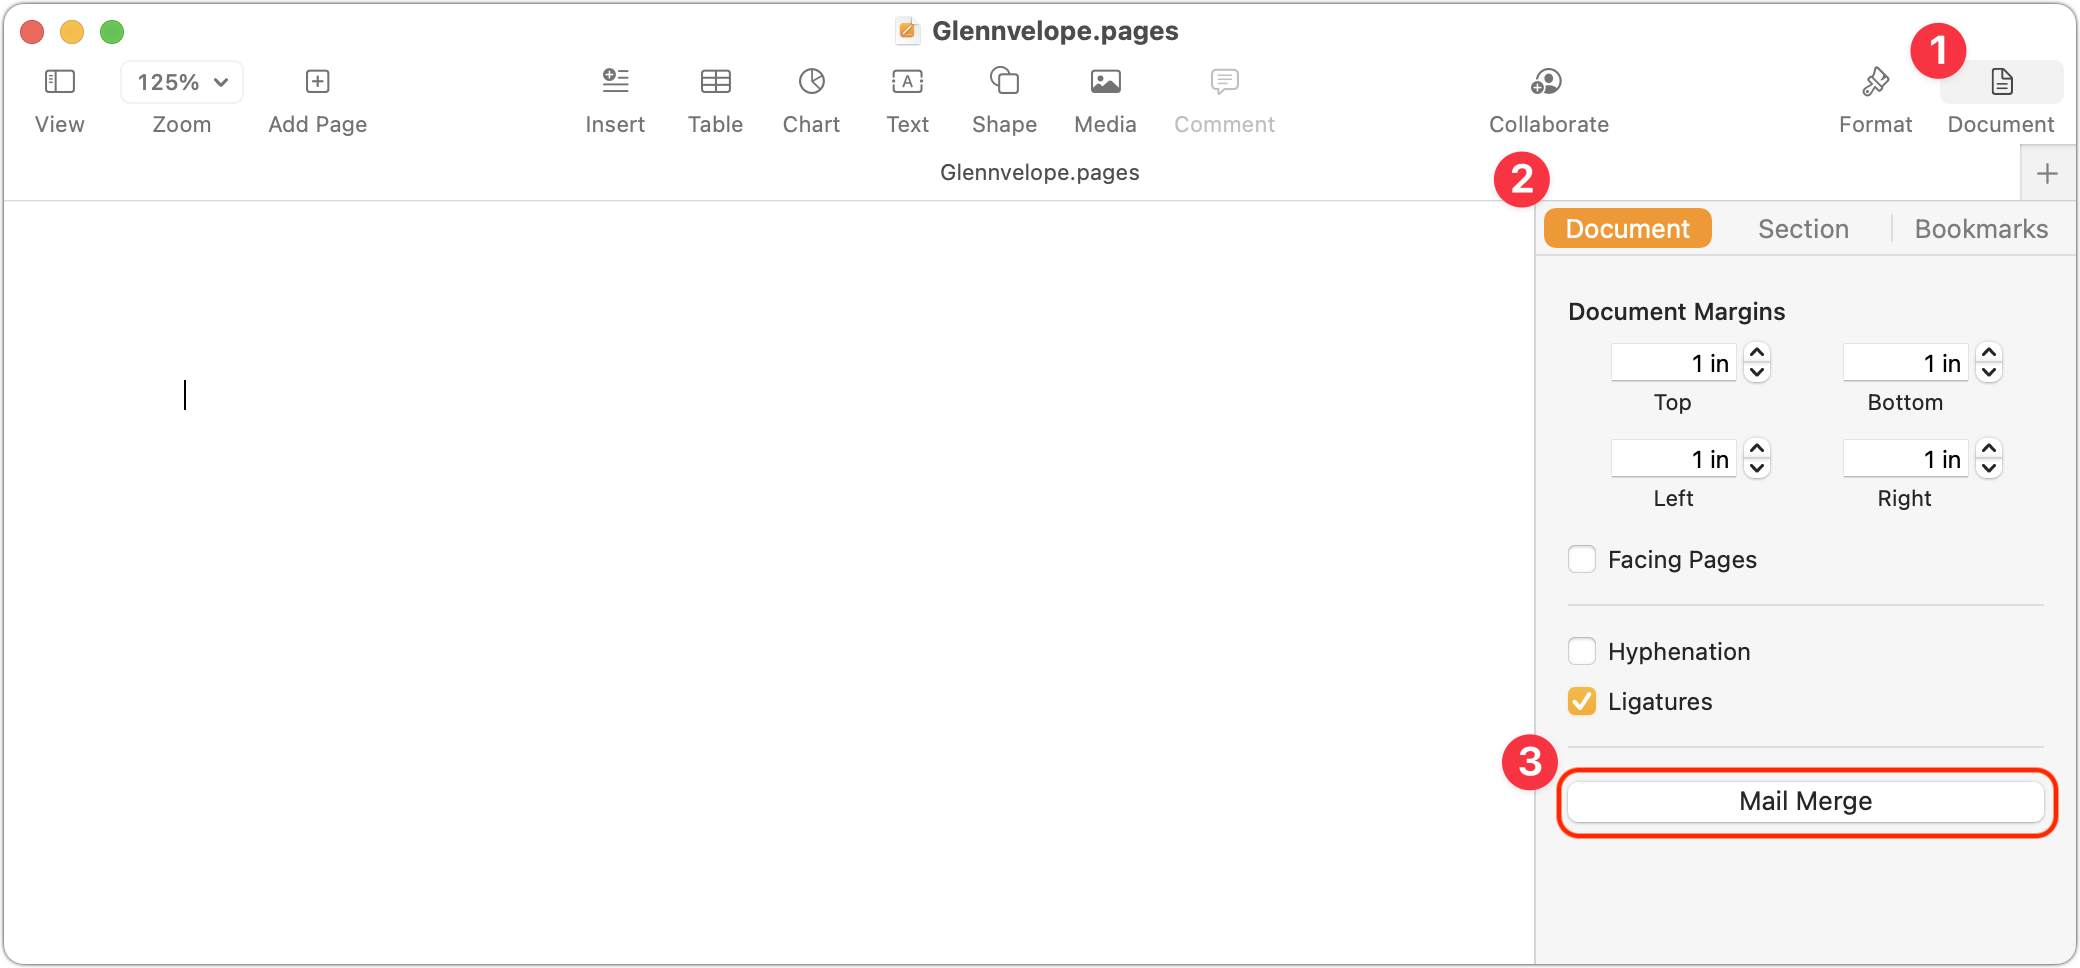
Click the Document icon at the far right of the toolbar to change the page dimensions, such as to an envelope or note size. Once you’re set, in the Document sidebar, click Mail Merge at the bottom to reveal the Mail Merge options sidebar. (My examples here are with Pages for macOS, but Apple also brought mail merge to Pages for iOS and iPadOS.)
You can merge with data from Contacts or a spreadsheet, as I explain in the next two sections.
Merge from Contacts
In the Mail Merge pane at the right, you can populate your document with fields that will be replaced by data:

- Position your cursor in the text where you want the field to go.
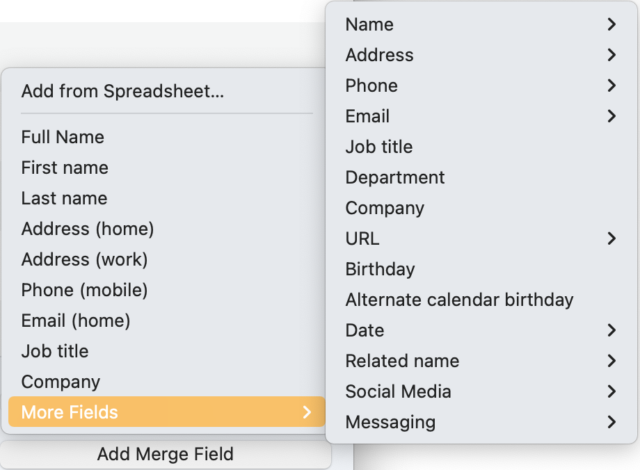
- Click Add Merge Field in the Mail Merge pane. (You can instead choose Insert > Mail Merge Field.)
- The fields listed come from the Contacts app. Choose an item from the list or More Fields, which lets you drill down into other contact fields. (Note that multi-line entries, like an address, will insert hard returns at the ends of lines, like the address line; see a tip below.)
- When you’re finished adding fields, click the Merge button at the top of the pane to open the Mail Merge dialog.
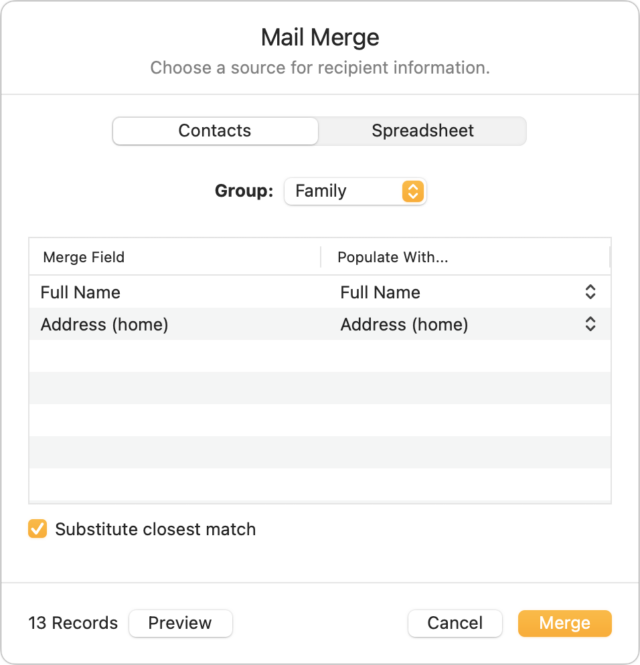
- You can draw your data from All Contacts or filter by groups. (If the group you need doesn’t exist, go to the Contacts app, and create and populate it.)
- Click Preview to see what data will be filled in for each merged entry. Click Close to exit the preview.
- If the preview looks correct, click Merge. Pages creates a new document with one page for each merged item.
- Save your merged document.
- You can now print the document as a series of pages, cards, or envelopes.


A few tips related to the above:
- You can access additional address options by drilling down in More Fields. Choose More Fields > Address and then one of the kinds of addresses, like home, and then you can select the full address as a multi-line entry or a single line without line breaks, or you can pick individual components of an address, like city and state.
- Mail merge documents can have multiple pages, which is useful for longer form letters. The Mail Merge pane shows the page number on which a field appears to the right of the field’s name in the fields list.
- While you can’t create labels, you could use a combination of Avery’s free downloadable Pages templates and mail merge. Create the mail merge, produce the merged document, open the Avery template and save it under a new name, and then copy and paste from the merged document into the fields on the Avery template. Tedious for hundreds of labels, but not too terrible for a handful!
- When creating an envelope, even though you can’t switch to Page Layout mode, you can add a text box. I click the Text icon in the toolbar, drop my return address into that text box, and drag and resize it to the space I want in the upper-left corner. I make the return address text box fill the whole left side of the envelope because Pages’ built-in text wrap will then let me push the left edge of the addressee to where I want it.
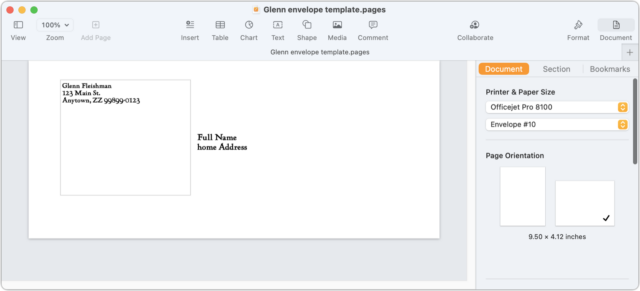
Set up an envelope with your return address in a text box to control the position of the addressee’s delivery address.

Merge Using a Spreadsheet
Merging from your contacts is useful, but what about from a spreadsheet? It’s pretty much a breeze, too. Follow these steps:
- As with a Contacts-based merge, position your cursor in the text.
- Click the Add Merge Field in the Mail Merge pane.
- Choose Add from Spreadsheet at the top of the menu.
- Select a Numbers document and click Open.
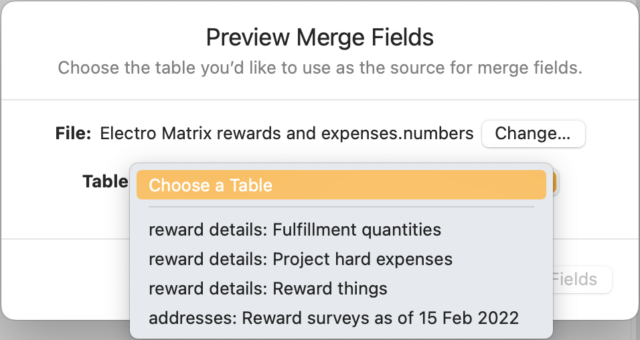
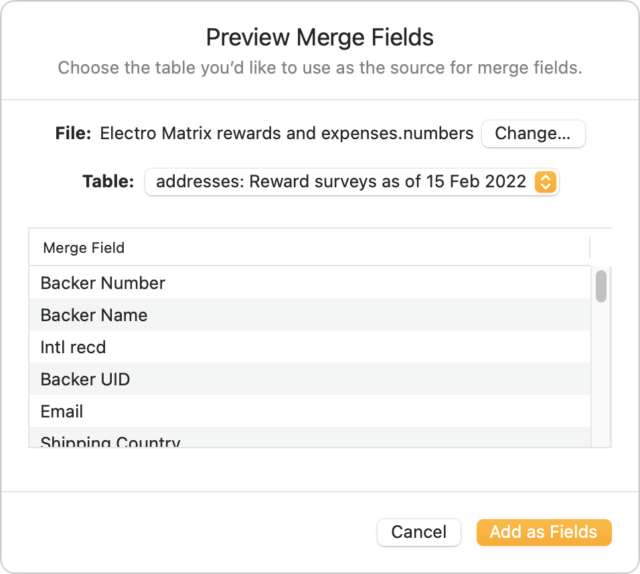
- Choose the desired table of source data from the Table field, which previews the fields that will be imported. If the Numbers spreadsheet contains multiple sheets, Mail Merge lists them as sheet name:table name. (You can also switch to a different spreadsheet by clicking Change.)
- Click Add as Fields.
- These fields now appear as items you can choose from the Add Merge Field menu in Step 3 in the previous instructions.

There’s no filtering option: your Numbers document must contain just the entries you want to merge.
Room for Improvement with Hope It Will Happen
There’s plenty of room for improvement in mail merge, but I count this as a stellar return engagement. Apple has consistently paid modest attention to its productivity apps, particularly in the last few years, often adding features or cleaning up around the edges.
What else would I like to see?
- Support for labels—the templates are already in Contacts!—and other repeating items on the same page
- Allow mail merge fields in Page Layout documents
- Link Numbers and Pages so you can mark fields in Numbers and export to create a merged Pages document directly
What mail merge capabilities would you like to see in Pages?
Contents

Click for special offers to Mac Users Groups members.

Website design by Blue Heron Web Designs

Click the image for information about advertising on this website.