
MacTalk
August 2022

Use ChronoSync to Move Large Folders
Imagine that you want to move a multi-gigabyte folder containing tens of thousands of files and subfolders to another drive to free up your Mac’s internal storage space. Your first instinct would be to use the Finder and drag the folder where you want it to go. That’s what the Finder is for, right? But it might not work.
Despite file management being one of its core functions, Finder isn’t always the best choice for moving files and folders. Its inadequacies are seldom obvious when moving small batches, but moving large, complex folders can turn into a hair-pulling experience. That’s because if Finder has a problem with a single file, it sometimes halts the entire transfer instead of skipping the problematic file.
In my case, it was a filename that was too long (and no, I don’t know how that was possible), but various things can cause a file transfer to fail, like file corruption, the Finder thinking the file is in use, the inexplicable Error Code 43 or Error Code 36, or the Finder hanging during a long file copy. Moving large amounts of data can take hours, and the last thing you want is a mysterious error wasting all that time.
I’ve dealt with this a lot lately, both in moving data to my Synology NAS and when I turned off iCloud Drive when troubleshooting sync issues, which dumped a 24 GB archive folder on my hard drive. (For more background, see “Using a Synology NAS to Escape the Cloud,” 29 April 2022.) I was leery of deleting the folder because I couldn’t be certain that iCloud had stored all the files, so I wanted to move it to my NAS to compare later. What started as a simple transfer ended up causing days of frustration.
A friend suggested using ChronoSync to move the folder. I’m familiar with ChronoSync, since we’ve covered it in our Watchlist for years, but I had always thought of it as a backup app. I checked Setapp and found that ChronoSync Express was included in my subscription. Otherwise, ChronoSync Express is $24.99 in the Mac App Store, and the full version of ChronoSync—which offers a few more features—costs $49.99. But ChronoSync Express is more than enough for syncing folders, and it does a darn good job of it.
Using ChronoSync Express to Move a Large Folder
Moving a folder with ChronoSync Express is a bit more work than drag and drop, but the app holds your hand through the process of creating the necessary task:
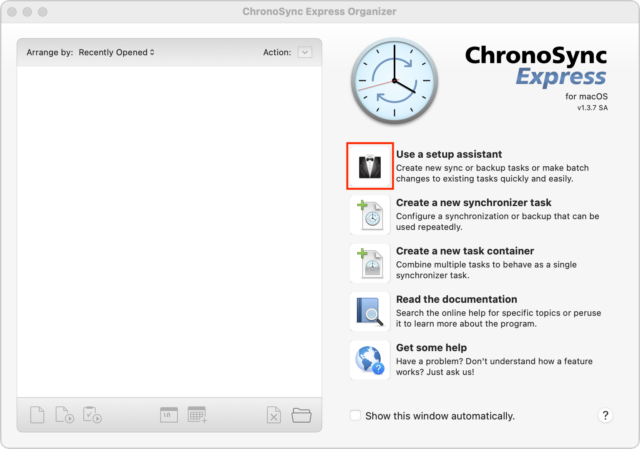
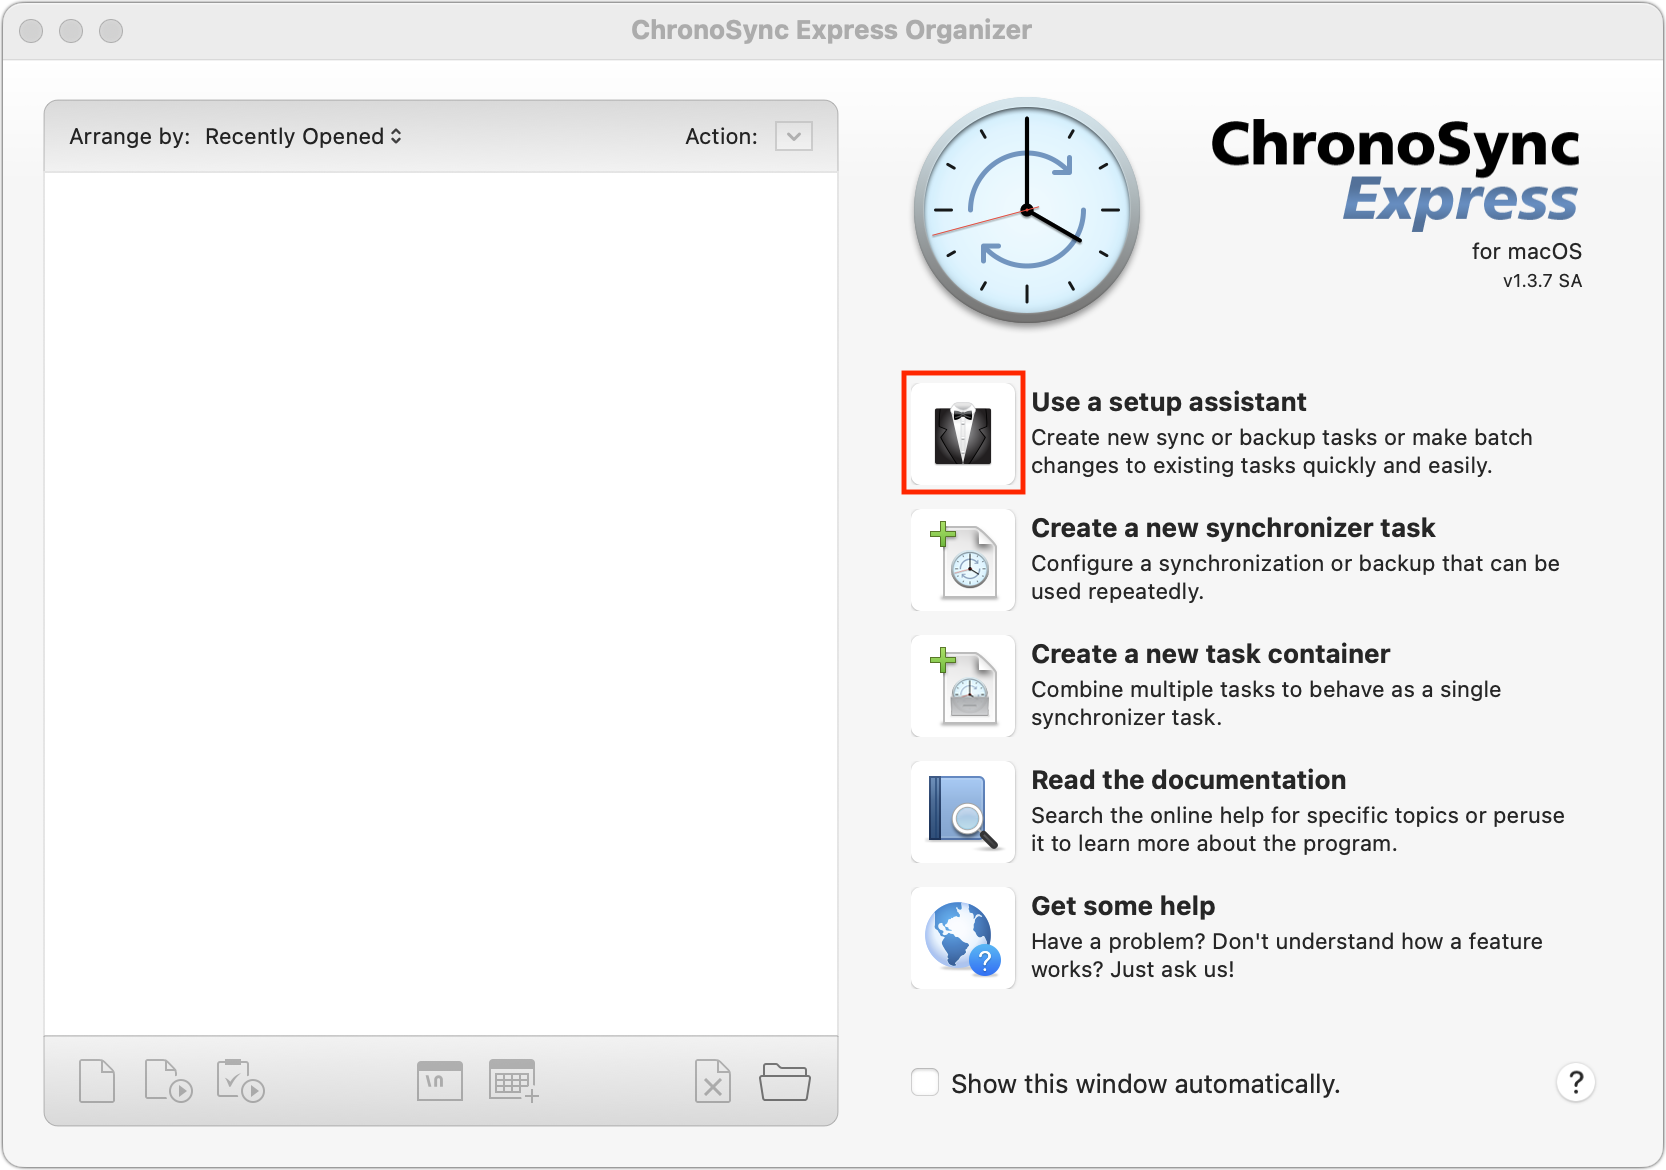
- Click the tuxedo button by “Use a setup assistant.” (You can also create a new synchronizer task manually by clicking the next button down; the steps are basically the same but take place in the task screen rather than as separate assistant screens.)
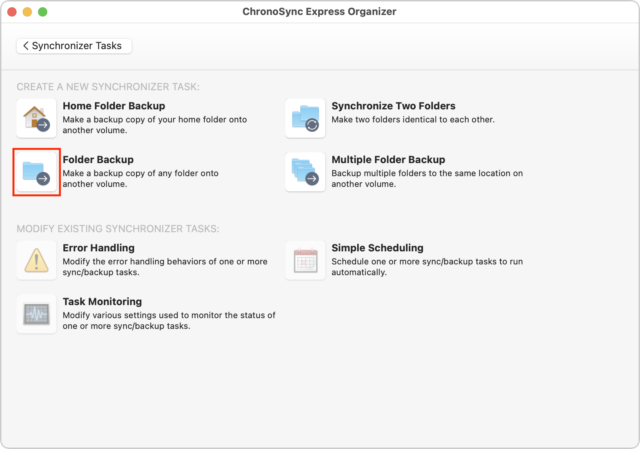
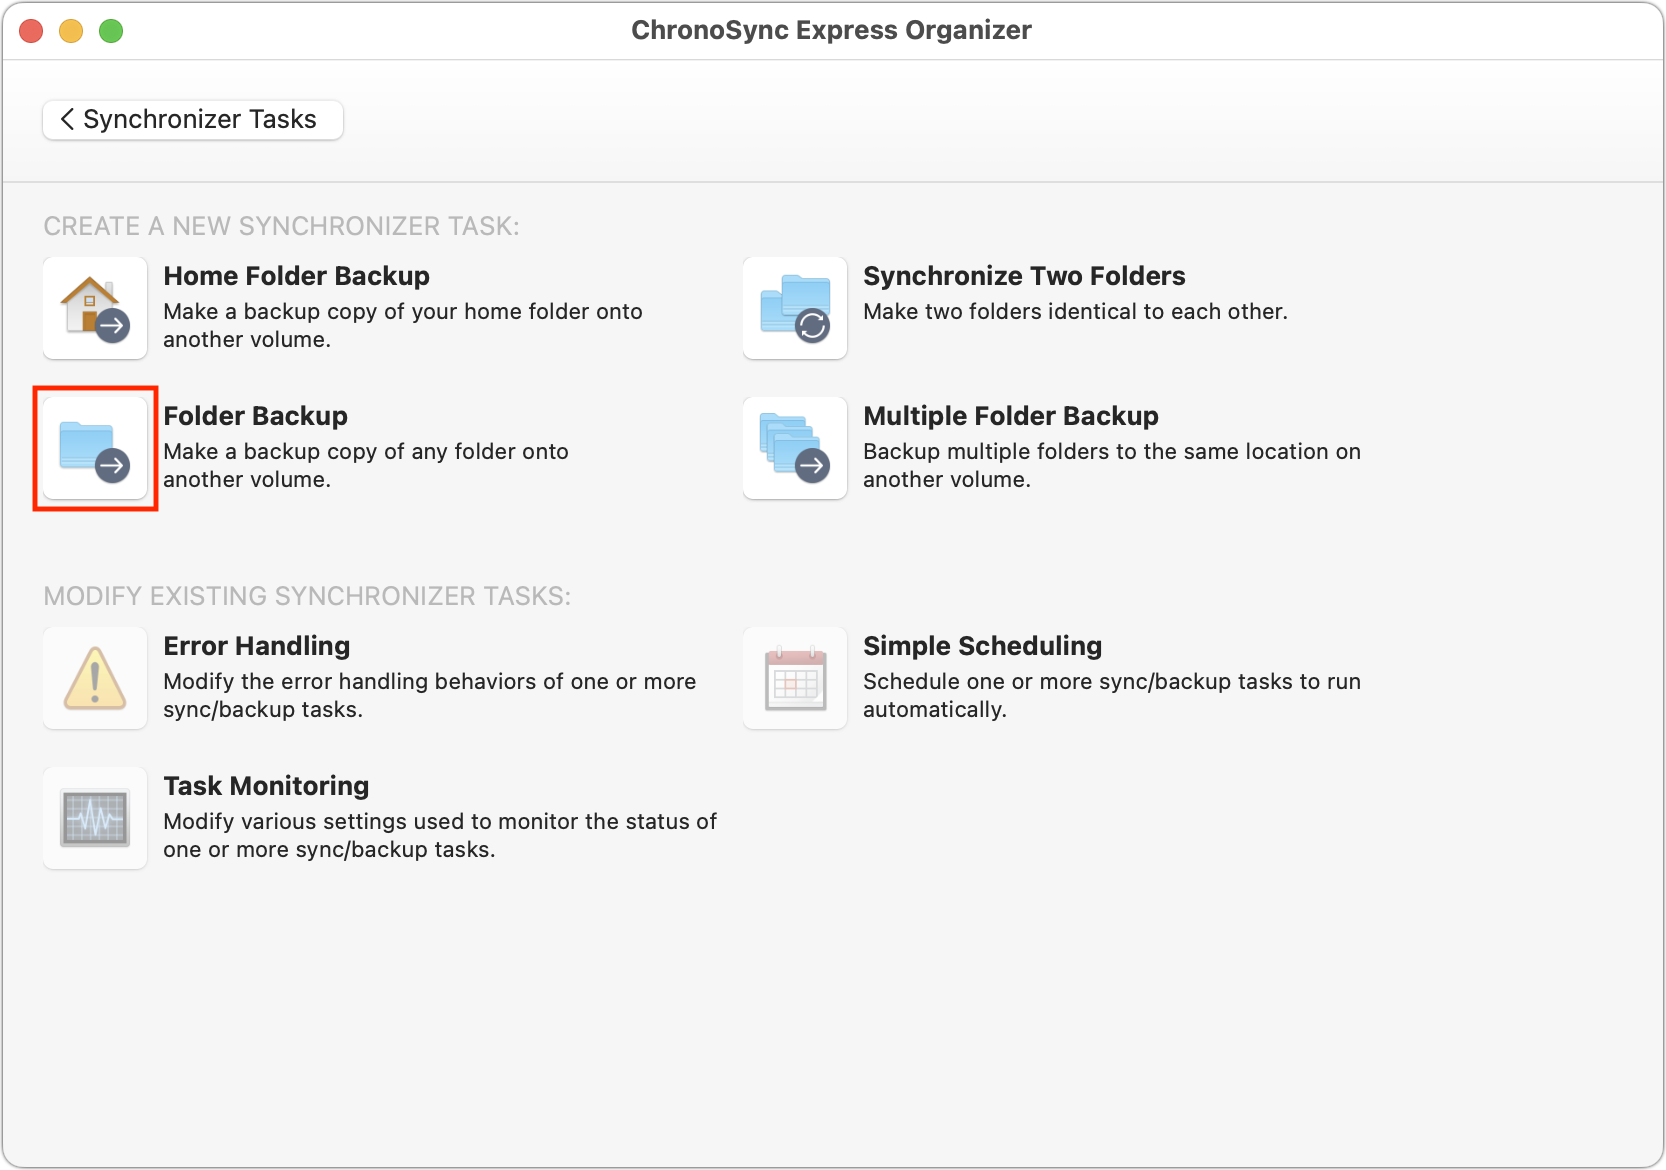
- Click the button by Folder Backup.
- Click Get Started.
- Drag the folder you want to copy into the Select a Source screen and click Next Step.
- Drag the destination folder into the Select a Destination screen and click Next Step.
- Keep “Backup all data” selected in the Backup Specific Types of Data screen and click Next Step.
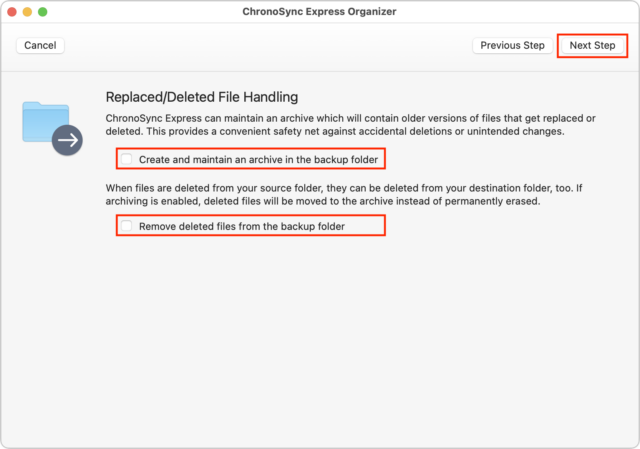
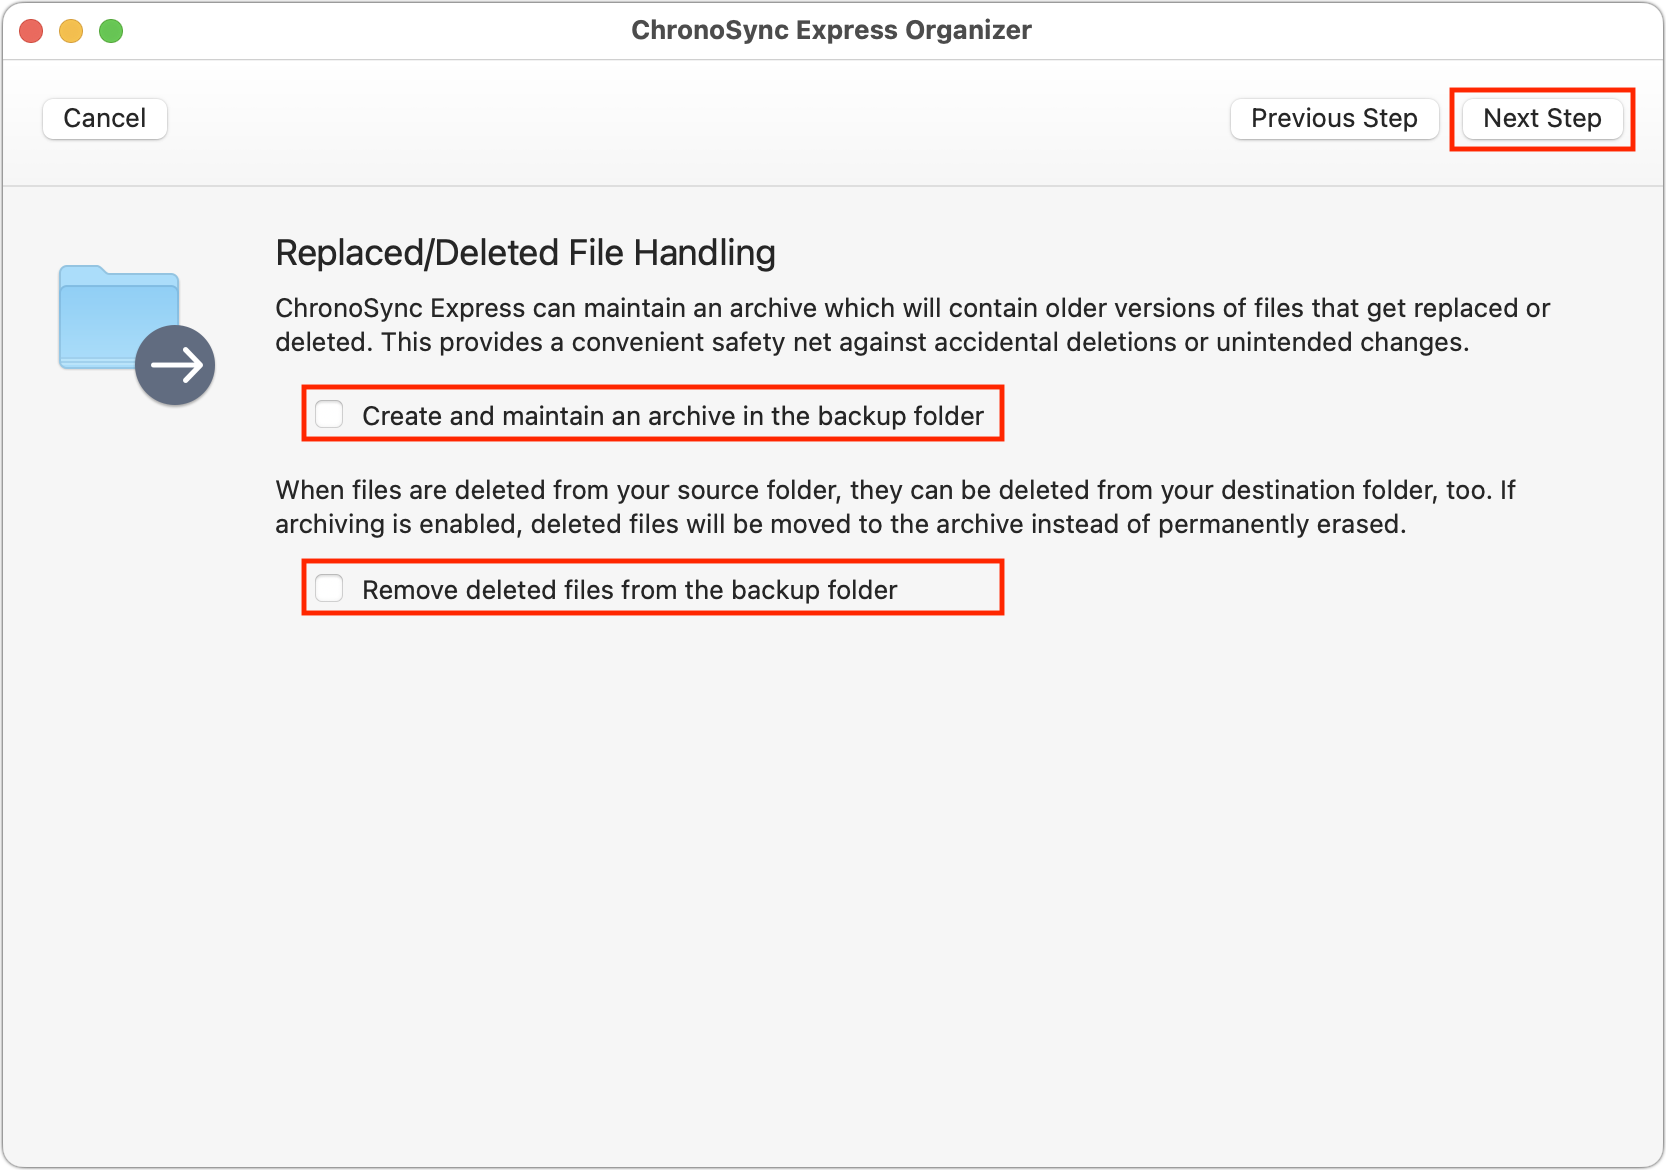
- In the Replaced/Deleted File Handling screen, deselect both checkboxes. Because we’re performing a one-way, one-time copy of the folder, we don’t need an archive, nor do we want to remove deleted files. Click Next Step.
- Enter a custom task name if you want and click Create Task.
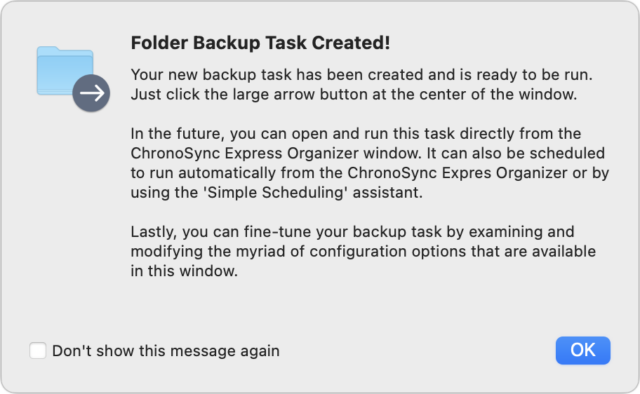
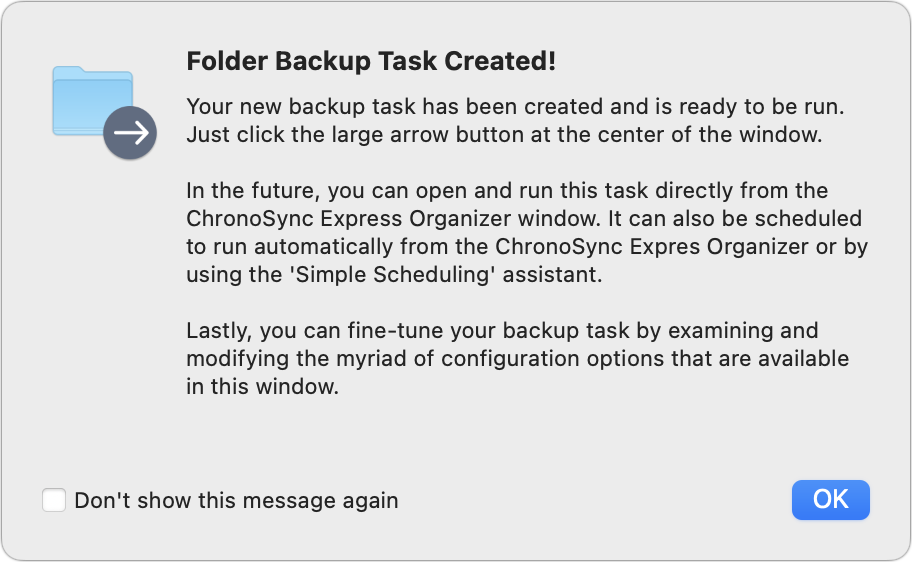
- ChronoSync Express opens the new task with some instructions. Click OK to continue.
- You could click Synchronize to start the transfer immediately, but I recommend moving on to the next step for additional configuration.
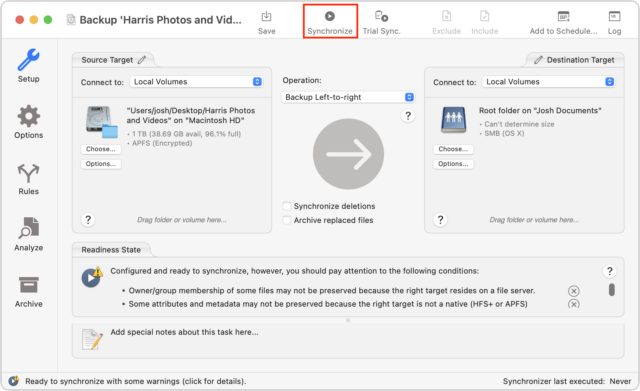
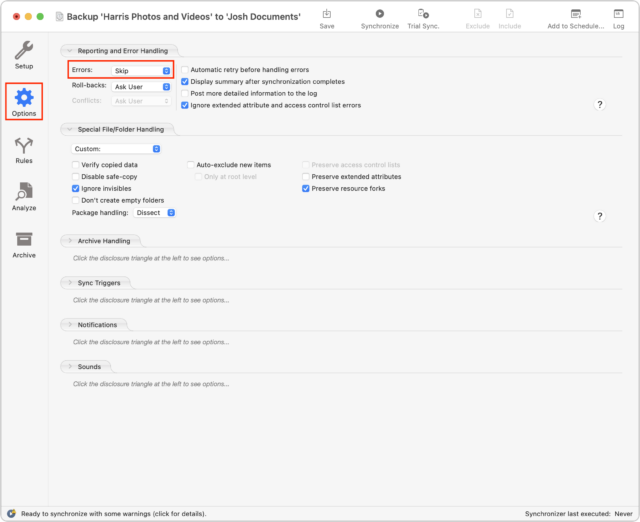
- If you’re in the same situation I was in, you may want to click Options in the sidebar, and in the Errors pop-up menu, choose Skip. The default setting, Report to User, pauses the transfer if there’s a problem, prompting you to intervene. That can be a hassle if you set a large transfer to run overnight, only to find that it only partially completed because it was prompting you for input. When you set that pop-up menu to Skip, ChronoSync Express moves on to copying the next file when it encounters an issue.
- Once you’ve changed the error reporting option, click Setup in the sidebar to return to the main task screen and click the Synchronize button to start the copy.
- After the copy finishes, choose Actions > Open Log to see if anything was skipped.
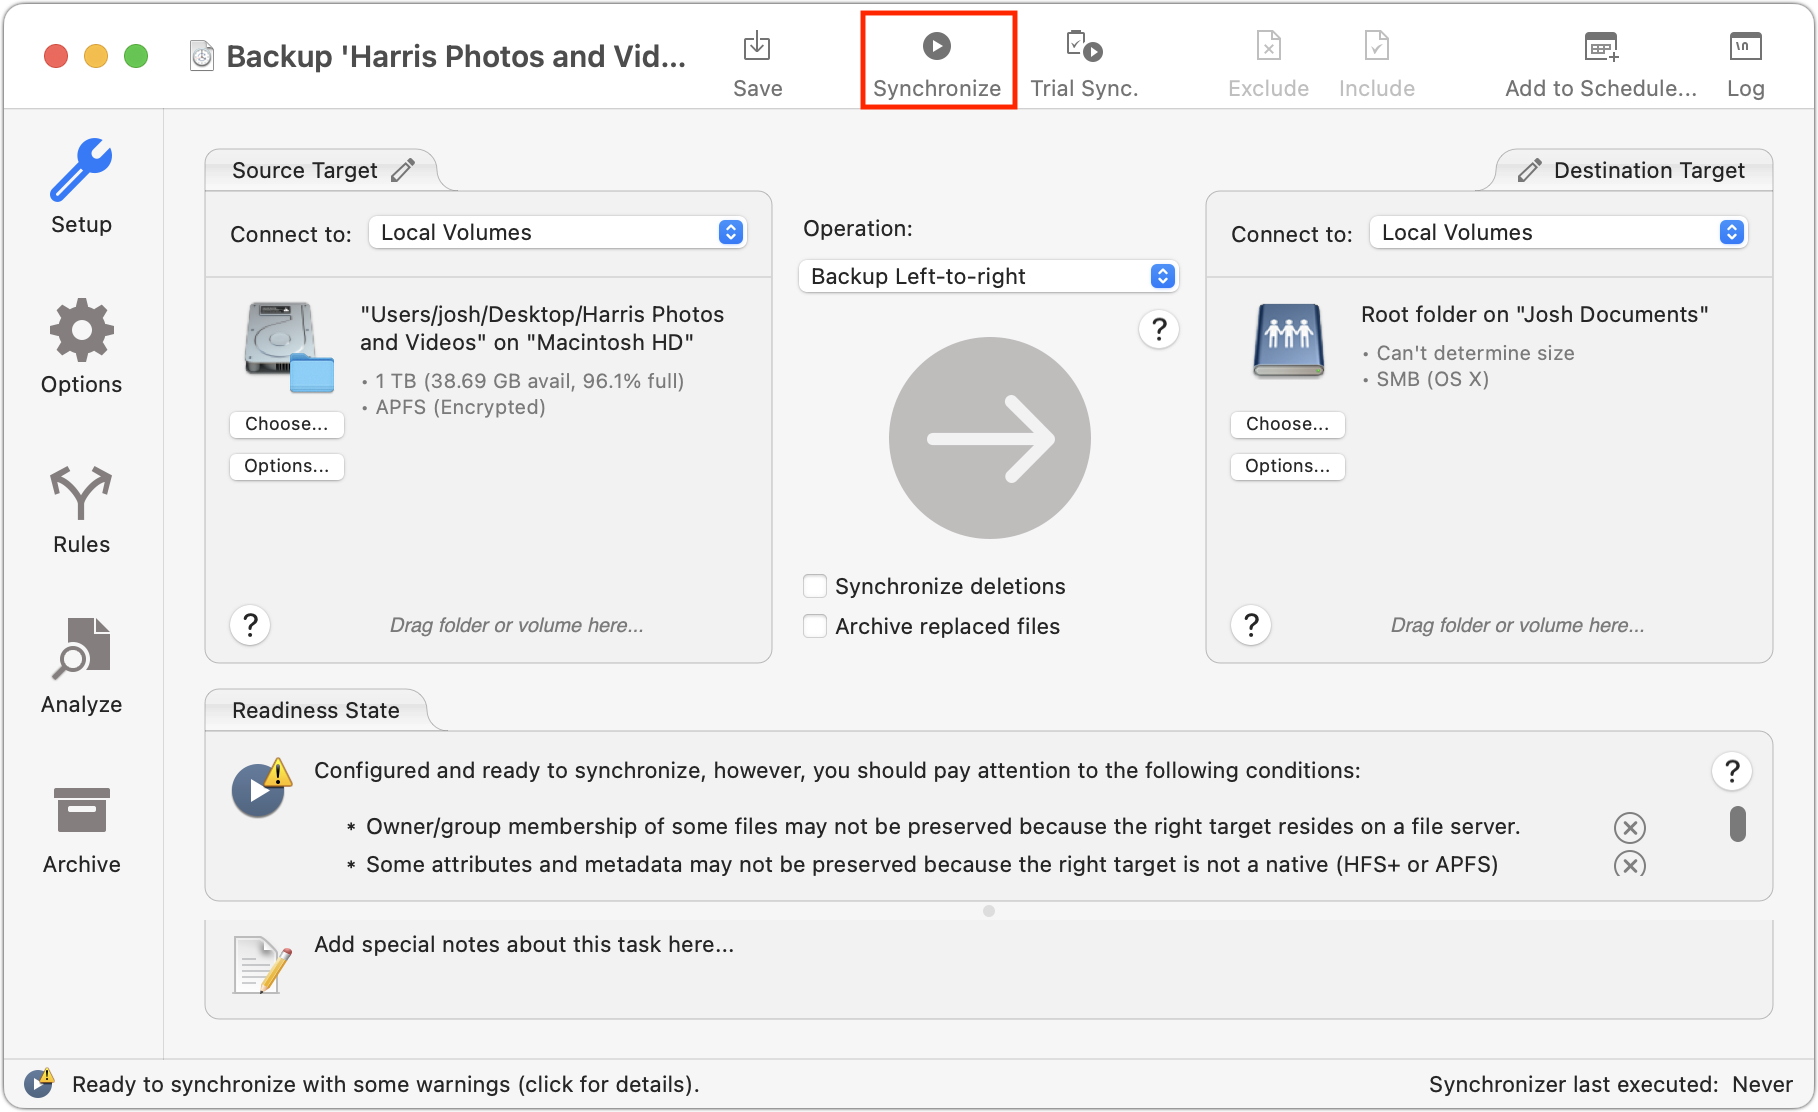

If you’re anticipating a lot of problems, instead of clicking Synchronize on the main task screen, click Trial Sync, which displays a list of files to be synchronized and warns you of potential problems before performing the full sync.
Needless to say, ChronoSync Express can do far more than merely transferring a folder that has stymied the Finder. But for reliably moving large folders while gracefully handling errors, it’s now my go-to tool.
Contents

Click for special offers to Mac Users Groups members.

Website design by Blue Heron Web Designs

Click the image for information about advertising on this website.