
MacTalk
April 2024
Follow These Steps to Clear Space on Your Mac
It’s inevitable that many of us will run low on free disk space on our Macs. The worst-case scenario is that you’ll run out entirely, which will cause your apps to exhibit all sorts of undesirable behavior or even render your Mac unusable! Don’t let it get to that point. The rule of thumb is that you want to keep at least 10% to 20% of your startup drive free to give macOS and everyday activities some breathing room. It’s necessary to keep that much space free for various reasons, including:
- Many apps rely on caches and temporary files that may require non-trivial amounts of space.
- If apps use up your Mac’s physical memory, macOS falls back on virtual memory, which creates large swap files.
- Time Machine creates snapshots on the internal drive before transferring them to a destination volume.
- Installing an upgrade to macOS requires significant amounts of free space.
What’s the very worst that can happen? Contributing editor Glenn Fleishman recently had to wipe one of his teenagers’ Macs after a massive Steam game download led to stalled Time Machine snapshots, resulting in a Mac with just 41K free. They tried numerous approaches to clearing space, but nothing worked—every attempt to delete files was met with errors complaining about the lack of free space. The Mac couldn’t even restart except into macOS Recovery. Fortunately, they had a Time Machine backup, and although full restores failed for unrelated reasons, its files were available for manual restoration.
Manually clearing space isn’t worth the effort if you have hundreds of gigabytes free. For instance, on a 1 TB drive, there is no benefit in having 500 GB free instead of 400 GB. Be more concerned if that drive has only 120 GB free.
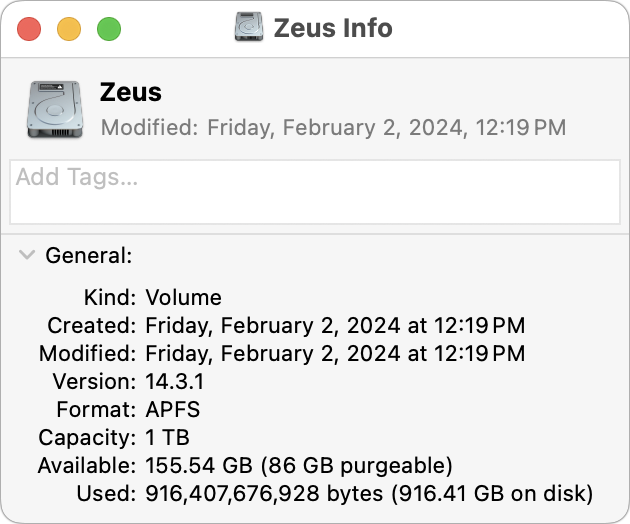 Longtime Mac users often get caught up in looking at the amount of free space reported by the Finder. We’ll check the storage numbers shown in a Get Info dialog, delete something, and check again. Don’t waste your time! Space management on the Mac is now largely indeterminate thanks to APFS, Time Machine snapshots, purgeable space, and more, as Howard Oakley explains. These technologies render the Finder-reported number unreliable at any given point in time. Even after you empty the Trash, it may take macOS several hours or more to update its free space reports. Restarting may or may not help trigger a recalculation.
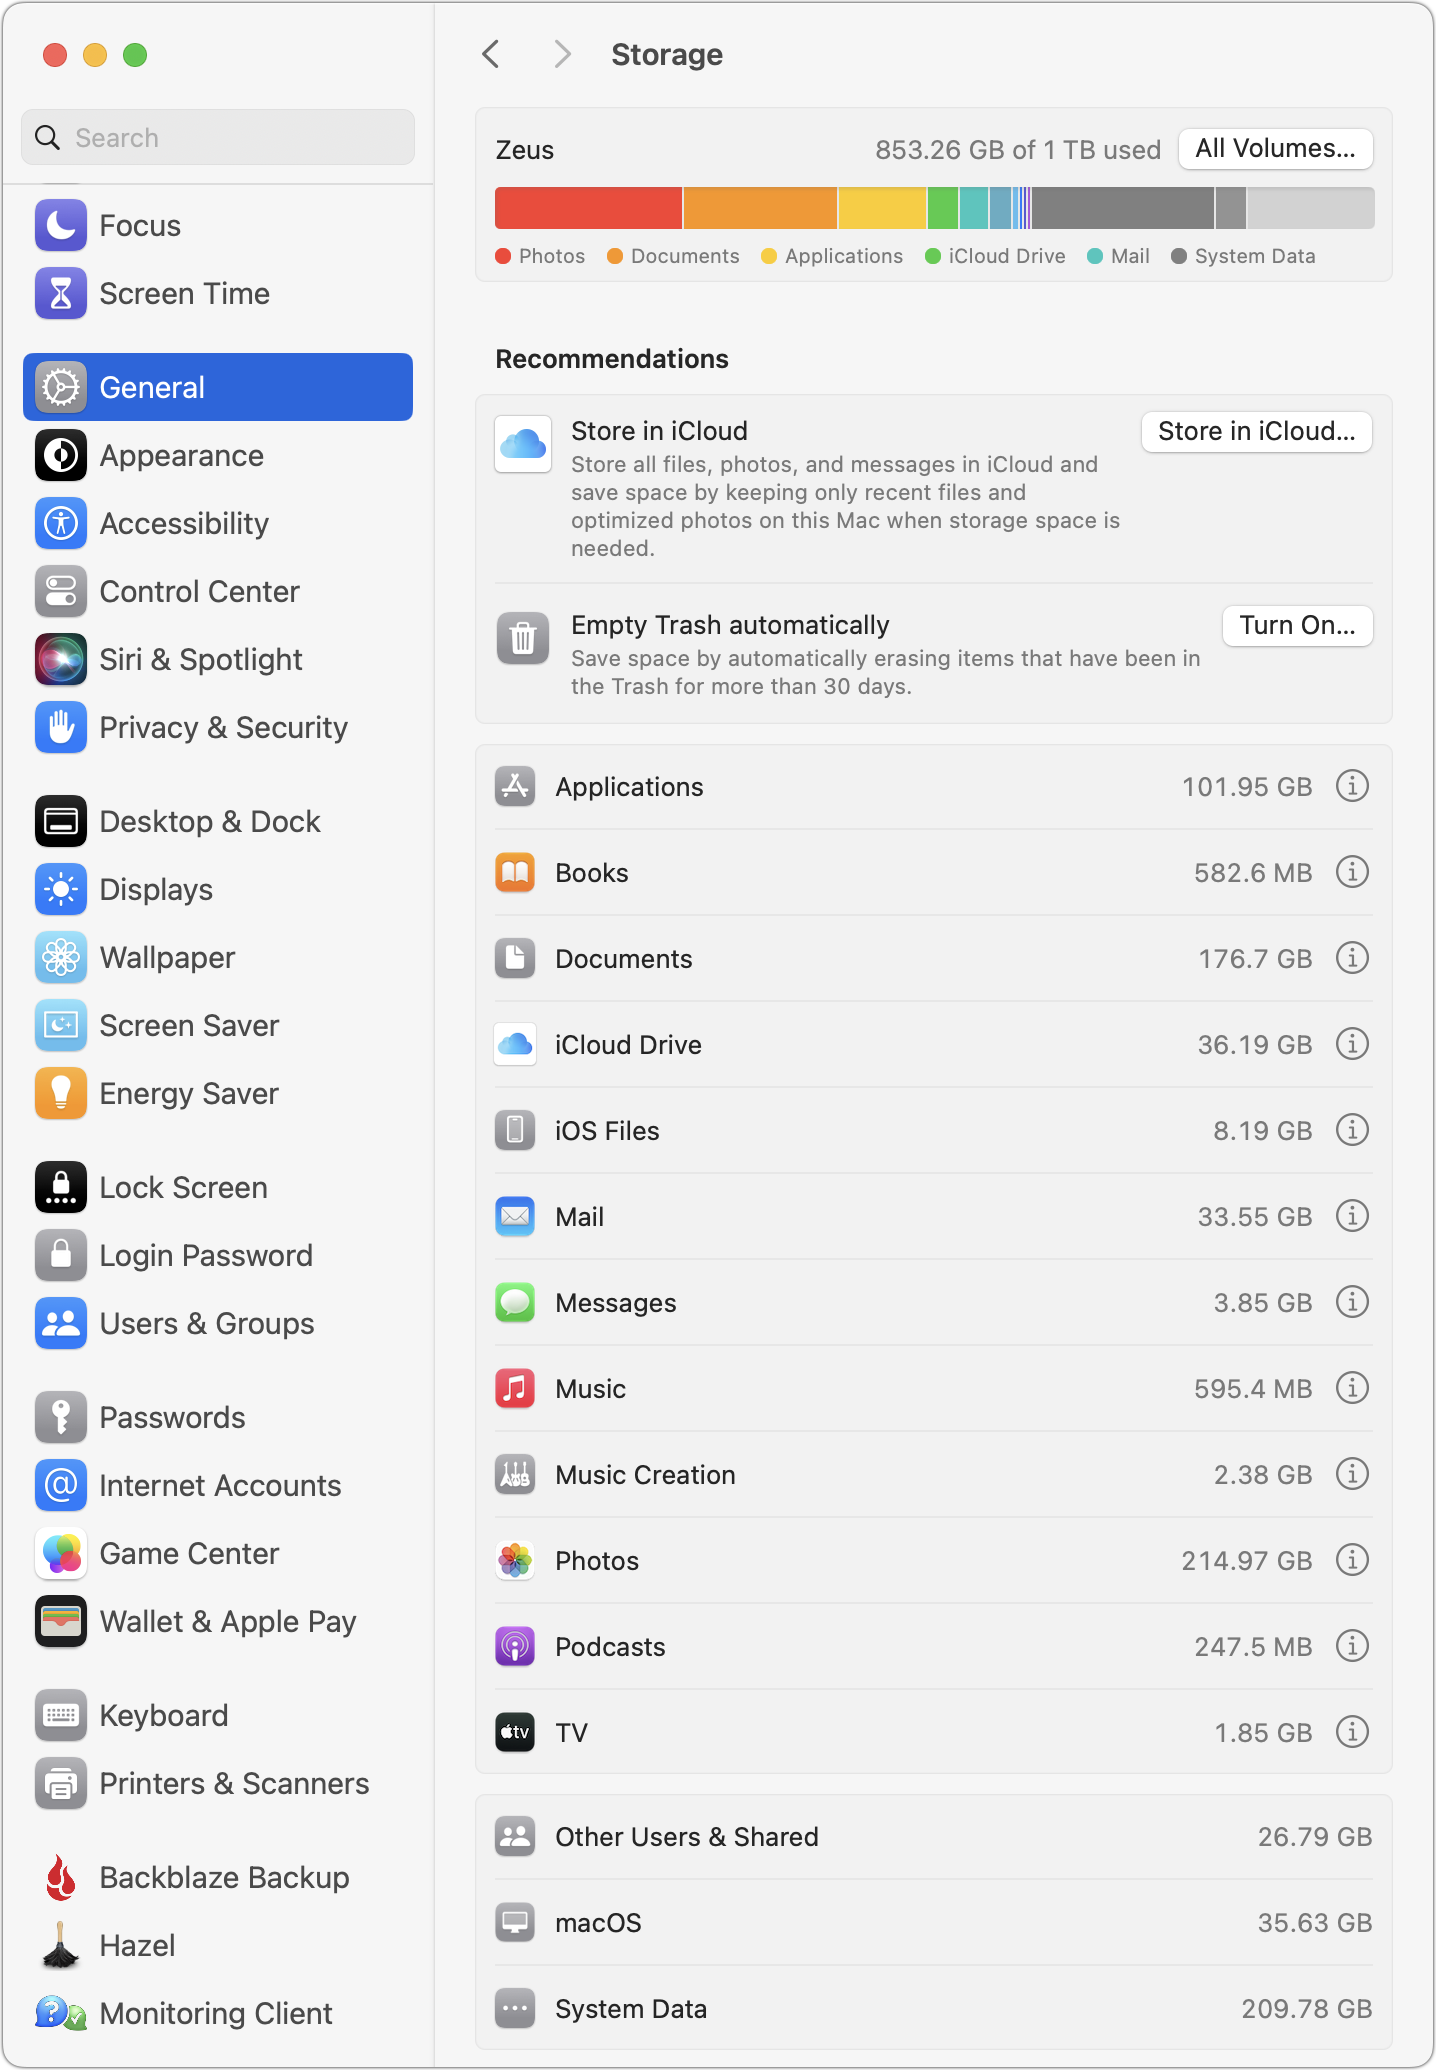
Instead of stressing about exact numbers, I want to offer you a set of steps that will clear space quickly and easily on most Macs. Apple has advice here, and it’s not wrong, but it’s far from comprehensive. macOS also provides tools to help reduce unneeded drive usage at System Settings > General > Storage. Some are worthwhile; others do little or are incomplete. I’ll cover the helpful ones below.
I’ve arranged these steps in a particular order: I start with the easiest to perform, the most likely to help, and the least likely to lead you to delete something important. Later steps become more complicated and are more likely to require some thought to avoid erasing important data. Two points to pay attention to:
- Don’t follow the steps mindlessly, particularly as you get further down the list! At all times, you should make sure any to-be-deleted data is truly unnecessary. That could be more difficult if you’re helping a friend or relative with their Mac—don’t immediately take their word for it when they say something isn’t necessary.
- Depending on your goal, you don’t need to follow all these steps—think of them as a set of increasingly complicated recommendations instead of a mandatory series. It’s fine to stop once you think you’ve cleared enough space, remembering that the Finder probably won’t update immediately. However, error conditions caused by a lack of free space may disappear before the Finder’s numbers reflect reality.
One final note: I try to use the word “delete” for instances where the data will be gone afterward and the word “remove” when you’re only deleting the local copy of something that can easily be downloaded again from the cloud.
1: Empty the Trash
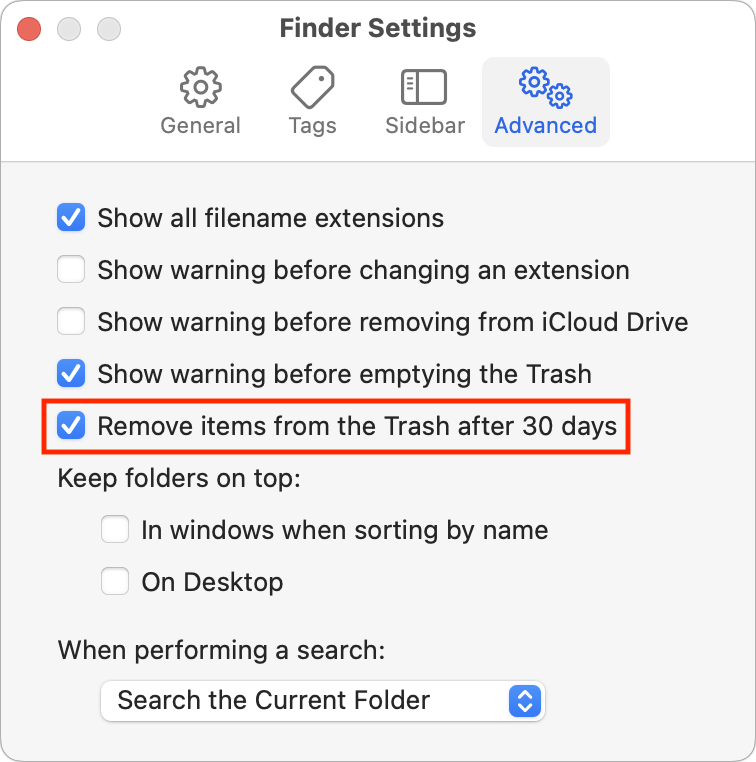
Choosing Finder > Empty Trash is obvious, I know, but not everyone does it regularly. Because modern Macs have so much storage, it’s easy to forget to empty it for months. If desired, you can set macOS to delete files automatically. Look in Finder > Settings/Preferences > Advancedfor the “Remove items from the Trash after 30 days” checkbox.
2: Restart, Possibly in Safe Mode
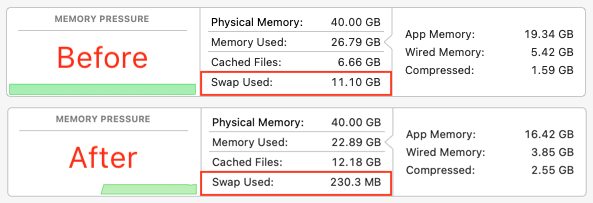
How could a simple restart reclaim disk space? Remember those virtual memory swap files I mentioned? When your Mac goes weeks or more without restarting, swap files consume a lot of space. A restart lets macOS start fresh. While writing this article, when I checked Activity Monitor’s Memory screen, my Mac was using 11 GB of space for swap files. After I restarted, that number dropped to 230 MB and remained there 90 minutes later for the second screenshot. Clearing swap files won’t help permanently, but it can be helpful briefly—particularly when the Finder reports it doesn’t have enough storage to complete file deletions or other activities.
To reclaim more space temporarily, consider restarting in safe mode, which clears potentially large caches. Since the introduction of Macs with Apple silicon, there are now two ways to boot into safe mode:
- On an Intel-based Mac, restart your Mac and immediately press and hold the Shift key until you see the login window.
- On a Mac with Apple silicon, first shut down. Then, press and hold the power button until “Loading startup options” appears. Select a volume, press and hold the Shift key, and click the Continue in Safe Mode button.
To have safe mode delete caches, you just need to get to the Finder. Once the Mac finishes booting in safe mode, you can restart again with no modifiers or startup steps to return to work—you don’t need to carry out any tasks within safe mode. Restarting in safe mode did nothing useful in my testing, but it’s easy and harmless.
Some suggest clearing logs and caches by running Titanium Software’s Maintenance, a subset of the company’s free maintenance utility Onyx. It offers many options for clearing space, but I’m hesitant to recommend it because I don’t know precisely what it does. When I tested Maintenance with a reasonable set of options, I couldn’t tell if it cleared anything at all. Also, Maintenance automatically restarts the Mac once it has reclaimed space, but several apps behaved oddly on the next boot, so I had to restart my iMac again before everything returned to normal.
3: Scan for Large Files and Huge Folders
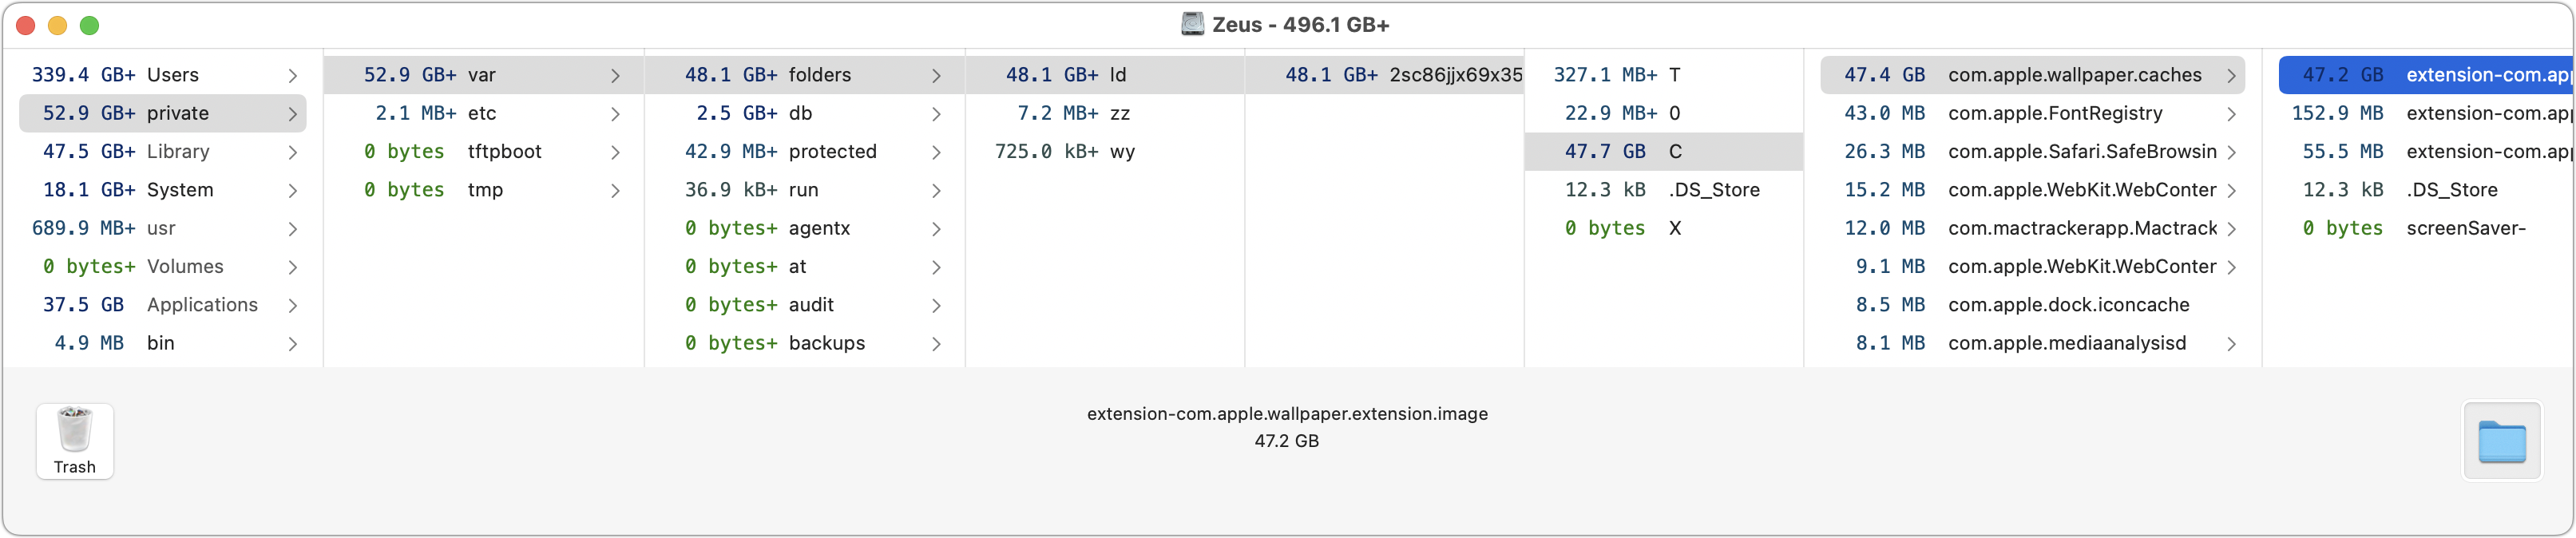
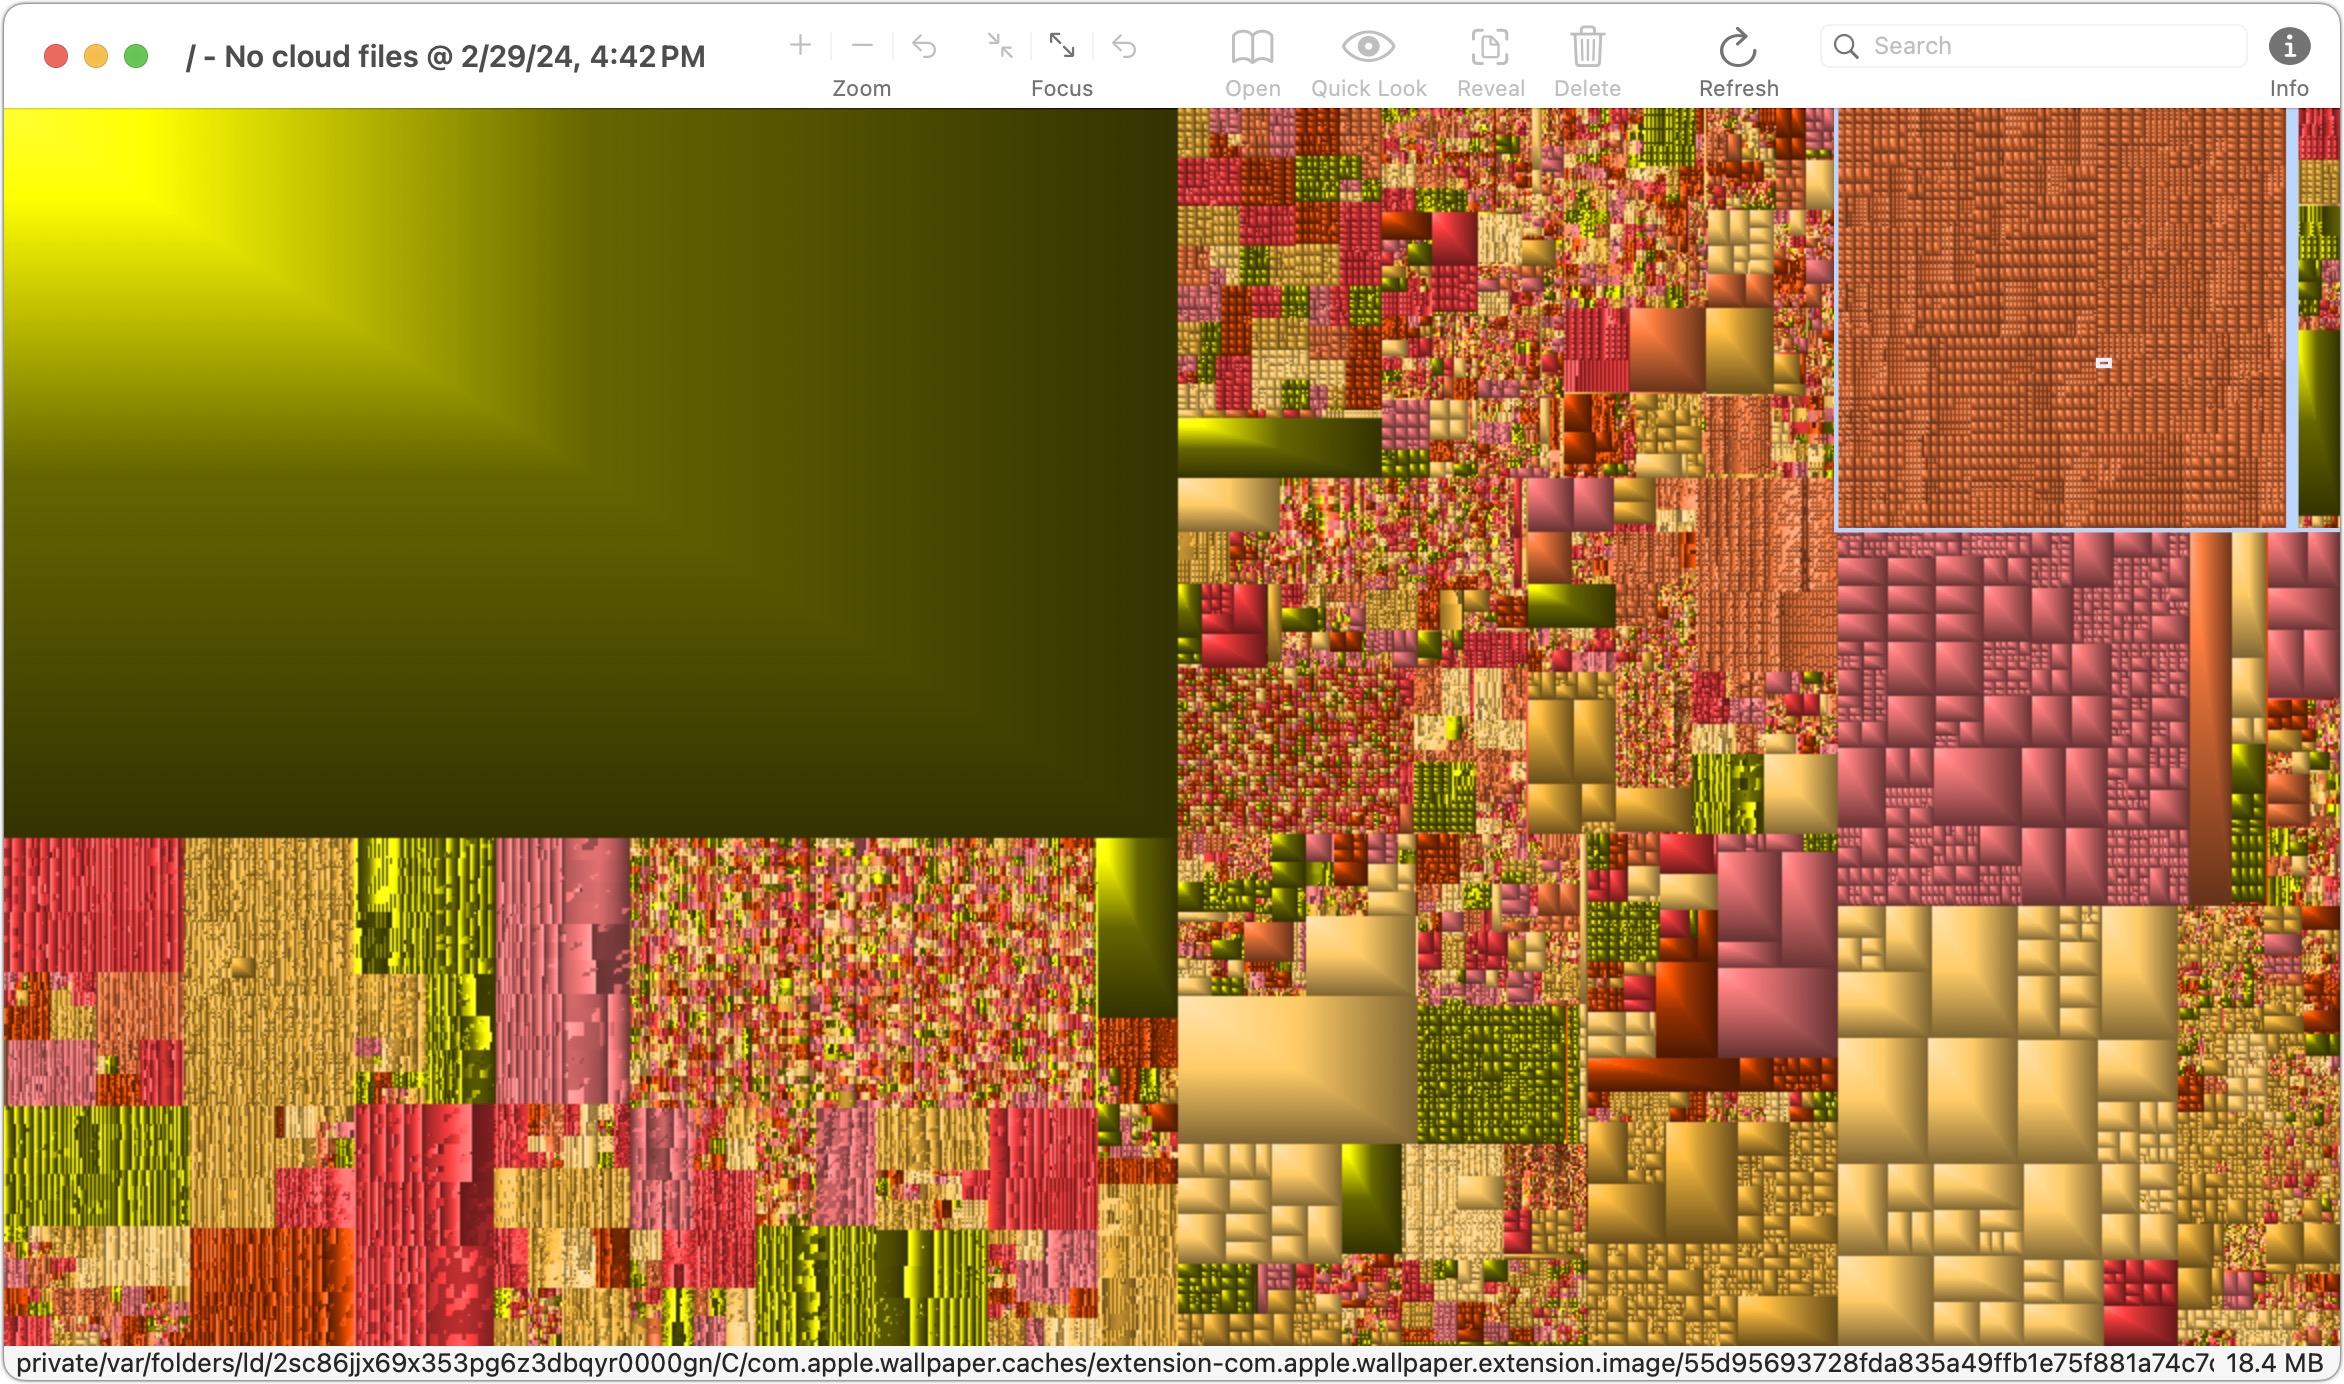
It can be hard to determine what consumes large quantities of your drive space, so I recommend using a utility designed to help identify egregious offenders. These include the free GrandPerspective, OmniDiskSweeper, Disk Inventory X, and the $9.99 DaisyDisk. I like GrandPerspective’s graphical visualization, but it’s much slower to scan than OmniDiskSweeper, which relies on a text-based hierarchical view like the Finder’s Column View. The open-source Disk Inventory X is older. The popular DaisyDisk offers a combination of text and graphical approaches.
These apps scan your entire drive—you’ll have to grant them Full Disk Access permission—and help you identify excessively large files and folders, which can help you decide which of the following steps to focus on first. They’re valuable for finding and deleting out-of-control log files, cache files that aren’t automatically removed, large installers or updates you no longer need, and massive files like unused virtual machines.
The revelations can be staggering. For instance, the OmniDiskSweeper and GrandPerspective windows below show 47 GB of wallpaper cache files. I use Irvue to randomize my desktop wallpaper, and I discovered that it chooses to download multiple copies of the same image rather than caching previously retrieved media. I have to look into that.
4: Delete 32-bit Apps and Duplicate Apps
On older Macs and those whose contents have been migrated forward across multiple versions of macOS, it’s easy to end up with defunct 32-bit apps that no longer run and may as well be deleted. Open System Settings > General > Storage > Applications, click the Kind column header, select all the apps marked Unsupported, and click Delete. You can do the same with apps marked Duplicate.
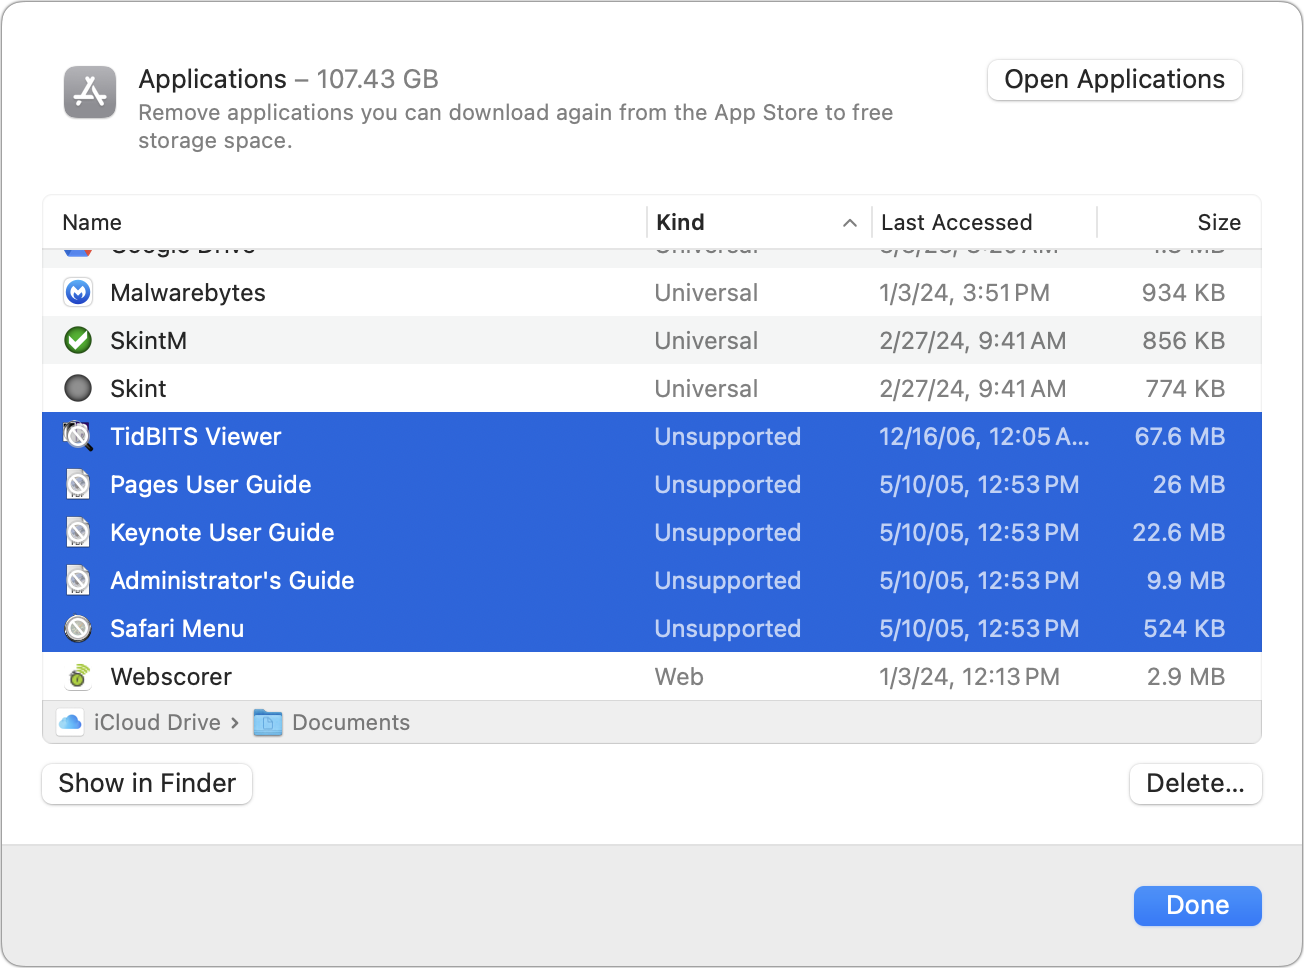
More generally, it’s usually safe to delete apps you no longer use since most can be downloaded again from the Mac App Store or a developer’s website should you ever need them. Sorting the Applications list by size may reveal some multi-gigabyte apps you haven’t launched in years.
To be sure you’re clearing out associated media, logs, preferences, launch agents, and other files when you delete an app, it may be worth employing a utility like AppCleaner, CleanMyMac X, or Hazel. When you delete an app, these utilities offer to remove associated files. Doing so won’t usually reclaim much space, but it will reduce the clutter in your Library folder, and it might remove a cache or media folder you didn’t even know existed.
5: Delete macOS Installers
Sort the Applications folder by name and delete macOS installers, whose names usually start with “Install macOS.” If you think you might need them again to install macOS in a virtual machine, archive them to an external drive or download them again.
6: Delete old iPhone and iPad Backups
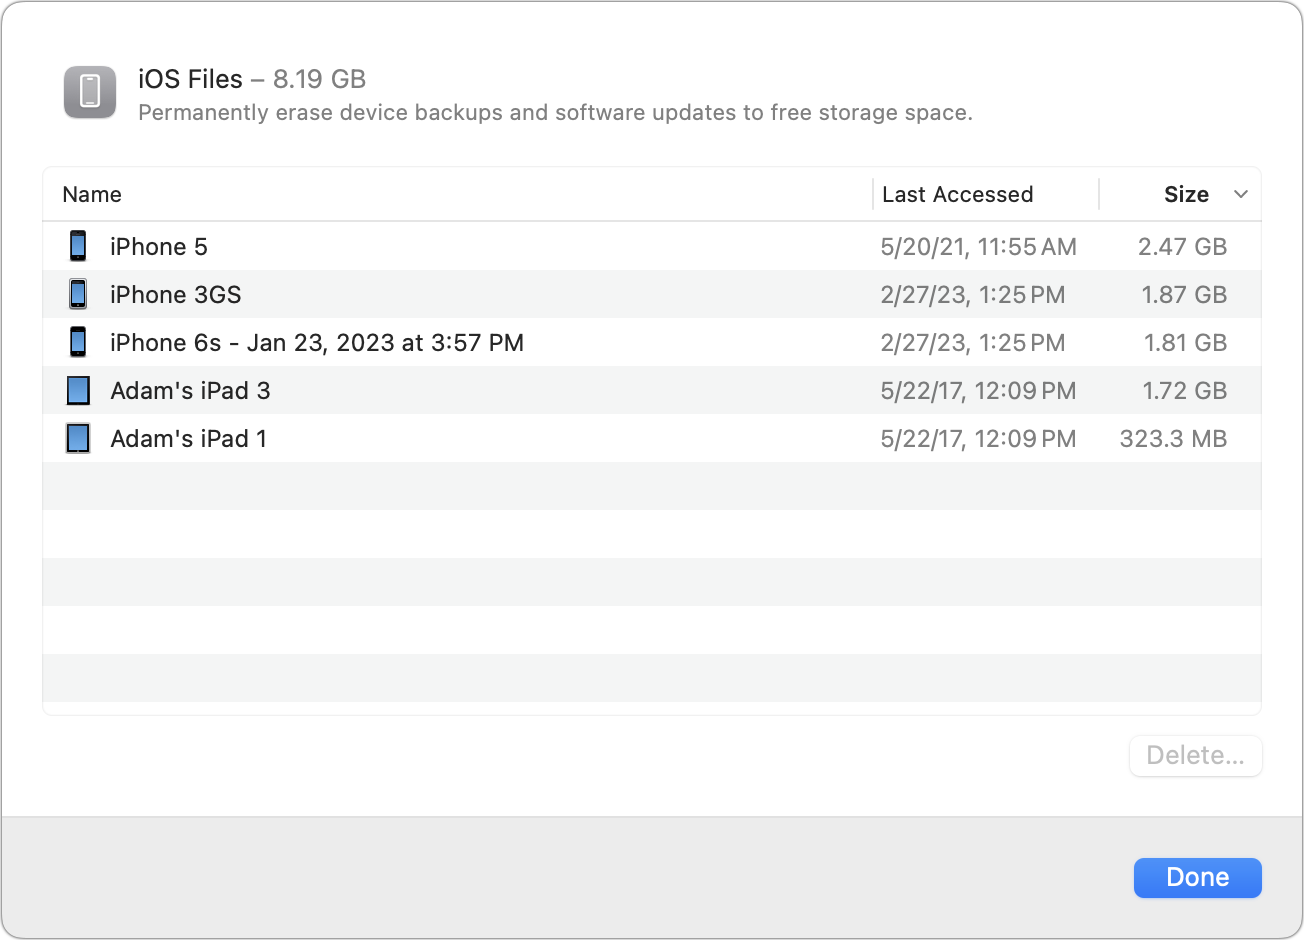
If you ever backed up an iPhone or iPad to your Mac, those backups may still be eating many gigabytes of storage space even if you’ve switched to backing up to iCloud. In System Settings > General > Storage > iOS Files, you can see how many backups you have and delete unnecessary ones. If you want to switch to iCloud for iPhone and iPad backups, make sure you have enough iCloud+ storage space and then turn on backups on your devices in Settings > Your Name > iCloud > iCloud Backup. These old backups will also appear in scanning utilities like GrandPerspective and OmniDiskSweeper, as mentioned in Step 3 above, but it’s easiest and safest to delete them using macOS’s native interface.
Those who have used iMazing may also see its backups and support files here, and they can also be deleted if you’re no longer using those devices or iMazing itself.
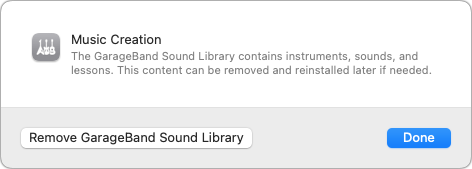
7: Remove the GarageBand Sound Library
During installation, GarageBand encourages you to install instruments and loops—first a 2 GB starter collection and then the complete 25 GB Sound Library. If you downloaded these files but are not actively using them, it’s safe to remove them because you can always get them again later from the GarageBand > Sound Library menu. To reclaim the space they occupy, open System Settings > General > Storage > Music Creation and click Remove GarageBand Sound Library.
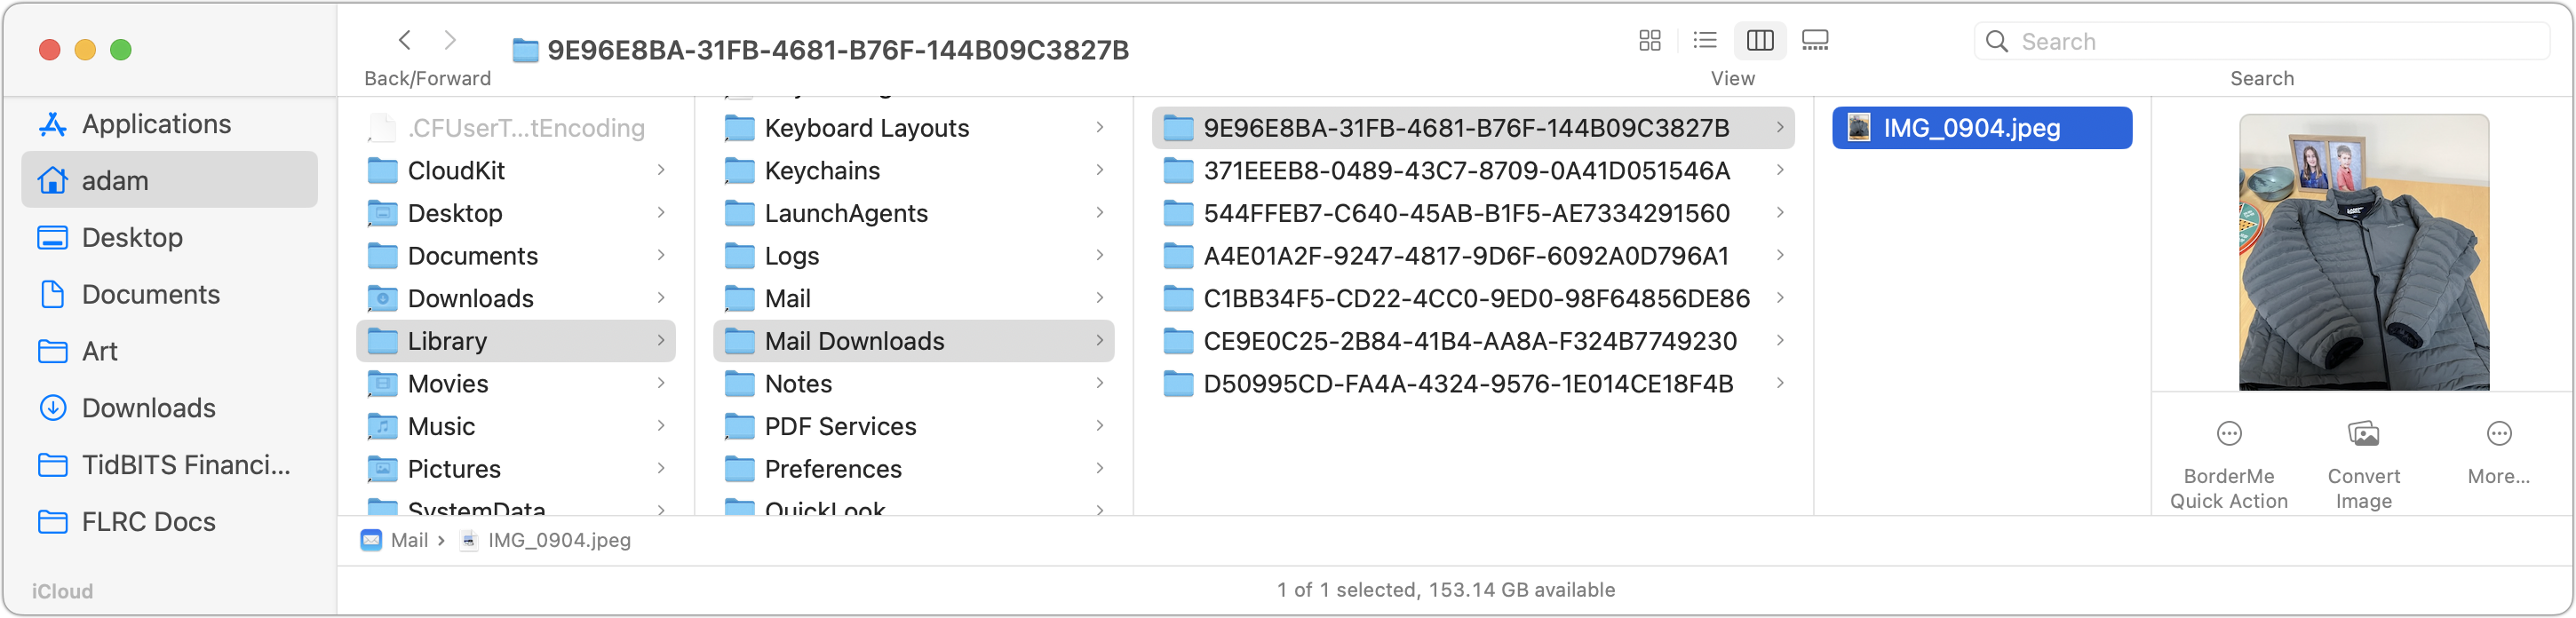
8: Remove Opened Mail Attachments
In Apple’s Mail, when you open an attachment, it extracts a copy of the file from the MIME-encoded message and stores it locally in a cryptically named folder at the path below. Or at least it does for me and many others—some seem to have nothing at that location, as discussed in TidBITS Talk. To view the contents of that folder, copy the path below, switch to the Finder, choose Go > Go to Folder, and paste this path.
~/Library/Containers/com.apple.mail/Data/Library/Mail Downloads
It’s unclear why Apple extracts attachments in this way, but since the attachments remain in the original messages, there’s no harm in deleting them. Some people reported finding gigabytes of files in there.
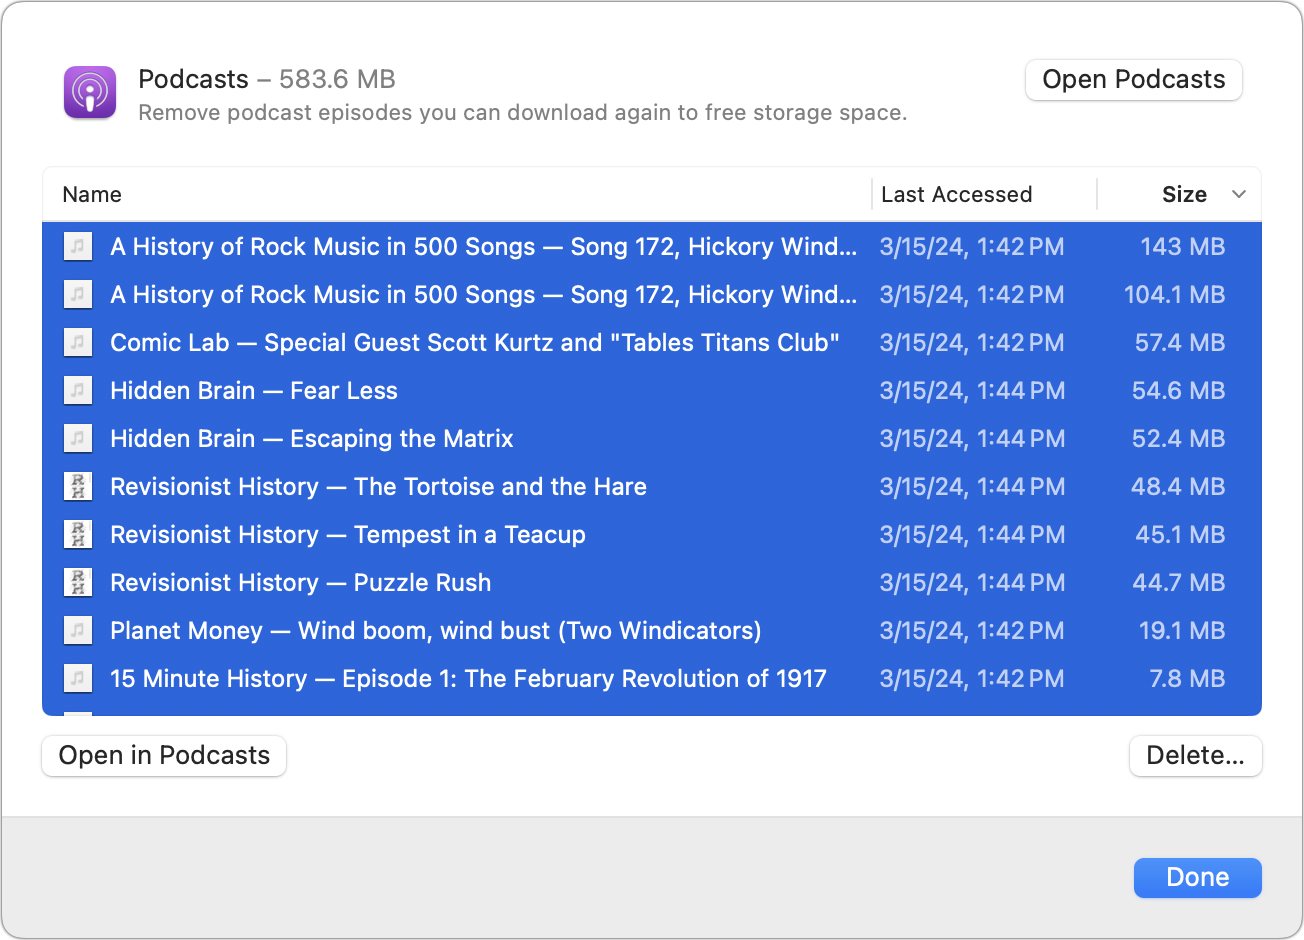
9: Remove Unwanted Podcasts
If you followed some shows in Apple’s Podcasts app but then stopped listening or switched to another podcast app or platform, the Podcasts app may have accumulated a lot of cruft you never intended to consume. To recover that space, open System Settings > General > Storage > Podcasts, select all the extra podcast episodes, and click Delete.
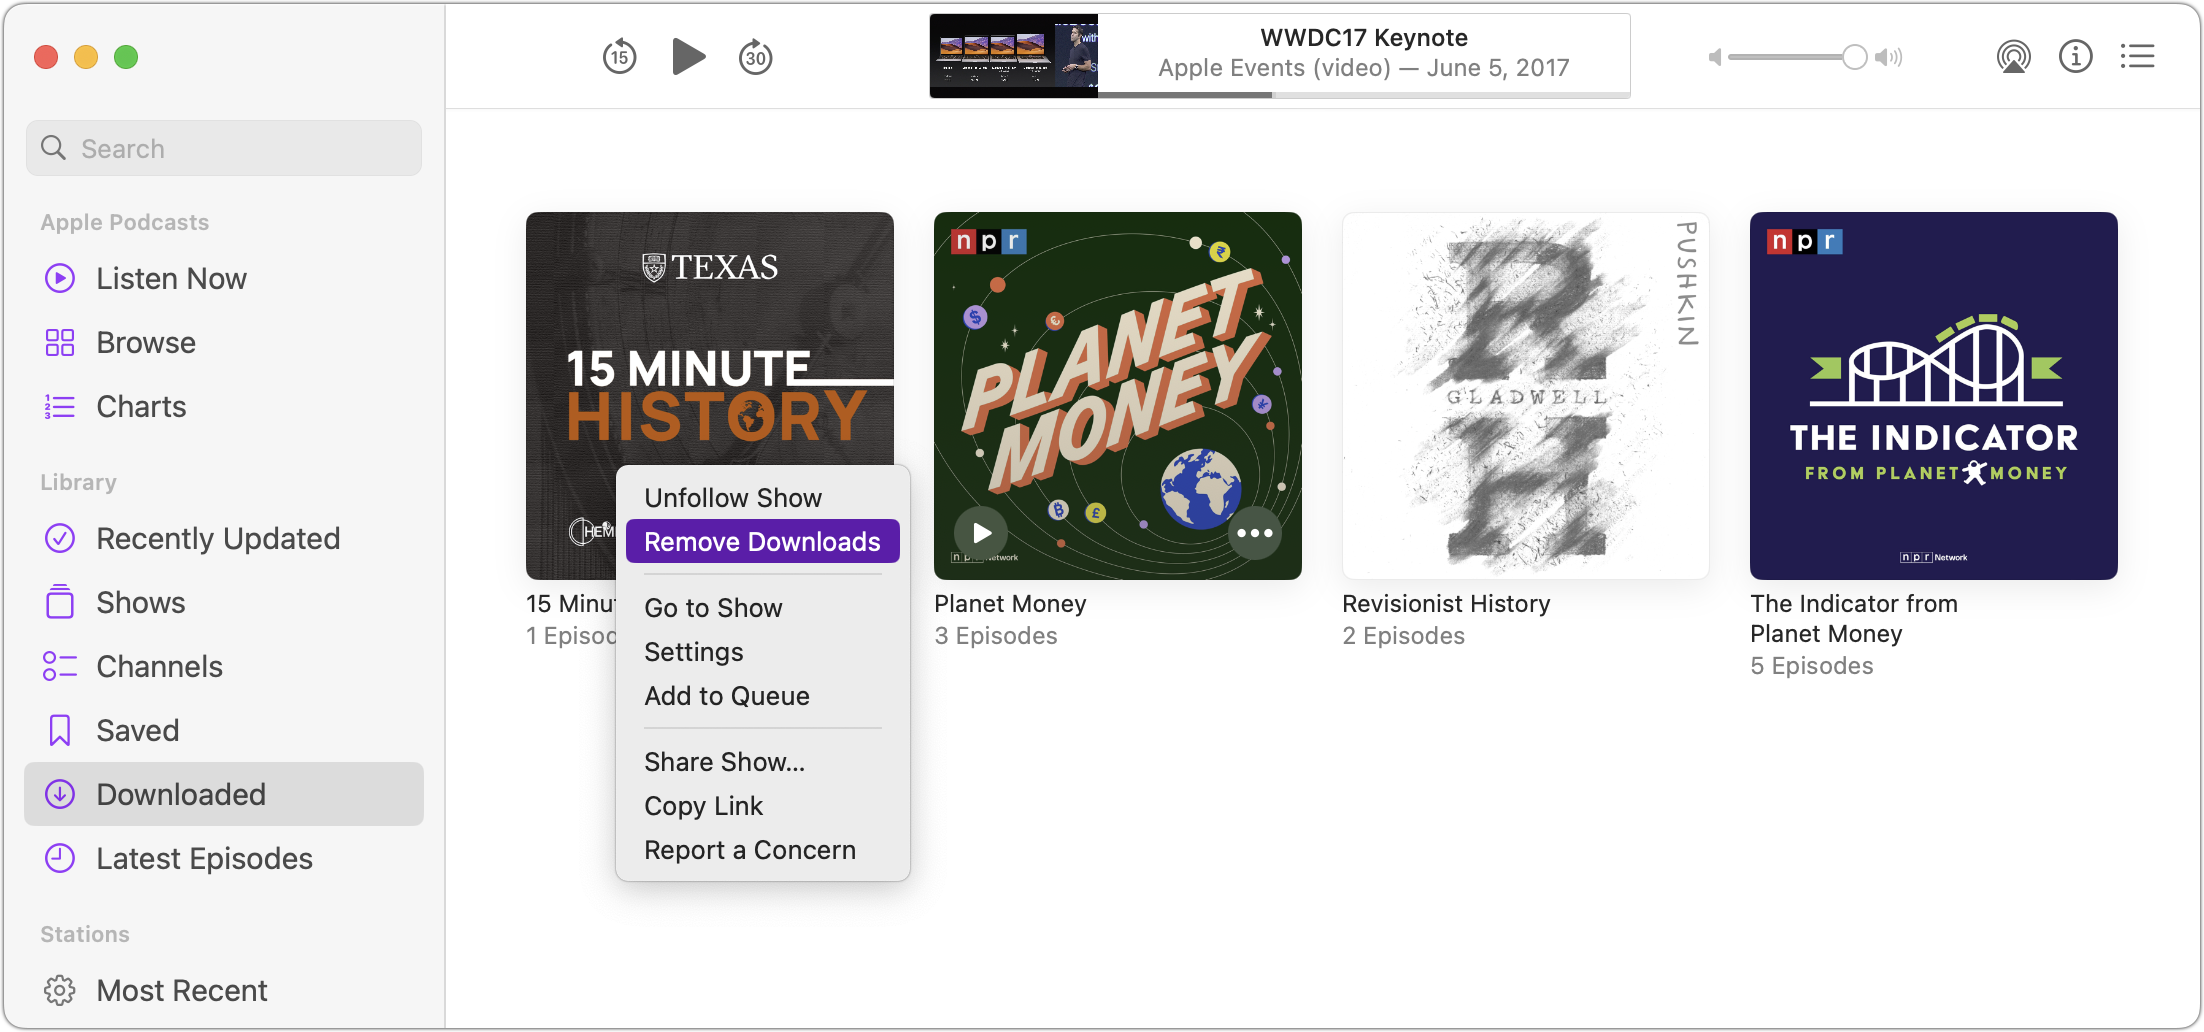
For a more focused approach, click Downloaded in the sidebar in Podcasts, Control-click each unwanted podcast, and choose Remove Downloads. Either way, make sure to set the downloading options appropriately in Podcasts > Settings > General. If you never want to listen to future episodes, choose Unfollow Show and then click Remove From Library to everything associated with the podcast.
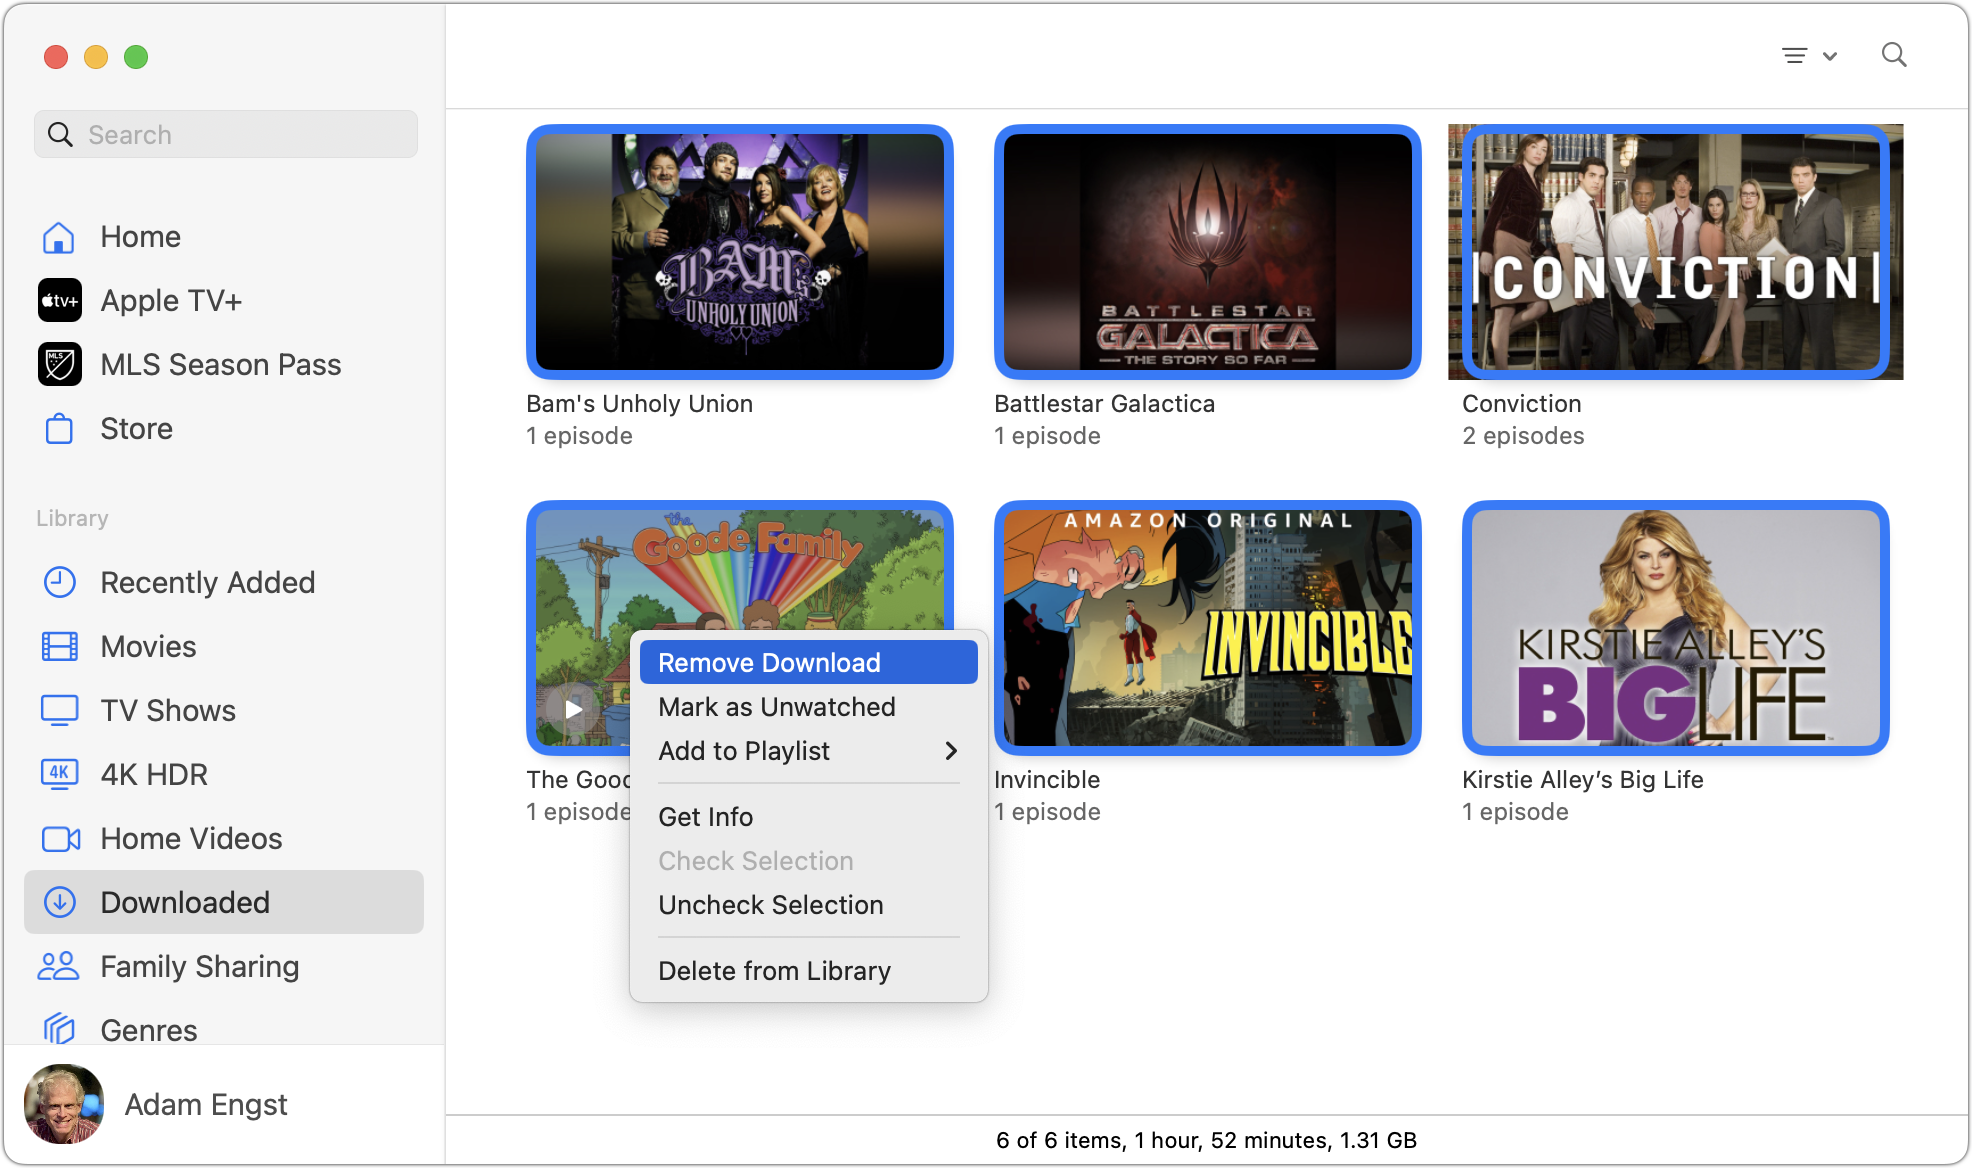
10: Remove Watched TV Shows and Movies
We’re starting to get into trickier territory here because not all movies and TV shows in the TV app can be downloaded again. To remove those that can easily be recovered, click Downloaded, select all, Control-click one of them, and choose Remove Download. (In my testing, the TV option in the System Settings Storage screen didn’t see all the downloads.)
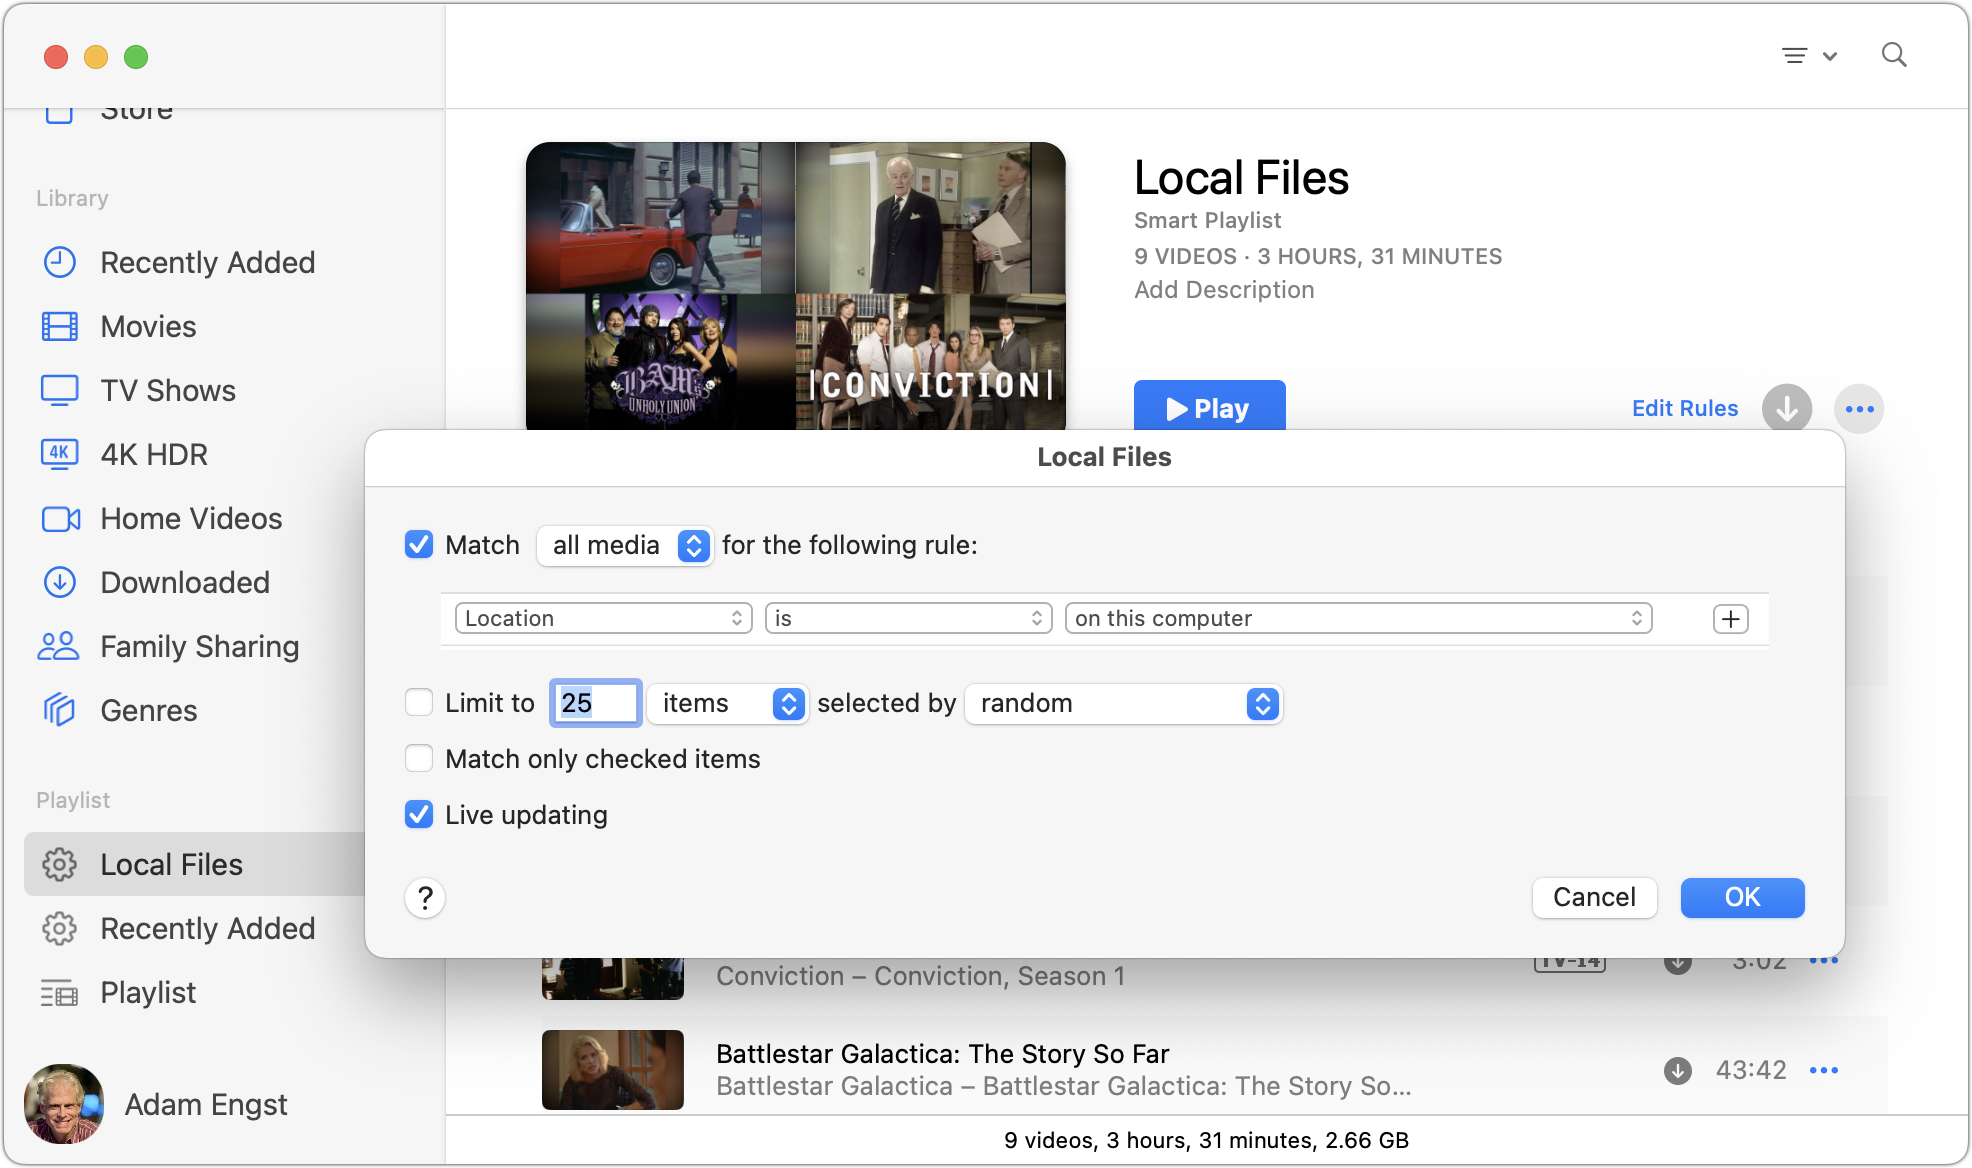
If manually added TV shows and movies are consuming space, create a smart playlist with a Location rule for items on the computer. To delete the files it collects, select them, Control-click one, and choose Delete from Library. Remember that you won’t be able to redownload such videos, so delete them only if they’re archived elsewhere or you don’t want to watch them again.
11: Remove Downloaded Copies of Apple Music and iTunes Match Songs
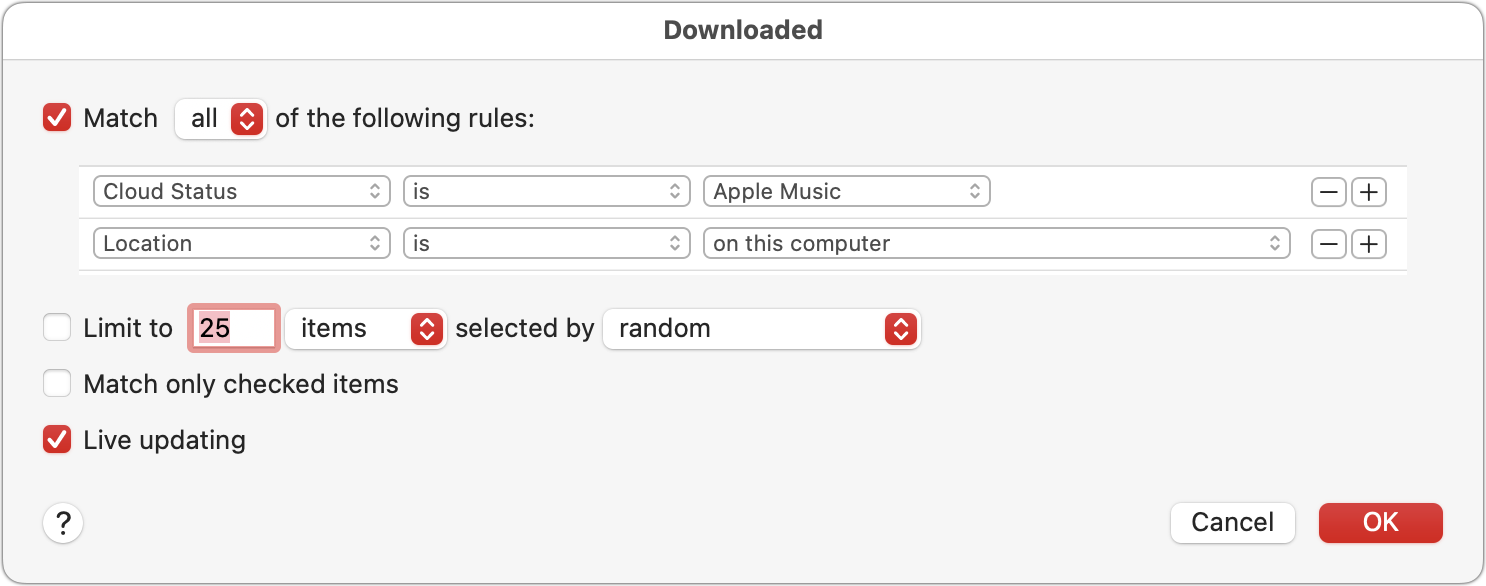
Just as you can remove downloaded video files in the TV app, you can also remove downloaded songs in the Music app. For some reason, the Music option in the System Settings Storage screen can only see and remove music videos, not regular tracks, but the smart playlist approach works for Music, too. Create a new smart playlist with a Cloud Status rule that matches either Apple Music or Matched (for iTunes Match) and a Location rule that looks for items on the computer. Then select everything it finds, Control-click one of them, and choose Remove Download. The Cloud Status rule is vital to avoid deleting music that exists only locally.
12: Remove Local Copies of Apple Books
I find Books the hardest to work with all of Apple’s media apps, but that may be related to it accumulating random test files over the years. (I’ve never regularly used it to read books—I prefer borrowing ebooks in Libby; see “Skip the Library Trip, Borrow Ebooks and More at Home,” 14 September 2020.)
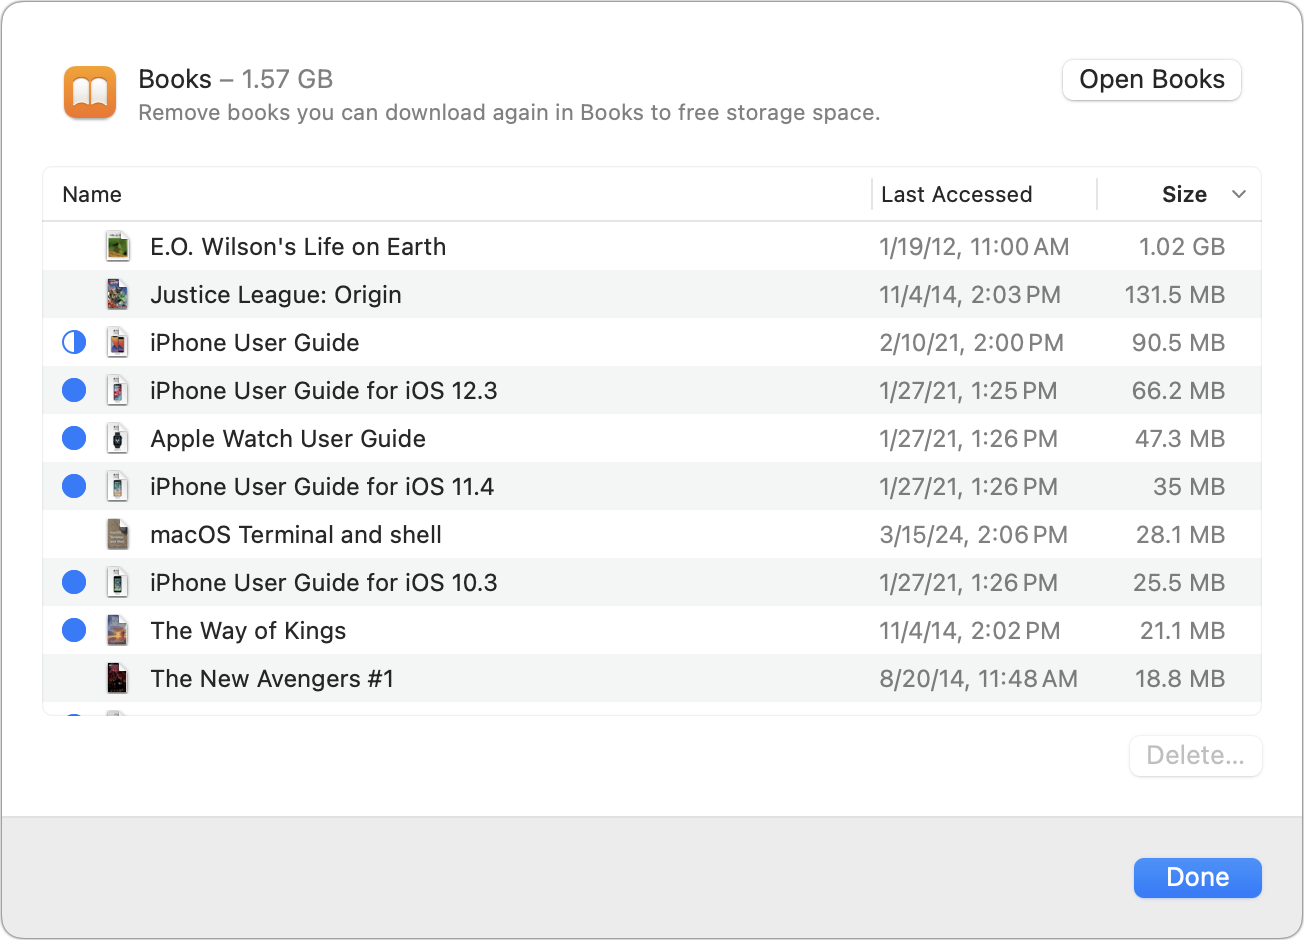
Apple makes it straightforward to remove downloads for books you’ve purchased from Apple Books (previously the iBookstore). Open System Settings > General > Storage > Books, select the books you don’t want, and click Delete.
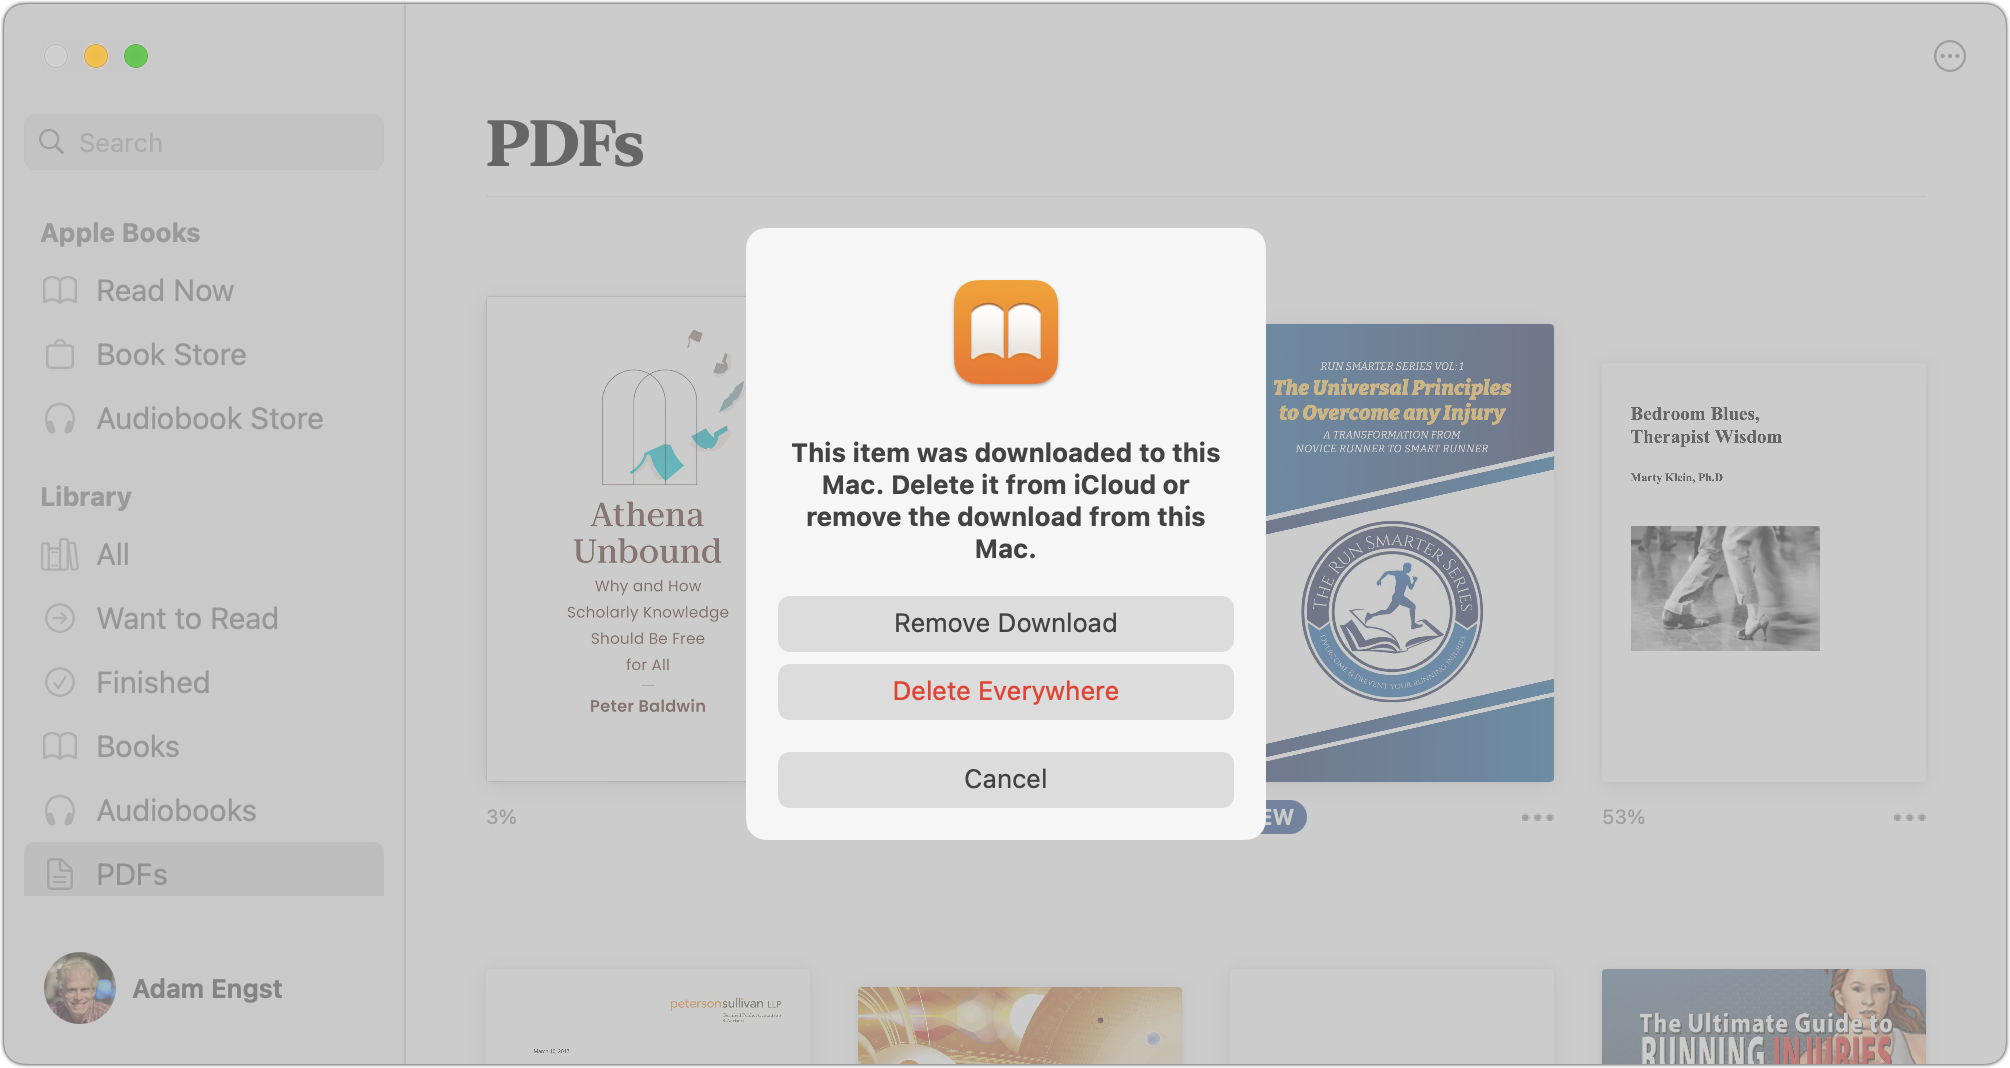
However, you could also have added large EPUB or PDF books to Books and synced them through iCloud. You can select one or more items in Books, Control-click one of them, choose Remove, and then click Remove Download. That’s unsatisfying because I could never figure out where the downloaded files lived to verify that they were actually being deleted. The only location I could find was iCloud Drive/Books, and I could view the contents of that folder only by double-clicking a PDF book to open it in Preview, Control-clicking the filename at the top of the window, and choosing the Books folder. But deleting a file from that folder deletes it from Books, too—it’s the same as clicking Delete Everywhere below and does not merely remove a download. Be careful.
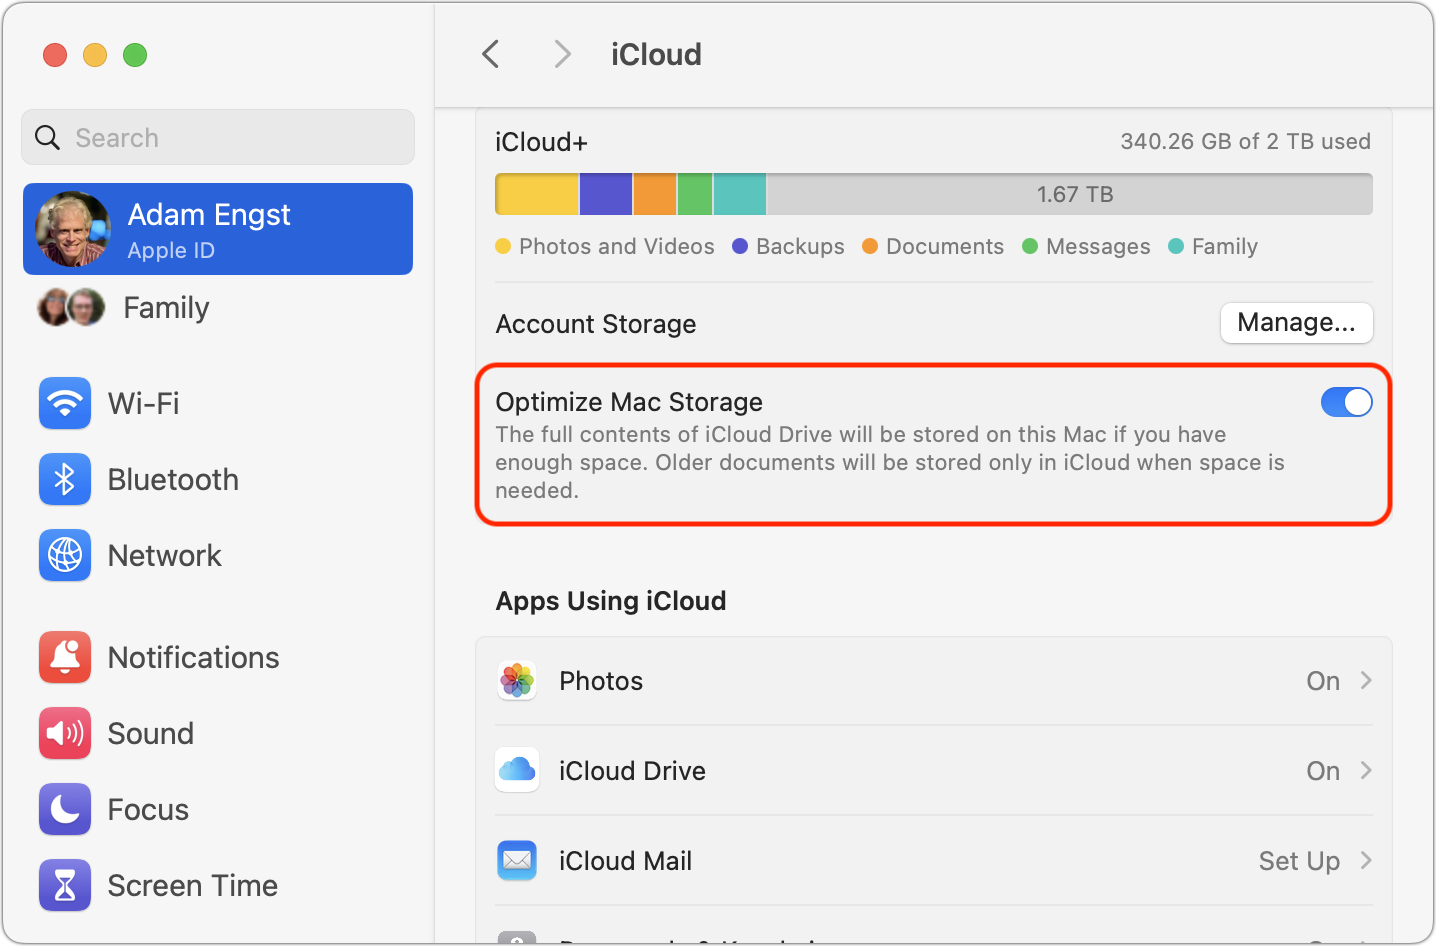
13: Select Optimize Mac Storage and Remove Local iCloud Drive Files
If you store large quantities of data in iCloud Drive, the local copies may consume a lot of space on your Mac’s drive. Because you can always download those files from iCloud Drive again, it’s safe to turn on System Settings > Your Name > iCloud > Optimize Mac Storage. Then, Control-click folders and choose Remove Downloads. Of course, cloud-only files won’t be backed up locally, but they should have been backed up before you turned on Optimize Mac Storage, and any files you modify or create will be local (at least for a while) and will thus be backed up.
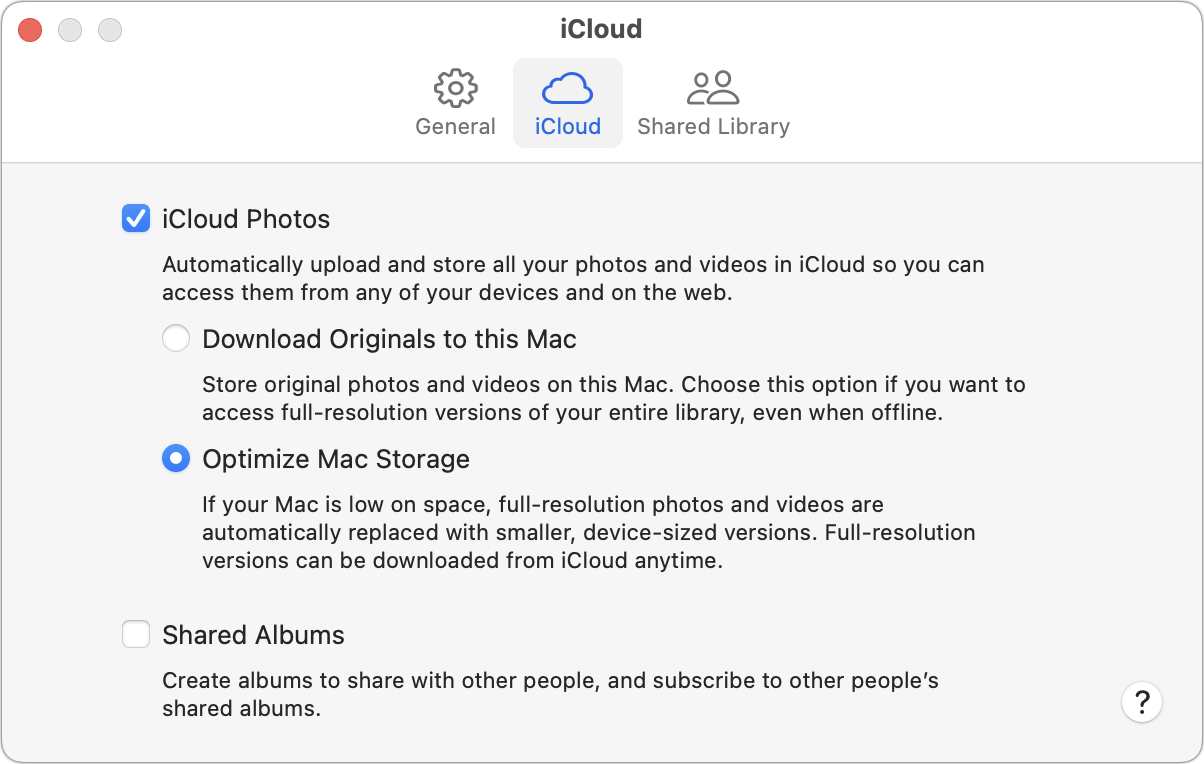
Conceptually similar is the option in Photos > Settings > iCloud to Optimize Mac Storage. As Apple says, it replaces full-resolution photos and videos with smaller, device-sized versions. Whenever you open a photo or video, Photos automatically downloads the full-resolution version from iCloud. You can turn this option on, and I’ve done that on my MacBook Air.
However, I would caution you about two things if you’re trying to clear space:
- Photos doesn’t provide a manual way to remove downloaded photos and retain just a placeholder. Space management happens automatically, so you shouldn’t expect to recover space immediately after enabling Optimize Mac Storage. However, turning it on will alert macOS that it can evict originals, so error conditions caused by low space may go away.
- Although I trust iCloud Photos insofar as I trust Apple’s ability to maintain the integrity of my files stored in its cloud services, I also want a local backup of the full-resolution images and videos because of the downside of a rare glitch deleting a lifetime of memories. There’s no way to create a local backup of iCloud Photos when Optimize Mac Storage is active. That’s why I use that setting only on my MacBook Air; I have my iMac set to “Download Originals to this Mac” for backup and better performance.
Although this is venturing into the weeds, if you use Box, Dropbox, Google Drive, or another cloud storage service, it almost certainly has an option to remove local copies of files. That may or may not be generally desirable, but if you’re trying to clear a bunch of space quickly, it will do so without permanently deleting any data.
14: Delete iPhoto Libraries
Although iPhoto has been dead and gone for many years, you could still have an iPhoto library on your drive because there was no prompt or migration path that deleted these libraries after you started using Photos. Assuming that you’ve migrated its contents to Photos (the package will have a .migratedphotolibrary extension), it’s safe to remove the iPhoto library.
However, you may not save much space. Apple uses Unix hard links to store the same master images in both iPhoto and Photos. Migrating from iPhoto to Photos doesn’t copy files from the iPhotos library—it adds new hard links. Likewise, deleting an iPhoto library doesn’t remove the hard-linked files from the drive, as those files exist independently of any single link. (Hard-linked files are deleted only when all hard links to them are deleted.) On TidBITS Talk, David C. explained how this works in detail, and when I looked back to see what we had written about it in TidBITS, I ran across Jason Snell’s article, “Initial Impressions of Photos for OS X Beta” (9 February 2015), which links to a Six Colors article explaining more about the hard links.
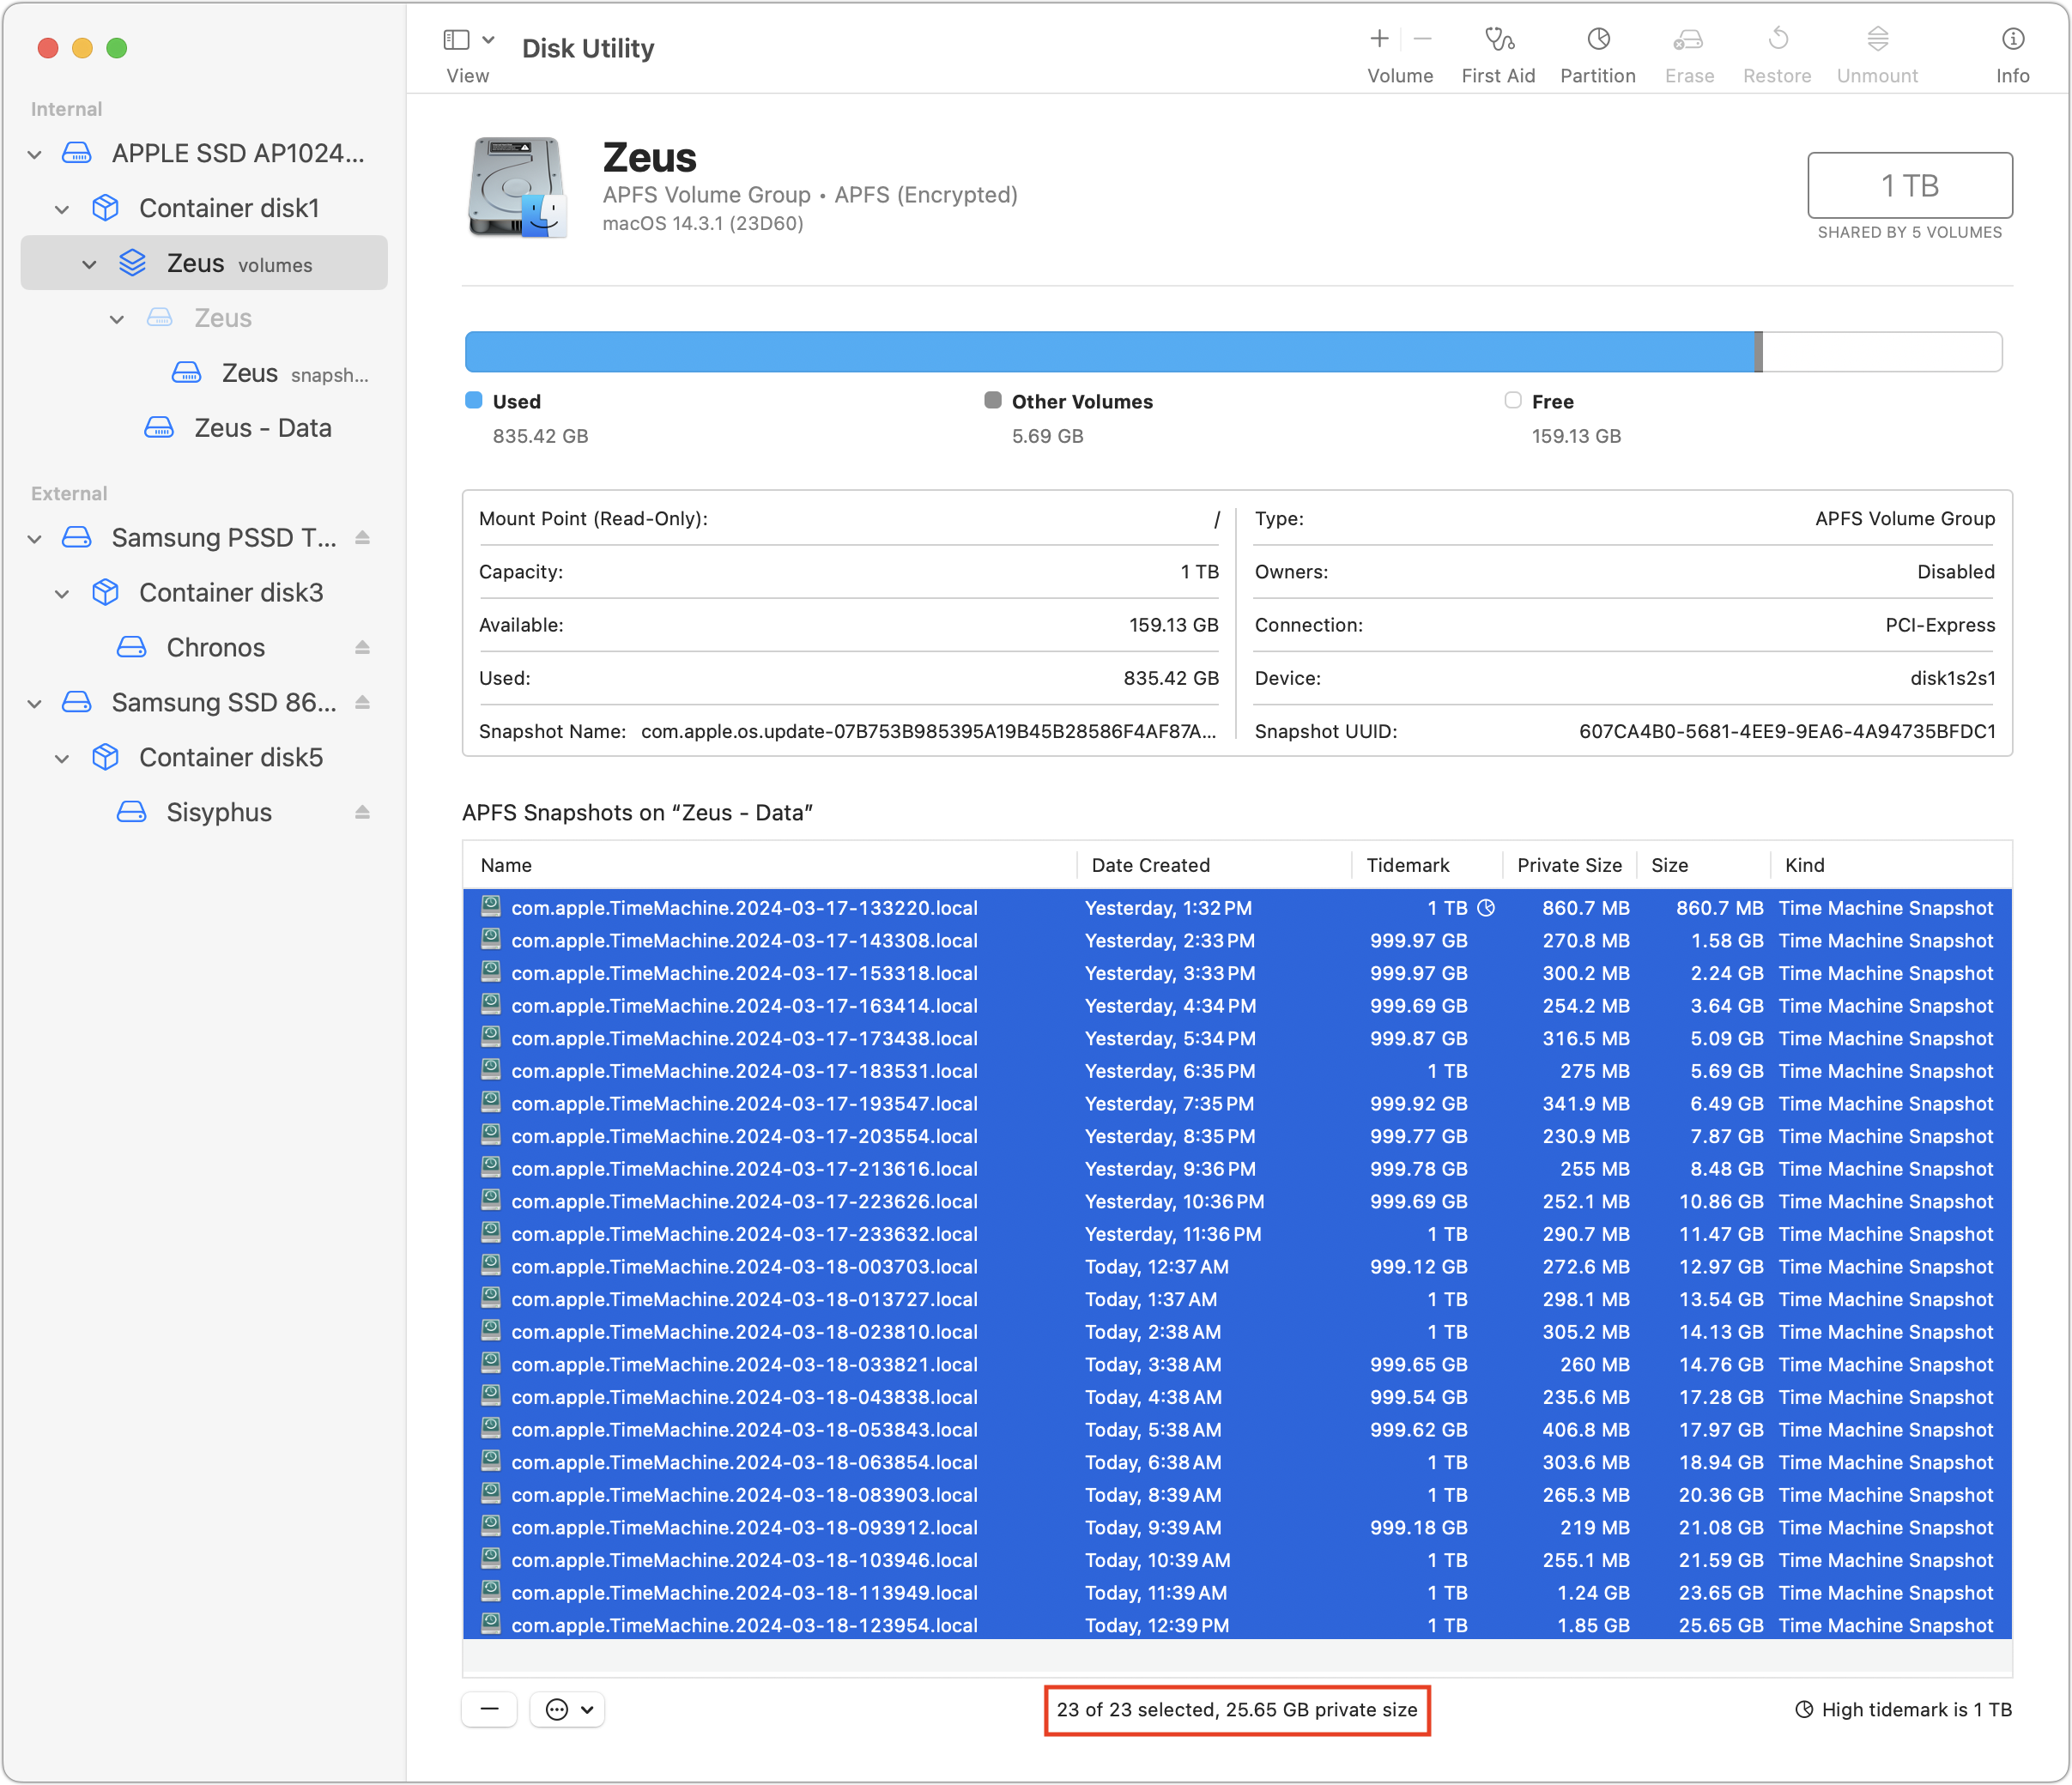
15: Delete Time Machine Snapshots
Today’s Time Machine leverages local APFS snapshots, generating one every hour and keeping the last day’s worth so you can restore recent files from Time Machine even if your backup drive isn’t available. Although these snapshots are of your entire volume, the magic of APFS means that each contains only the data that has changed since the previous one. This also means that if you download a huge amount of data in a single day, that data is essentially doubled by the snapshot!
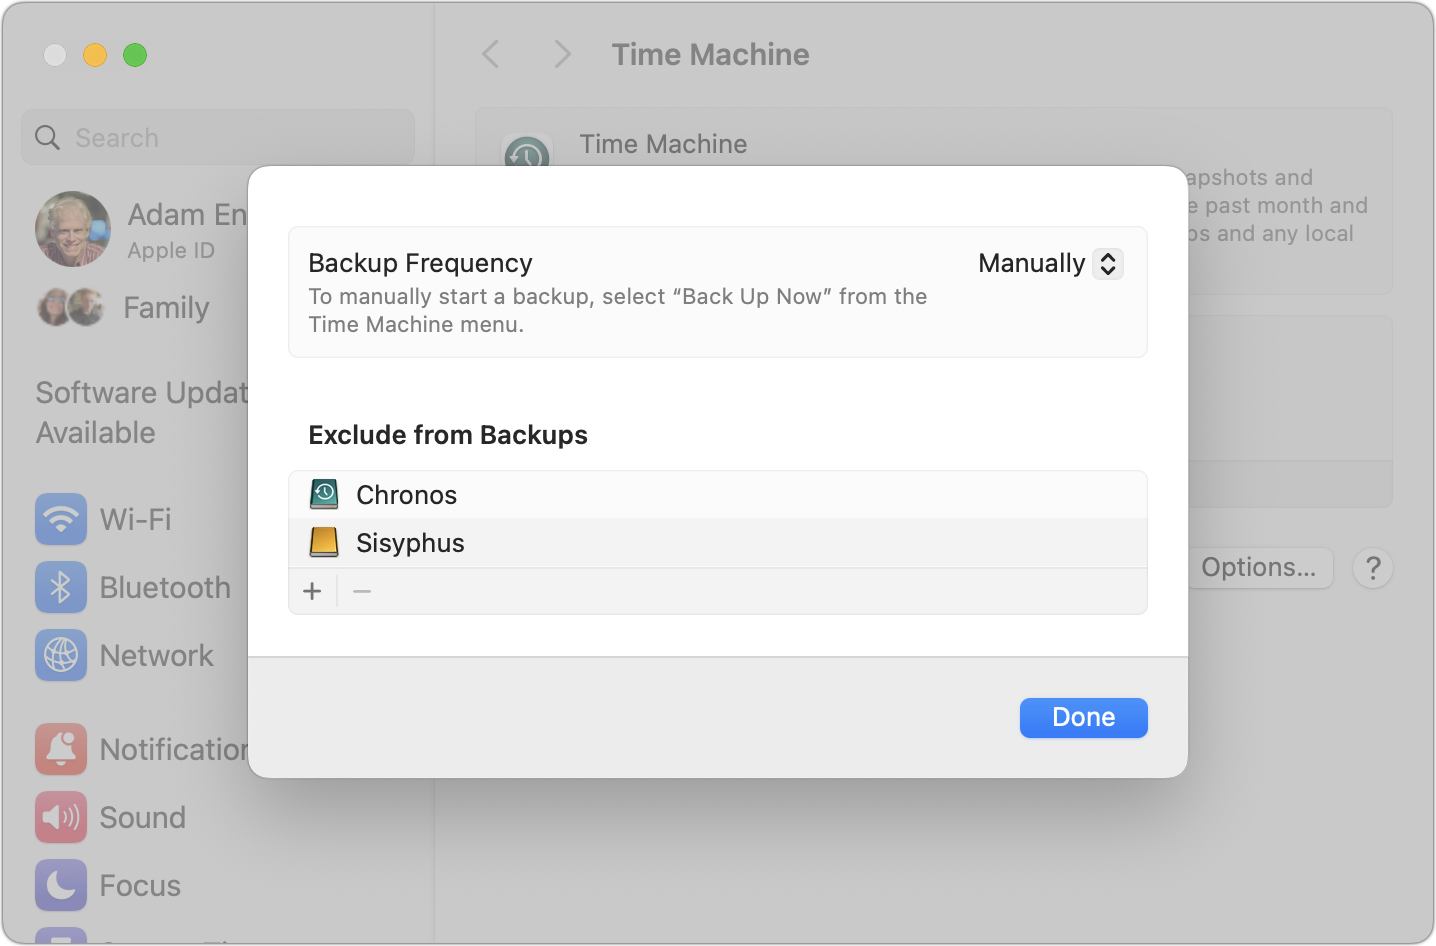
If you need to recover space temporarily, you can delete these snapshots. Apple recommends doing this by turning off automatic backups: open System Settings > General > Time Machine > Options, and set Backup Frequency to Manually. Make sure to turn automatic backups back on later—any sort of manual selection of files or backup triggering leaves open the possibility of not having a backup when you need it. Although Apple says the snapshots will be deleted in a few minutes, that didn’t seem to happen in my testing.
For more direct manipulation and immediate gratification, work in Disk Utility. Select your startup drive’s volume, and delete snapshots by selecting all of them, Control-clicking one, and choosing Delete.
I don’t recommend deleting Time Machine snapshots other than in exceptional circumstances for three reasons:
- Even though the snapshots are on your startup drive, deleting them seems to prevent the Time Machine interface from showing data that has been copied to your external Time Machine drive. If you need to recover something from the time covered by the snapshots, you may be able to do that by manually browsing each Time Machine backup folder in the Finder.
- Theoretically, you can see how much space deleting snapshots will save by selecting all the snapshots and looking at the private size number at the bottom of the screen. I’m not confident that will always be the case, but it will give you a ballpark figure.
- This approach to saving space works only temporarily because Time Machine will recreate these snapshots as it runs.
All that said, it may be worth checking Disk Utility to see if there are orphaned Time Machine snapshots taking up space unnecessarily.
16: Delete Unwanted Contents of the Downloads Folder
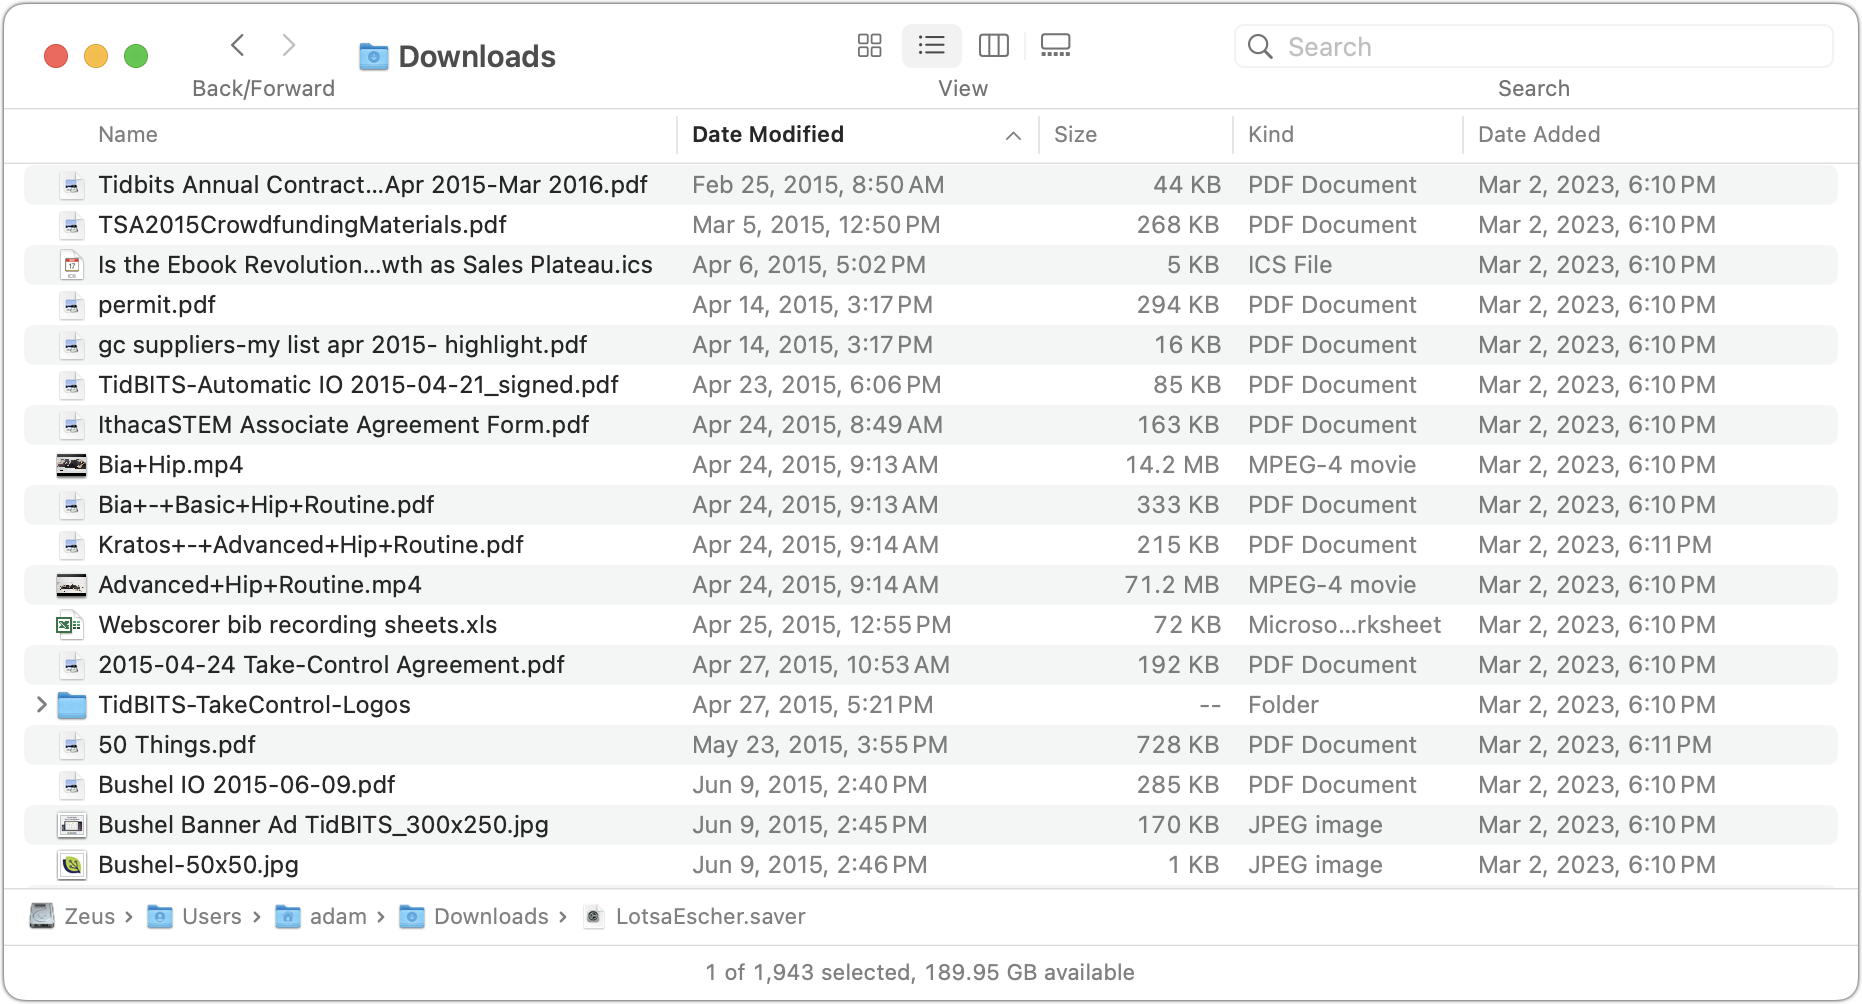
Many of us haven’t established a routine of deleting downloaded files we never need again. I’m terrible about this—my Downloads folder currently holds 1943 files occupying over 16 GB of space. If you’re sure you don’t need any of these files, you could choose File > Select All and drag them to the Trash.
But if you might need some recently downloaded files, consider sorting the Downloads folder by the Date Modified column in List View, then delete all the files that were last modified more than a year ago. Embarrassingly, I still have downloads from 2015.
Of course, if you have files or apps in your Downloads folder that you regularly use, don’t delete them. I think it’s dangerous to keep anything important in the Downloads folder—there’s no reason not to move such files to more appropriate folders.
17: Delete Photo, Song, and File Duplicates
In theory, there’s no downside to deleting duplicates, but in my experience, it can require a fair amount of time to verify that what’s being deleted is genuinely a duplicate and isn’t desirable for some other reason, such as having the same file in multiple folder hierarchies.
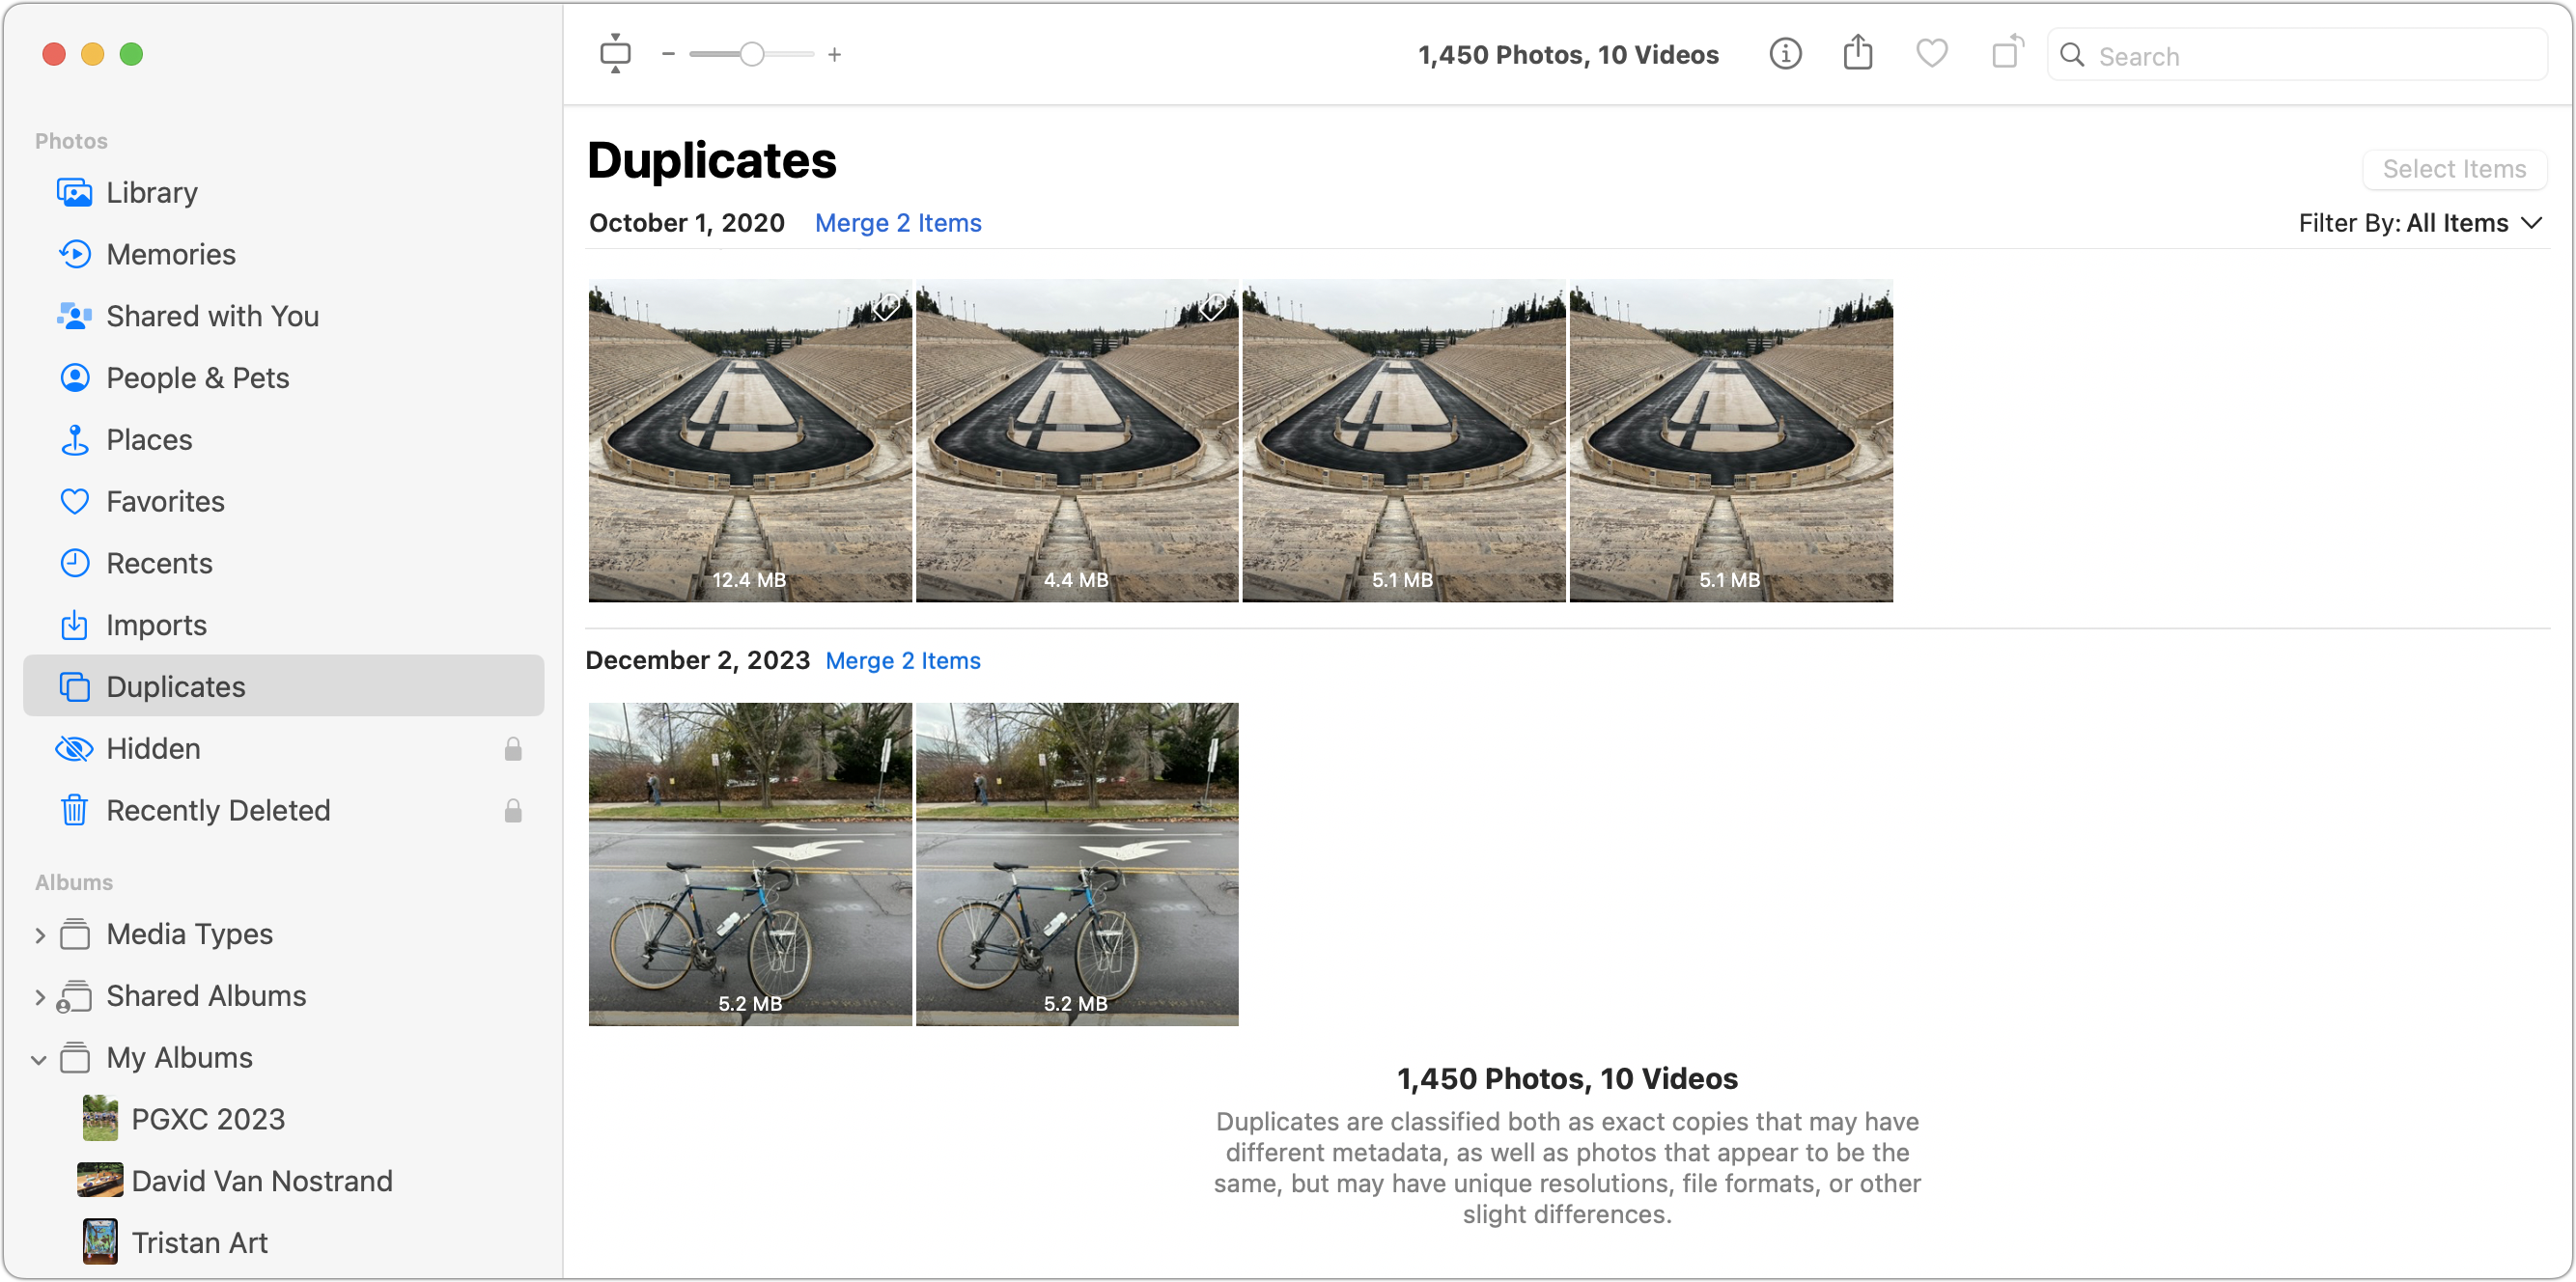
Nonetheless, it’s generally safe to use the duplicate removal feature of Photos. Click Duplicates in the sidebar, select one or more sets of duplicates, and click either the Merge link above them or the Merge X Items button. Whether or not that saves significant space depends on your situation. Fat Cat Software’s $29.95 PowerPhotos may be easier to use or do a better job.
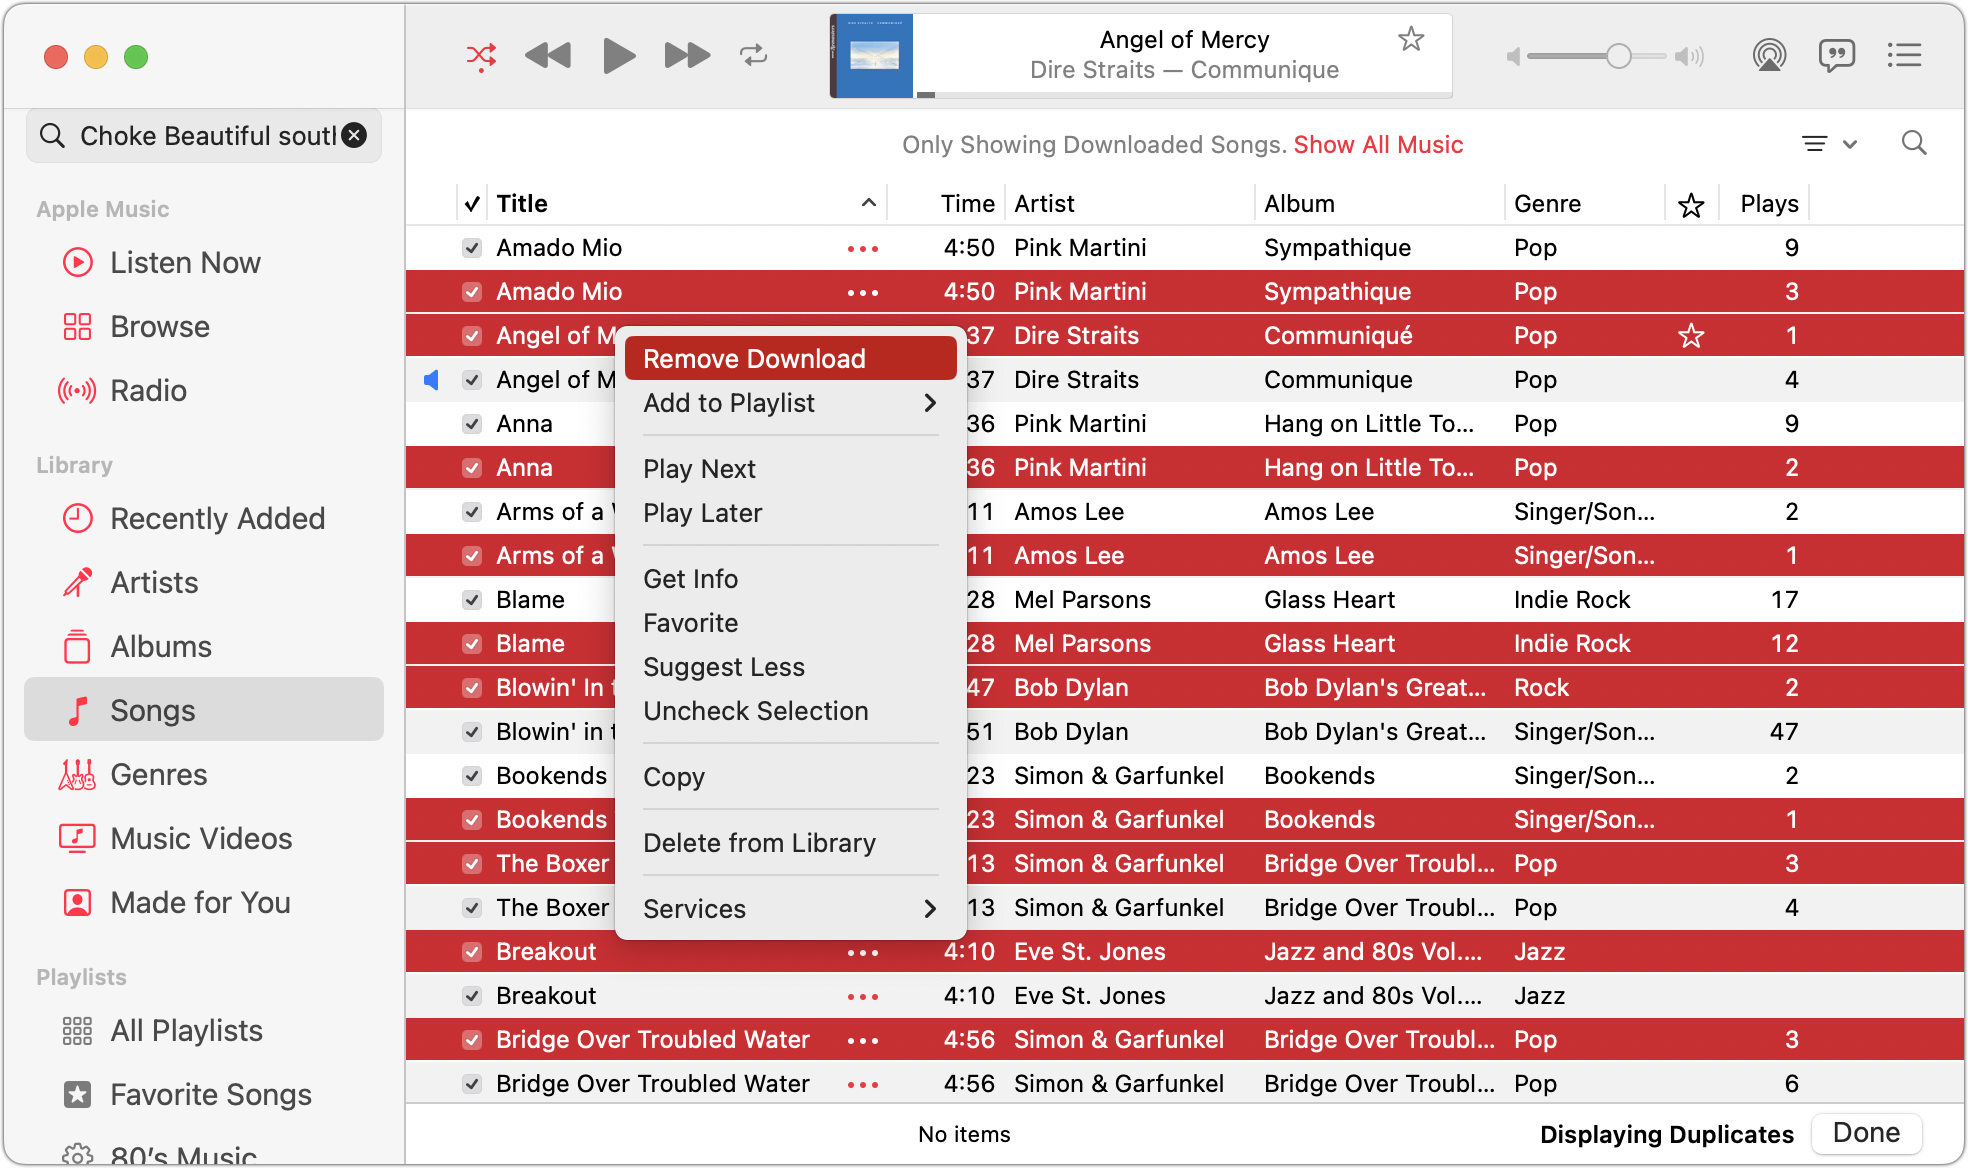
Although it can identify duplicates, Music provides no automated way to merge them like Photos. Click Songs in the sidebar, choose View Only Downloaded Music (since deleting Apple Music duplicates won’t save any space), hold down the Option key, and choose File > Library > Show Exact Duplicates to see duplicates whose downloads you might want to remove by Control-clicking and choosing Remove Download. I doubt most people will save much space by deleting duplicate songs.
Various utilities provide more general duplicate removal, but I’ve only used the $19.95 Gemini 2 from MacPaw; it’s also included in MacPaw’s Setapp service. It works pretty well when identifying duplicate images.
18: Delete Already-Imported Folders of Photos
Be very careful here. More than once, I’ve seen significant amounts of drive space consumed by leftover folders of photos that have already been imported into Photos, where the user wants them. If you can be certain those photos have been imported into Photos and copied into the Photos library (make sure Photos > Settings > General > Copy Items to the Photos library is selected), you can delete the folders. Moving the folders to an external drive or cloud storage service would be safer.
You could also reimport the folders of photos into Photos and then rely on the app’s duplicate-checking and removal features to ensure that you have everything in.
19: Use DevCleaner to Delete Xcode Caches
I mention this option near the end because most people don’t use Apple’s Xcode development environment. If you do, consider using DevCleaner to remove device support symbols, build archives, derived data, cached documentation, old simulator and device logs, and old documentation. I don’t use Xcode, so I can’t comment on how well it works.
20: Compress Large Files
If you have a collection of large files that you need to keep but don’t need to access regularly, you could consider compressing them. The easiest way would be to create a Zip archive by selecting a file or folder in the Finder and choosing File > Compress. That’s lossless—when you expand the files, they’ll be exactly as they were before being compressed. If compressing and expanding files manually sounds like a hassle, can we have a brief moment to remember DiskDoubler?
Those with video collections could consider using Handbrake to recompress the video files with a more efficient codec and tighter settings. Although such conversions can reduce the size of files by 75% or more, the process is lossy—the compressed data can never be recovered. Tread carefully!
21: Get External Storage
Finally, if you’ve gotten this far, you’re really bumping into the limits of your Mac’s internal storage. Since there’s no way to expand that for modern Macs, you’ll want to look into external storage, either an SSD or a hard drive. I’ve mentioned moving little-used data off to external storage a few times already, but if you have a massive Photos library you want to keep local, moving it to an external SSD can be a highly effective way of clearing space on your internal drive. Make sure you back up externally stored files as rigorously as you do your startup volume’s data!
Contents

Click for special offers to Mac Users Groups members.

Website design by Blue Heron Web Designs

Click the image for information about advertising on this website.