
Here at TidBITS, we spend a lot of time on screenshots: composing them, taking them, editing them, bordering them, and more. The goal is always to end up with a screenshot that illustrates something we’re discussing in the text without adding confusion with extraneous information or messing up the article layout with unnecessary drop shadows or white space. For that, we rely heavily on this technique to take a screenshot of a particular user interface element without its drop shadow:
- Press Command-Shift-4.
- Press the Space bar.
- Move the pointer over the desired interface element, which turns blue.
- Option-click to take the screenshot sans drop shadow.
For the last few versions of macOS, we’ve had a problem with dialogs that are attached to a window, technically called “document-modal dialogs” or “sheets,” although Apple prefers they just be called “dialogs” in user-facing text. The built-in macOS screenshot capability can see the window, but it can’t grab the attached dialog as an independent interface element. When the context of the overall window is informative, getting both is fine. At other times, it’s just unnecessary or even awkward.
For instance, look at the dialog that appears when you click the Advanced button in the Software Update preference pane below from macOS 10.14 Mojave (it looks odd because it was captured without the drop shadow that’s necessary to set it off from the Advanced dialog).
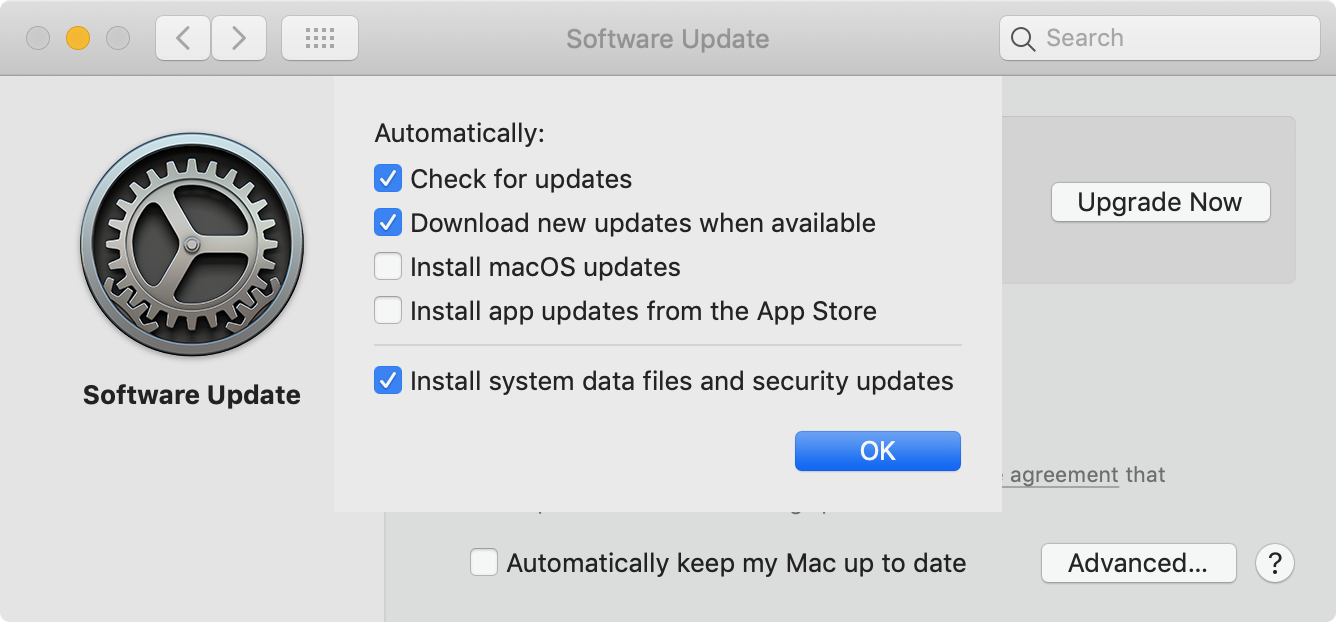
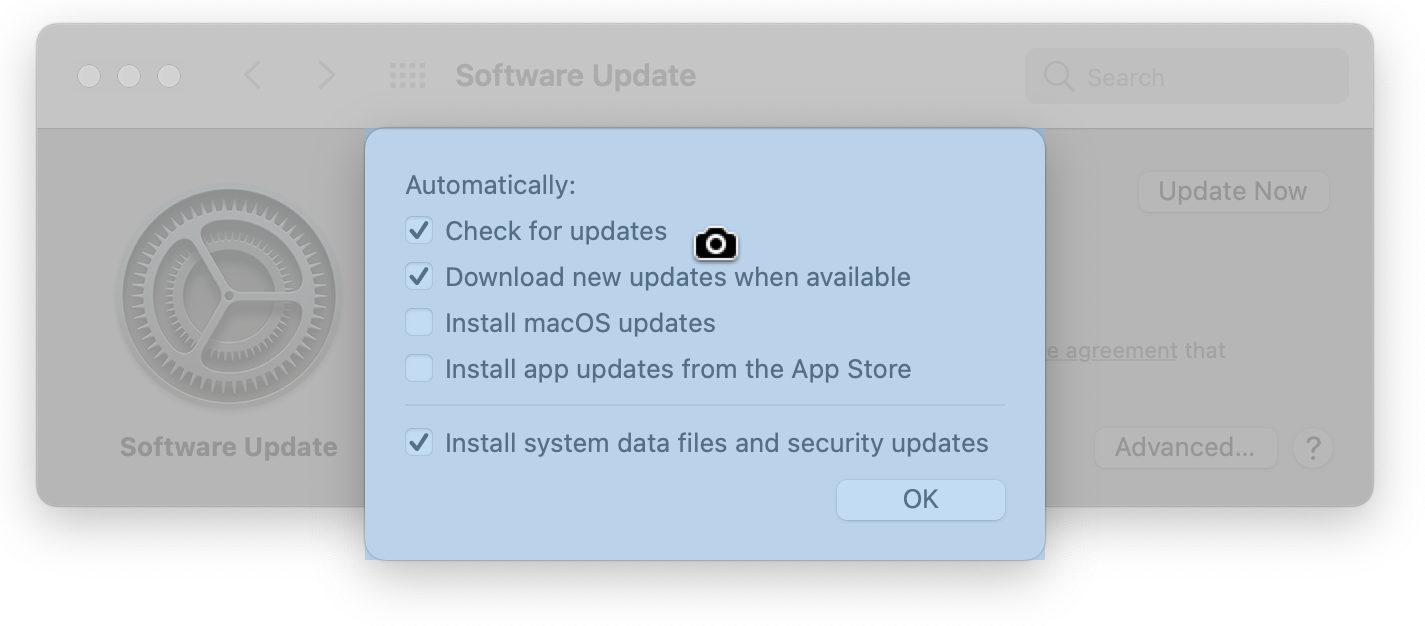
There’s no benefit in showing the Software Update preference pane behind the dialog, so we’ve been cropping such screenshots to focus only on the dialogs and bordering them separately. That wasn’t too hard in Mojave or 10.15 Catalina because they were rectangular. However, in macOS 11 Big Sur, rounded rectangles reign supreme. Here’s that same screenshot in Big Sur.

It actually looks a little better thanks to the contrast between the grayed-out preference pane and the bright dialog, but extracting that dialog out would leave ugly little gray chunks in the top corners. They too could be edited out, but if we wanted to border the dialog as well, it would have a rectangular border rather than one that followed the rounded corners.
The solution—I cannot believe that I didn’t know this existed for all these years!—is to hold down the Command key in Step 3 above and then mouse over the dialog you want. macOS highlights it, as you can see in the action shot below, and clicking the mouse captures just that dialog (Option-click to capture without the drop shadow, as always).
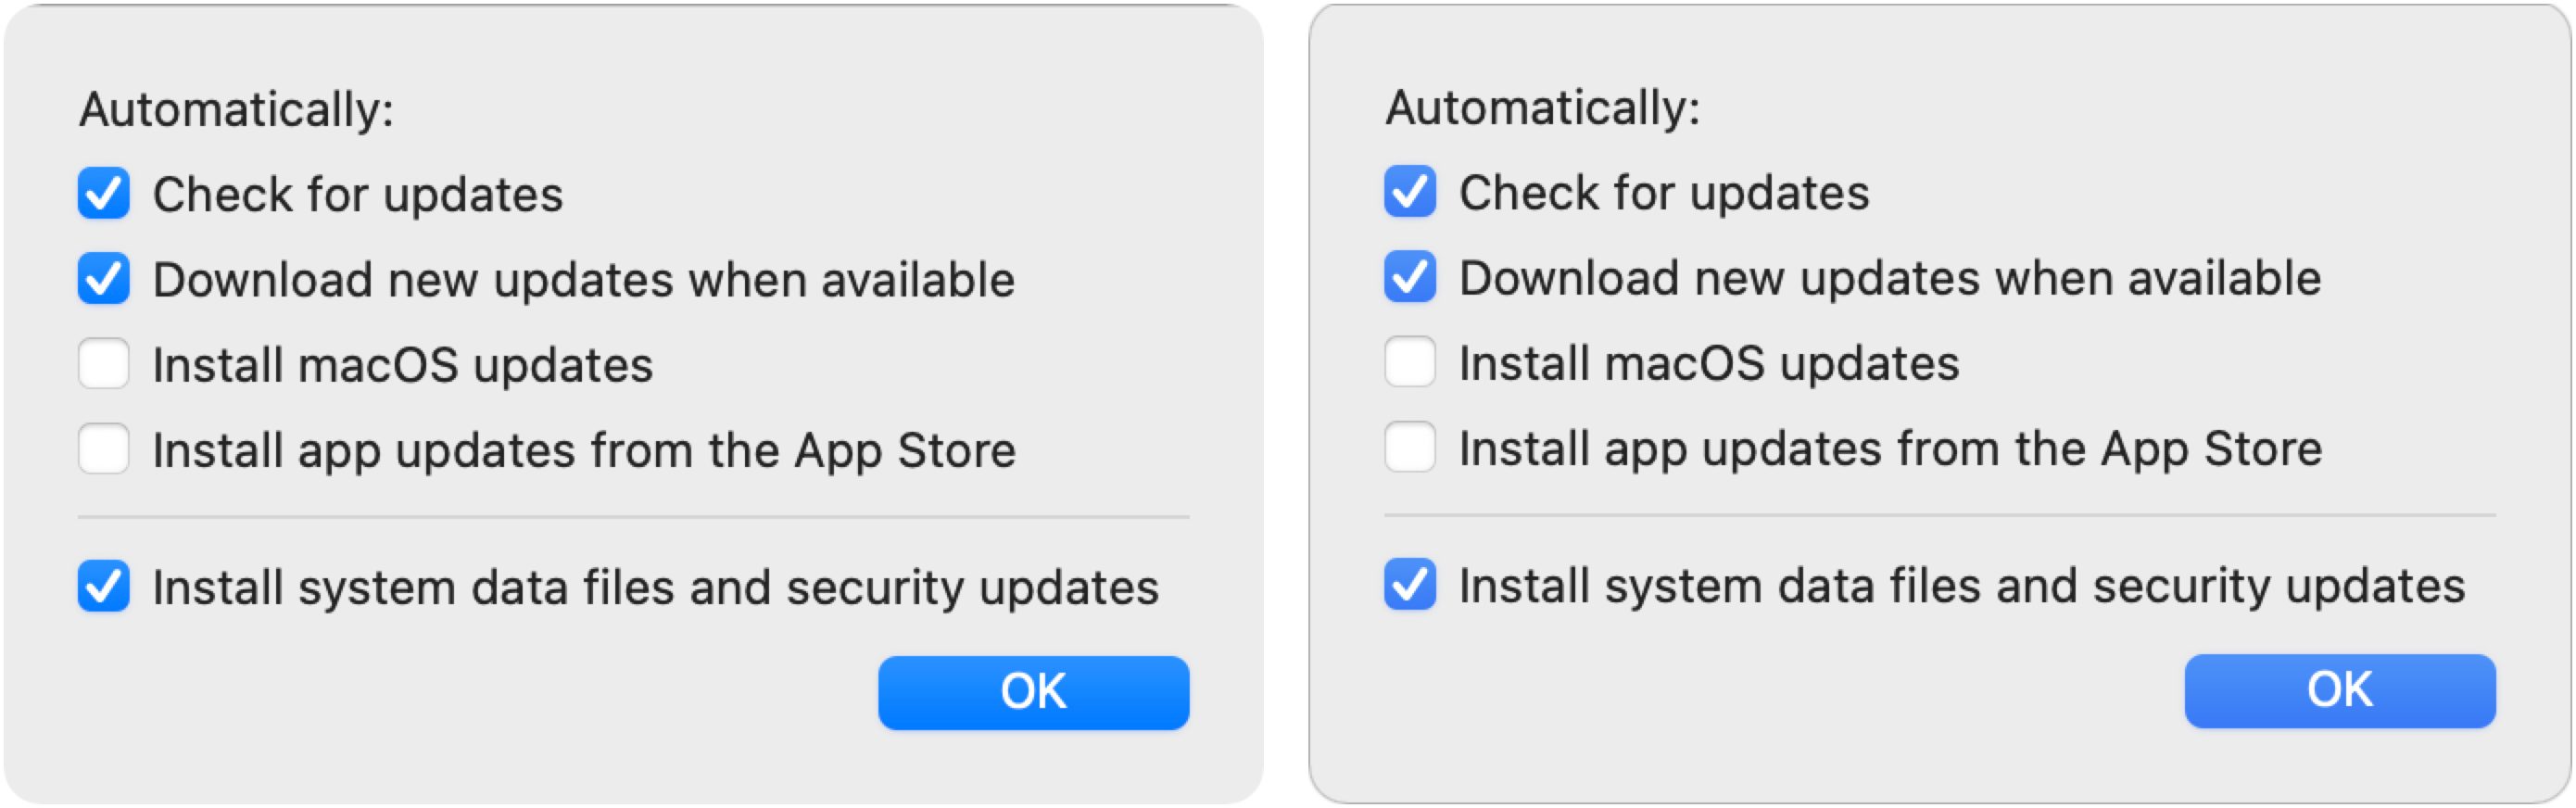
Here’s what that dialog looks like after being captured (left) and after I’ve bordered it (right) with Retrobatch, my new favorite way to border Big Sur screenshots. (This dialog doesn’t absolutely need a border, but many do because of having white elements that bleed into the white page background.) The eagle-eyed among you will notice in the left-hand version that macOS captured a two-pixel black line at the top, which isn’t ideal, so for the right-hand version, I removed it with a quick crop in Preview before bordering with Retrobatch.
This Command key trick has existed since at least Mojave, and a big thumbs up to Ky Leggiero, who turned me onto it recently. Simultaneously, Apple gets a raspberry for failing to document this trick in the otherwise decent support note that explains how to take screenshots.
Contents
- New Members
- Two Siri Remote Sleeves That Incorporate AirTag Pockets
- The Ultimate Guide to Choosing Apple/Beats Audio Gear
- The Hidden Trick for Capturing Document-Modal Dialogs in Mac Screenshots
- Brave Search Public Beta Offers Alternative to Google
- Apple Opens Public Betas for macOS 12 Monterey, iOS 15, iPadOS 15, watchOS 8, and tvOS 15
- Apple Justifies iOS App Store’s Tight Control in White Paper