
MacTalk
September 2022

Use AssistiveTouch for Customizable Shortcuts on the iPhone and iPad
I’ve long been a fan of the AssistiveTouch feature in iOS (and I have receipts to prove it: see “Work Around a Broken iPhone Button with AssistiveTouch,” 24 July 2013). AssistiveTouch creates a virtual button that opens a menu giving those with limited dexterity one-touch access to common functions that may otherwise be difficult to use, like Control Center and the App Switcher, both of which require finicky gestures.
But AssistiveTouch has come a long way since I wrote about it nearly a decade ago, offering many more features and customization options. Most intriguing, AssistiveTouch can now trigger shortcuts, letting you turn it into an always-accessible menu of whatever quick actions you can create in Shortcuts. In that respect, it’s much like the Back Tap accessibility feature Adam wrote about a couple of years ago, but with a visual interface instead of the sometimes funky double or triple tap requirement (see “iOS 14’s Back Tap Feature Provides Interaction Shortcuts,” 24 September 2020).
AssistiveTouch Basics
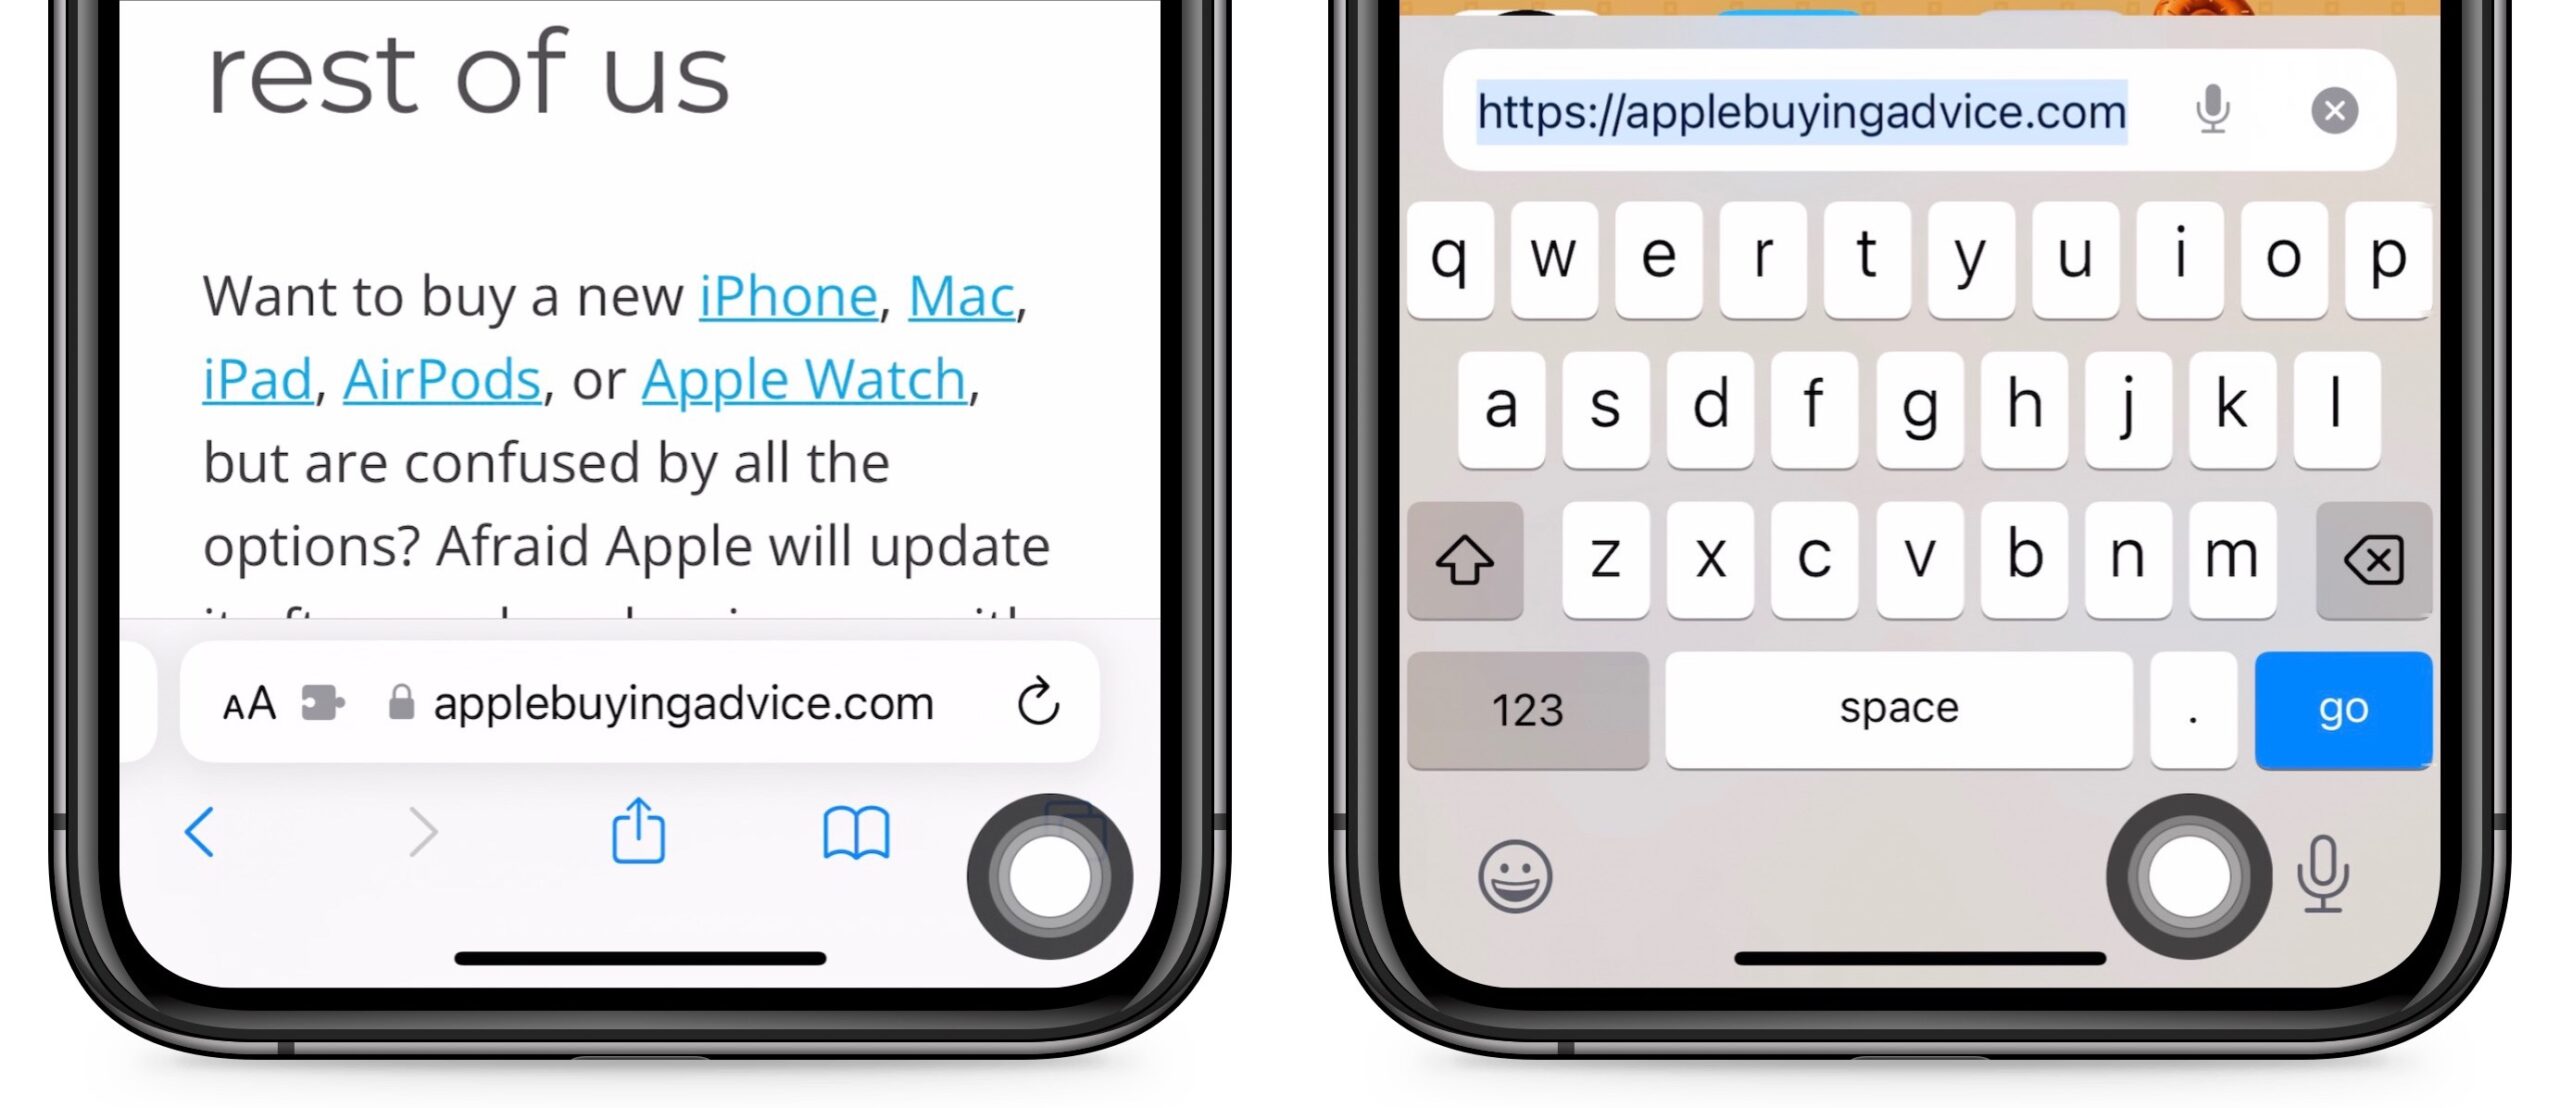
You can find AssistiveTouch settings in Settings > Accessibility > Touch > AssistiveTouch. Turn on AssistiveTouch there, and a circular button appears on your screen, floating above everything else. You can drag the button around as needed to keep it out of your way. In a nice touch, if you have the AssistiveTouch button anywhere on the bottom of your screen where it would get in the way of typing, it shifts to the left of the dictation key when you open the onscreen keyboard.
Tap the AssistiveTouch button, and a menu appears.
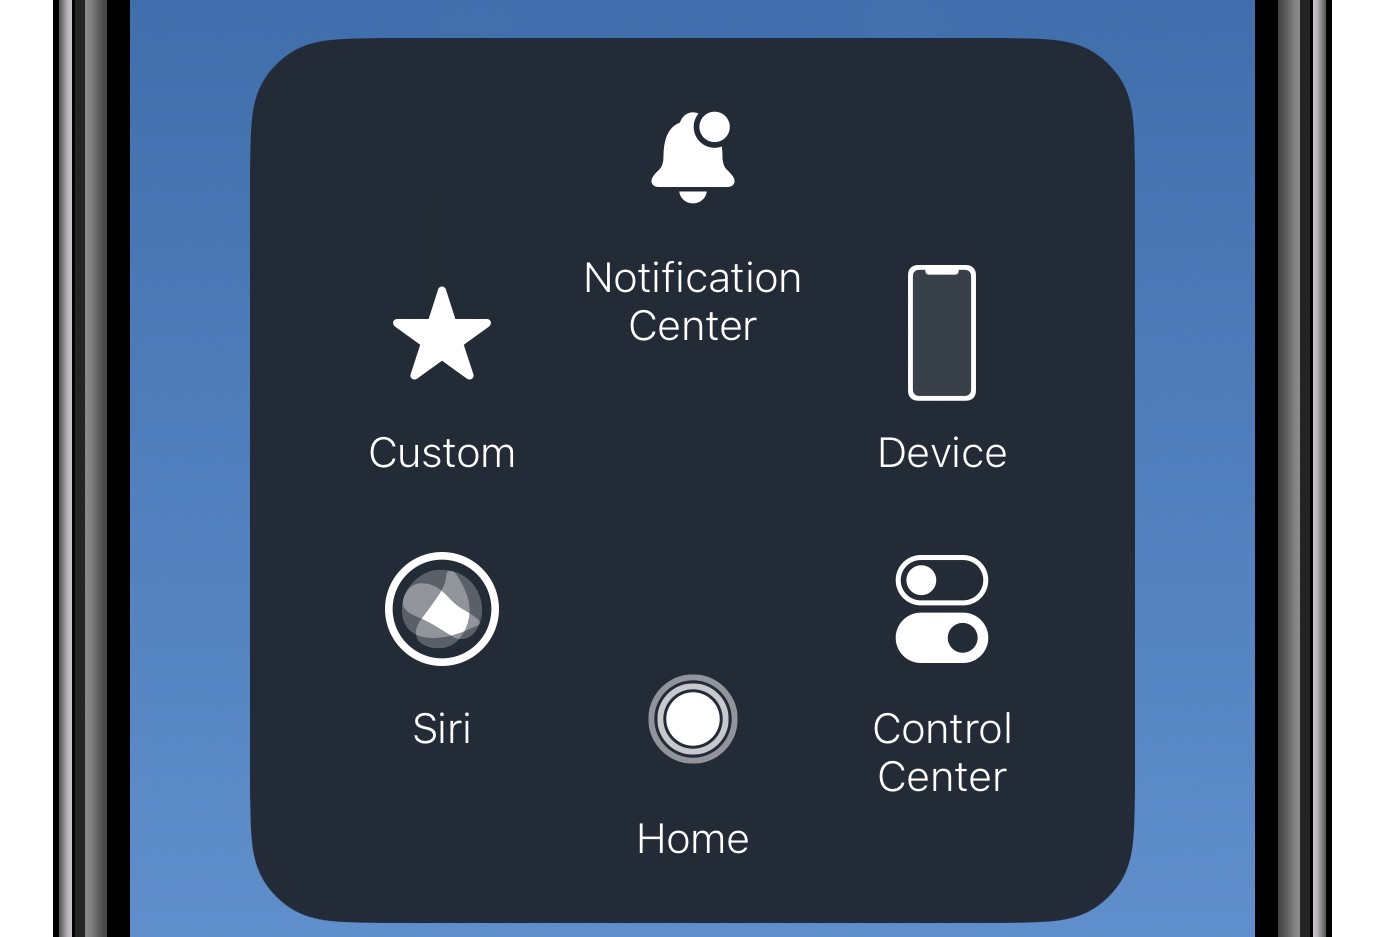
The Notification Center, Control Center, Home, and Siri buttons are self-explanatory, but Device and Custom require additional explanation:
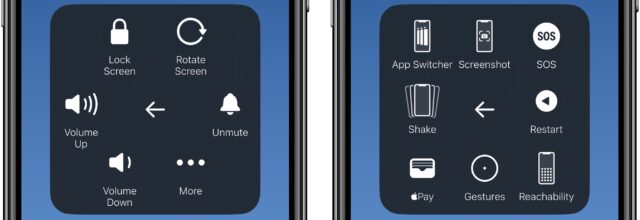
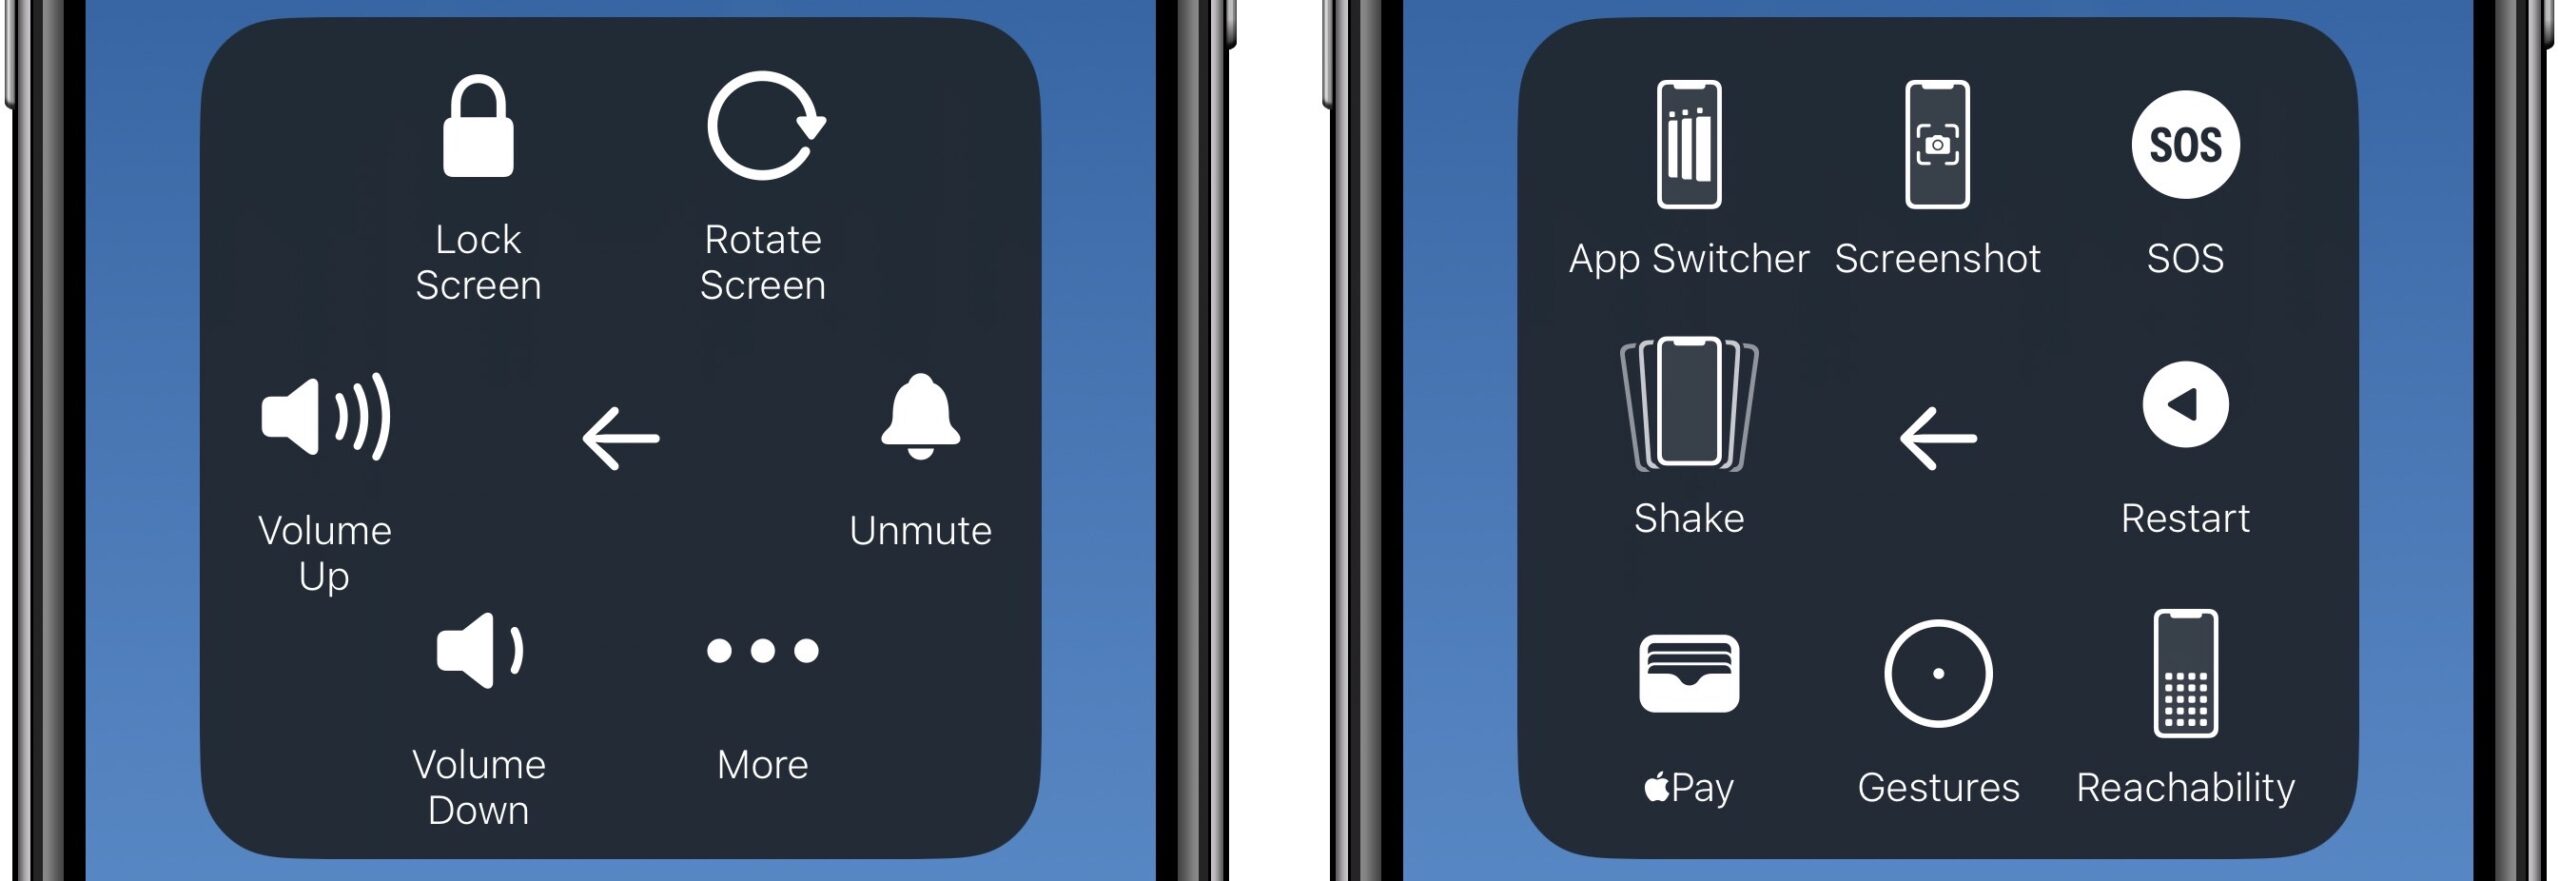
- Device: Tapping this button provides access to a grab bag of system settings, like screen locking and rotation, muting, and volume control. Tapping the More button offers additional functions like the App Switcher, taking screenshots, Emergency SOS, restarting, Reachability, additional gestures, Apple Pay, and shaking the device. (Shaking the device lets you undo an action, though you can turn that off in Settings > Accessibility > Touch if it annoys you.)
- Custom: The Custom button provides an interface that lets you simulate finger gestures like pinch and rotate, double tap, and long press. Tap a gesture, and a dark dot appears on your screen. Drag it to a place on the screen, and iOS will simulate the gesture at that spot. For instance, if you select Long Press and drop the dot over an app icon, its contextual menu appears. You can create custom gestures in Settings > Accessibility > Touch > AssistiveTouch > Create New Gesture.
Note that the AssistiveTouch button also appears on the Lock screen, although some commands may require you to unlock the device before they execute.
Make the AssistiveTouch Button Disappear, Mostly
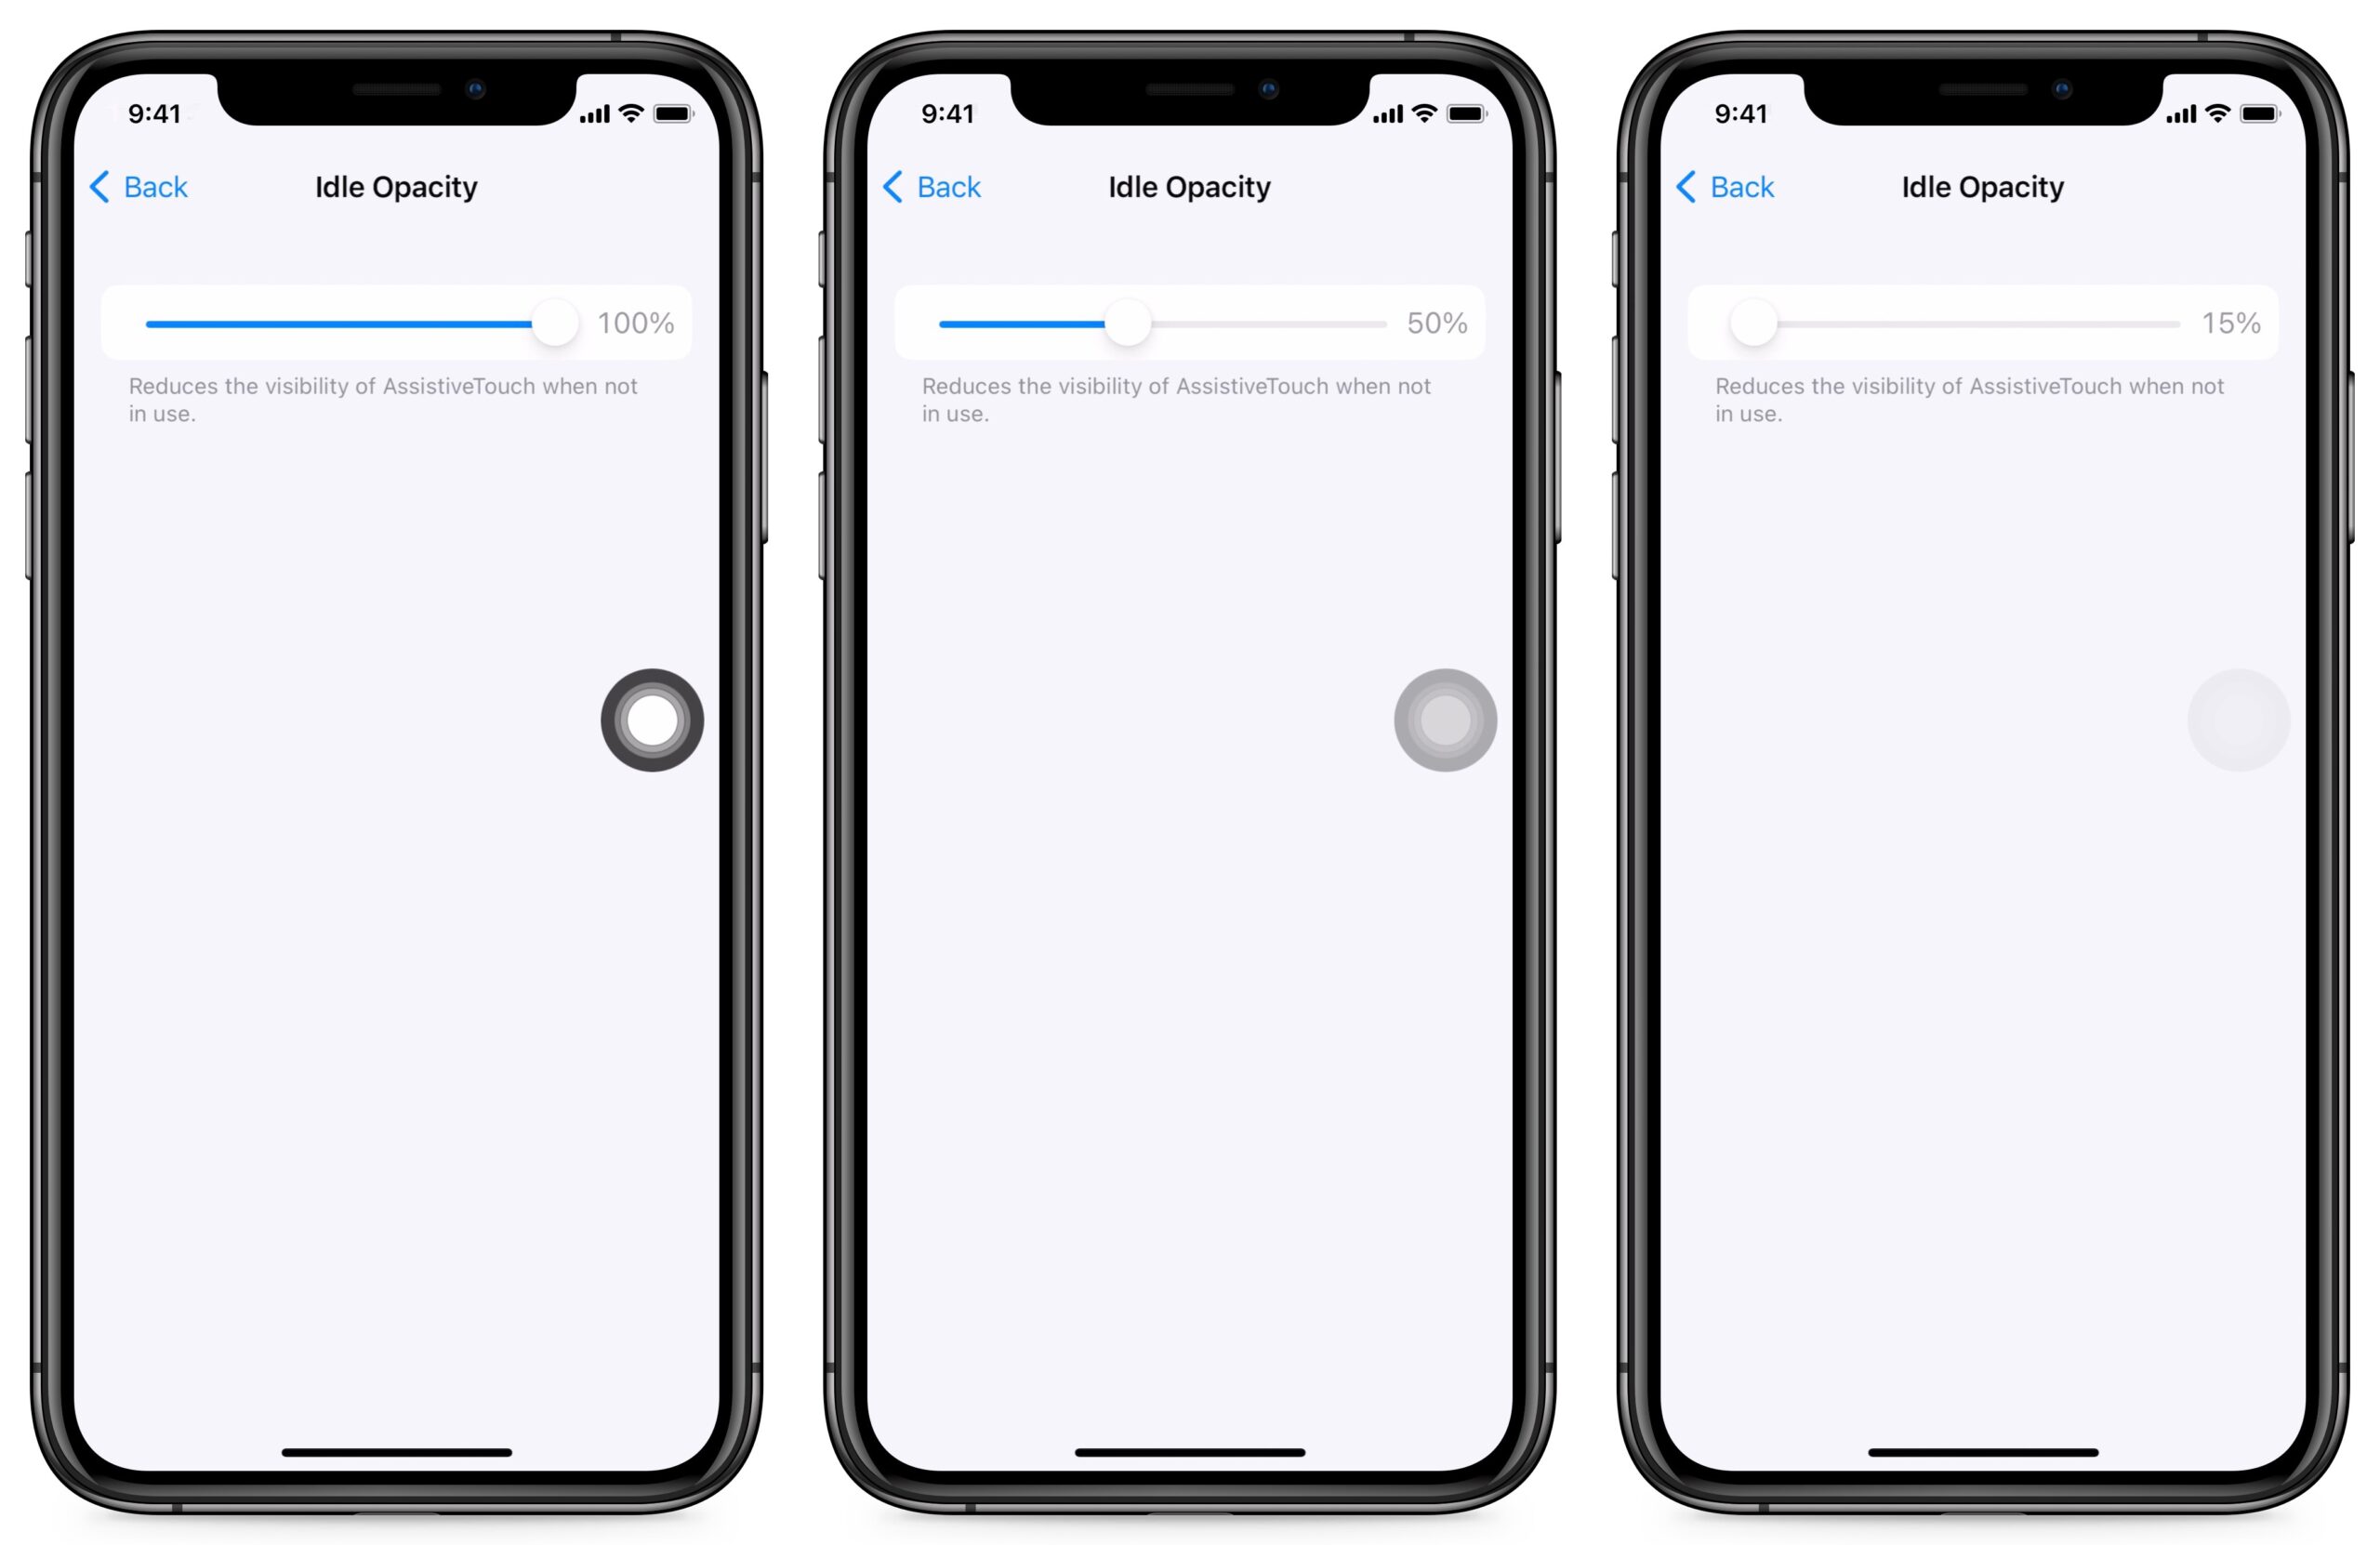
The primary drawback of AssistiveTouch is that it slaps a big button on your screen, and wherever you put it, it’s certain to get in the way at some point. Fortunately, you can now make it far less distracting.
Go to Settings > Accessibility > Touch > AssistiveTouch > Idle Opacity, where you can adjust the Idle Opacity slider all the way down to 15% to make the AssistiveTouch button nearly invisible when you’re not using it.
Customize the AssistiveTouch Menu
Useful though the contents of the AssistiveTouch menu are, they may not fit your needs. You can change what’s presented in the menu by default. Go to Settings > Accessibility > Touch > AssistiveTouch > Customize Top Level Menu. Tap any of the icons to see a long list of actions you can use instead of the default action.
For instance, if you don’t need help triggering Siri but have trouble double-pressing the side button to bring up Apple Pay, you could tap Siri, choose Apple Pay from the list, and tap Done. Note that all your shortcuts are listed at the bottom, so you can assign a shortcut to any slot on the menu.
By default, the AssistiveTouch menu shows six icons. You can tap the + and – buttons to add and remove icons, for a total of anywhere from one to eight. Be careful here—if you remove an icon and then add it back, its functionality will be cleared, and you’ll have to reprogram it manually.

Don’t worry if you mess up. Tap the Reset button below the icon customization interface to restore all the AssistiveTouch defaults. Beware that this button resets both the menu and all AssistiveTouch settings other than any custom gestures you’ve created.
Customize the AssistiveTouch Button
I realize I’ve rather buried the lede here, but now that you know what the AssistiveTouch button does and how you can customize its menu, the real excitement comes when you discover that you can attach custom actions to a single tap, double tap, or long press of the button instead of just using the AssistiveTouch menu.
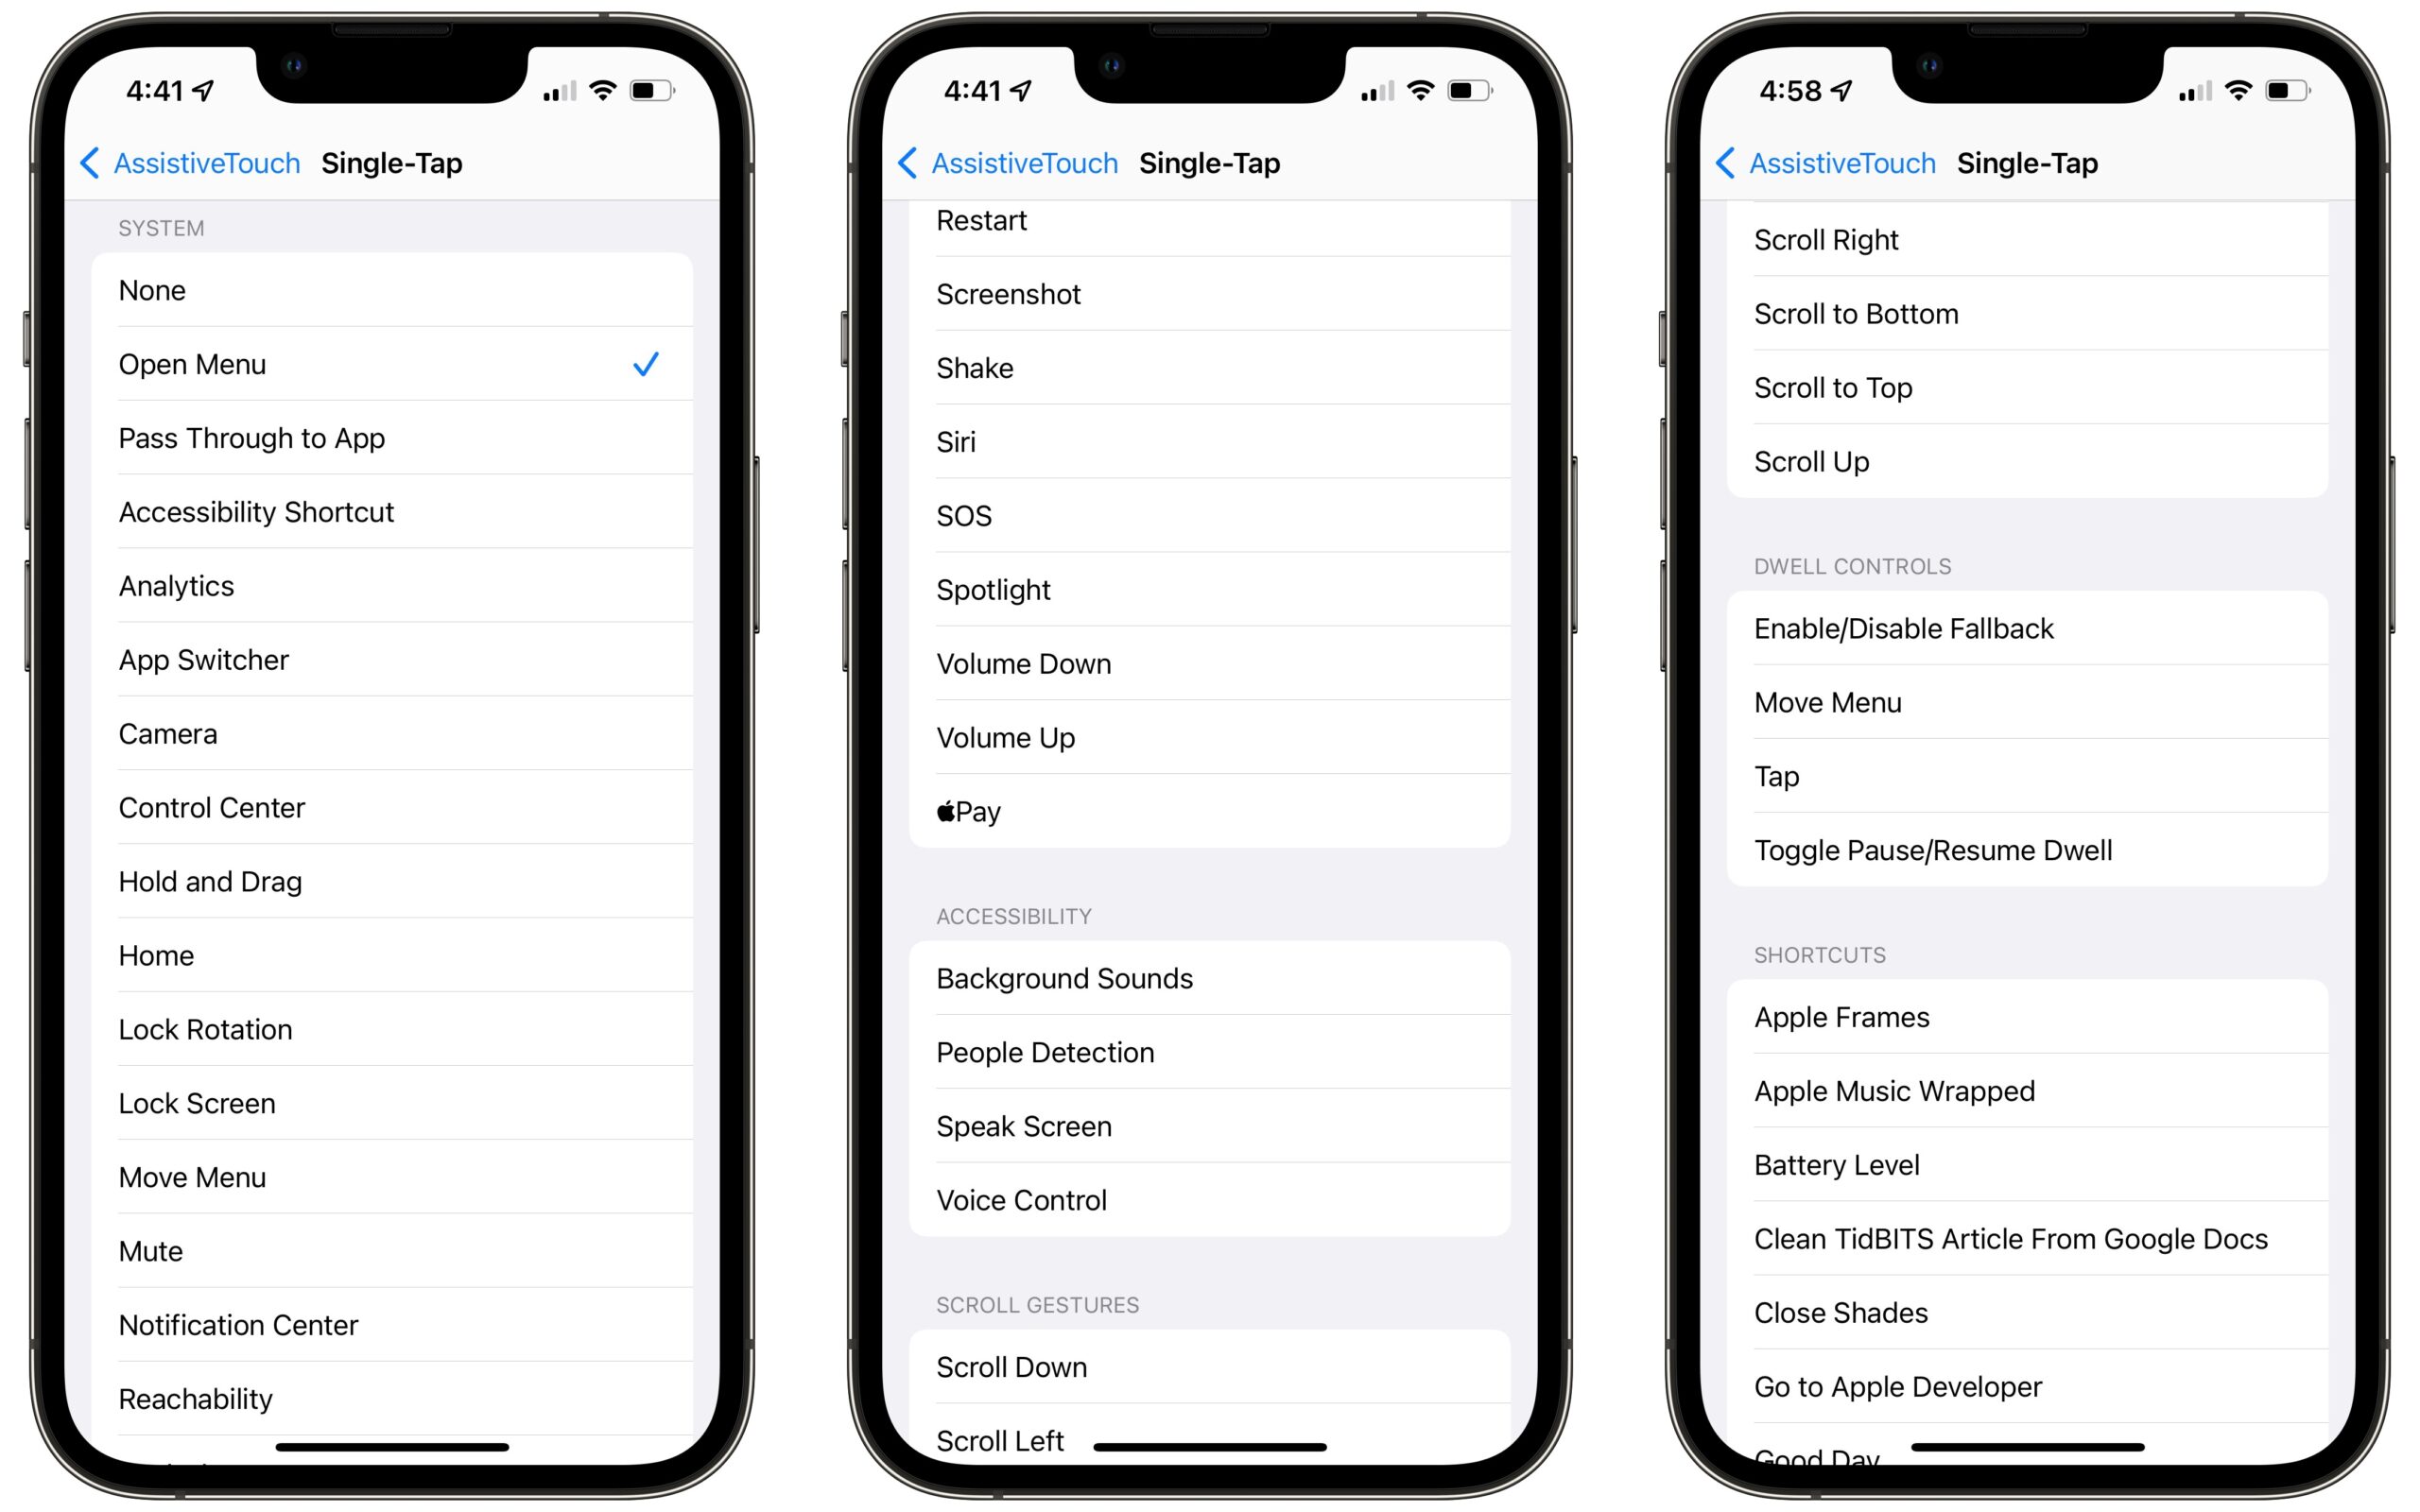
Open Settings > Accessibility > Touch > AssistiveTouch. Under Custom Actions, there are three settings: Single-Tap, Double-Tap, and Long Press. Tap one and choose an action to change it. The options are the same as when you’re customizing menu options, which means that you can do anything that it provides or that you can create in Shortcuts.
There are tons of interesting possibilities here. I’m experimenting with using a single tap of the AssistiveTouch button to open the Camera app, a double tap to set a HomeKit scene, and a long press to open the AssistiveTouch menu. That way, a single tap lets me quickly open the Camera without fumbling with Control Center, making it easier to capture snapshots of my kids being cute. I can double-tap the button to turn my lights off. And I can still access the plethora of commands available in the AssistiveTouch menu by pressing and holding the button.
So there you have it—a subtle, always-available button to which you can attach three or more actions. What do you plan to do with it?
Contents

Click for special offers to Mac Users Groups members.

Website design by Blue Heron Web Designs

Click the image for information about advertising on this website.