
MacTalk
November 2021

Cut Down on Junk Mail with iCloud+’s Hide My Email
Much of the time, when some website or app asks for my email address, I wince because I know I’m going to get more email, some of which I probably don’t want. It’s not spam since I have agreed to receive the emails. (The technical term for such legitimate but generally unwanted messages is “bacon” or “bacn.” While we’re on the topic, I prefer my spam with rice, wrapped in nori.)
Email services like Fastmail have long offered alternative email addresses, which you can create and delete on the fly, and AgileBits recently partnered with Fastmail to integrate that functionality into 1Password. But alternative addresses aren’t available from all email providers. Nor are some traditional methods of creating alternative addresses all that effective. With Gmail and many other email services, you can use “plus addressing” to add “+something” to your email username, making it unique and thus easy to use for filtering messages from particular websites or that end up receiving actual spam. Unfortunately, there’s no way to turn off such an address, and the global spam machine caught on and started stripping the “+something” automatically.
A new solution to this problem has just become available to users of Apple’s iCloud+: Hide My Email. (iCloud+ is Apple’s new name for what you get when you pay for extra iCloud storage, a necessity for many iPhone and iPad owners who need more than the paltry 5 GB of storage Apple provides for free.) Hide My Email lets you create alternative email addresses that forward to your regular email address, whether or not it’s hosted at iCloud.
Suppose you share one of those alternative addresses and start receiving unwanted messages from which you can’t easily remove yourself by clicking an Unsubscribe link at the bottom. In that case, you can deactivate or delete the address and never be bothered again. Hide My Email also ties in with the Sign in with Apple feature, so you can view and manage the anonymous email addresses it generates.
Note that Hide My Email addresses can only receive email. You can’t send an email message from one of these addresses.
Create a Hide My Email Address
There are four ways to create a Hide My Email address: in Safari in iOS 15 and iPadOS 15, in the Settings app in those operating systems, in System Preferences in macOS 12 Monterey, and on iCloud.com for those using earlier versions of macOS or other devices. Alas, the Safari support hasn’t made its way into macOS 12 Monterey.
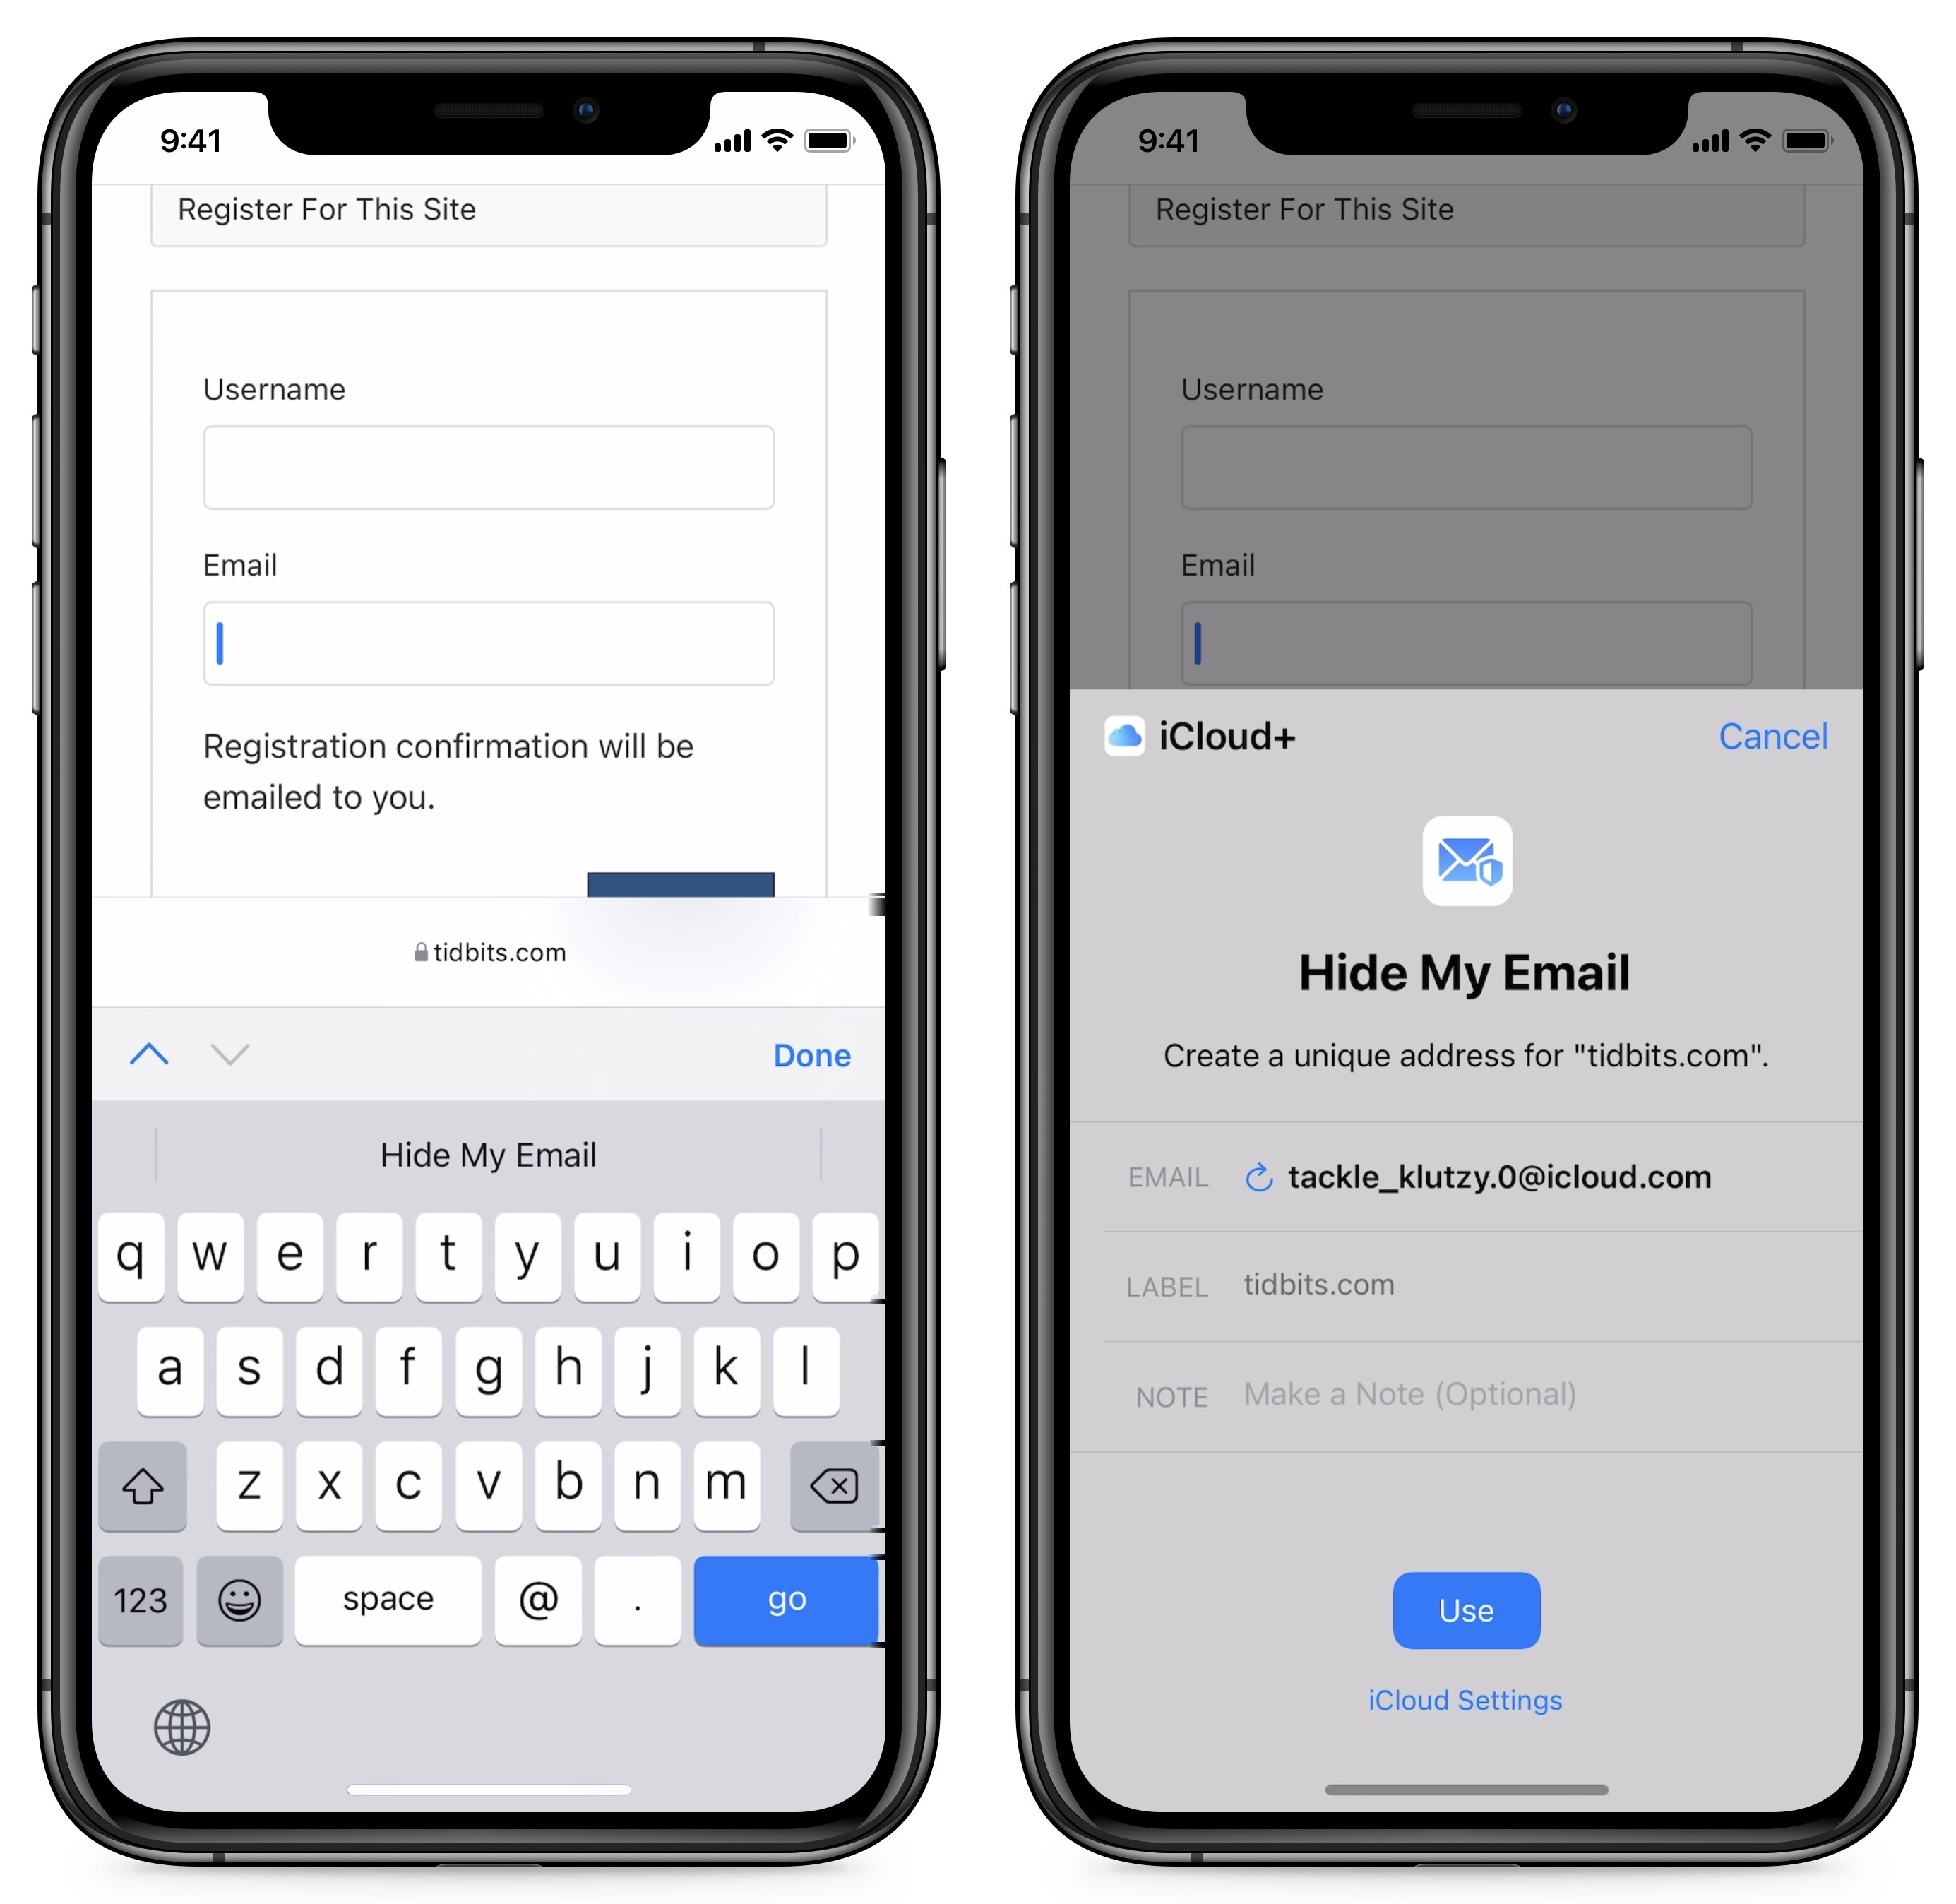
- Safari in iOS 15 and iPadOS 15: The easiest way to create a Hide My Email address is in Safari on an iPhone or iPad. When you tap an email field on a Web page, Hide My Email appears on the QuickType bar above the keyboard. Tap it, and a panel appears with a random, often silly, email address, like
tackle_klutzy.0@icloud.com. Tap the Use button to generate and autofill the email address, labeling it with the site’s domain.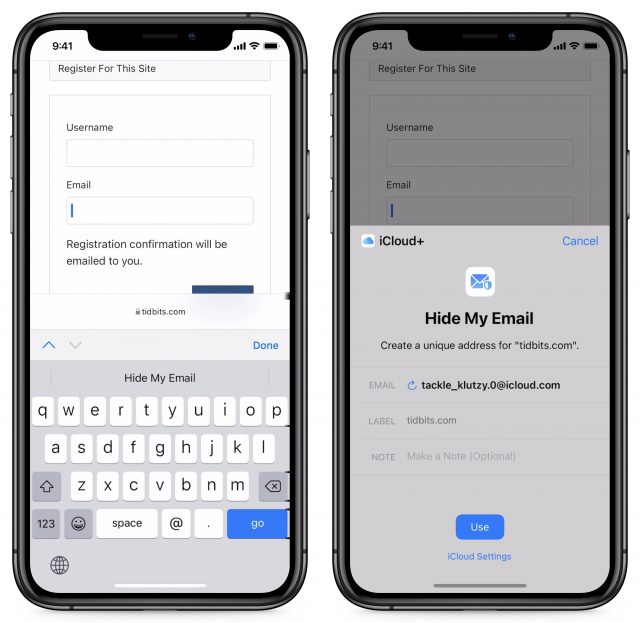
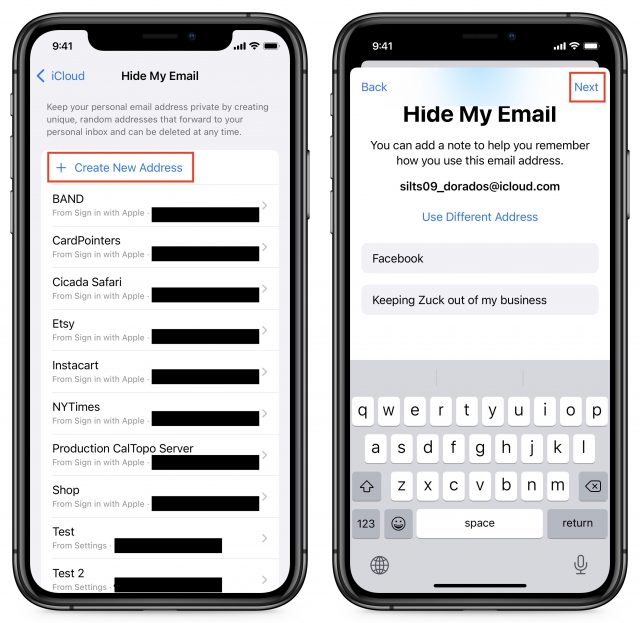
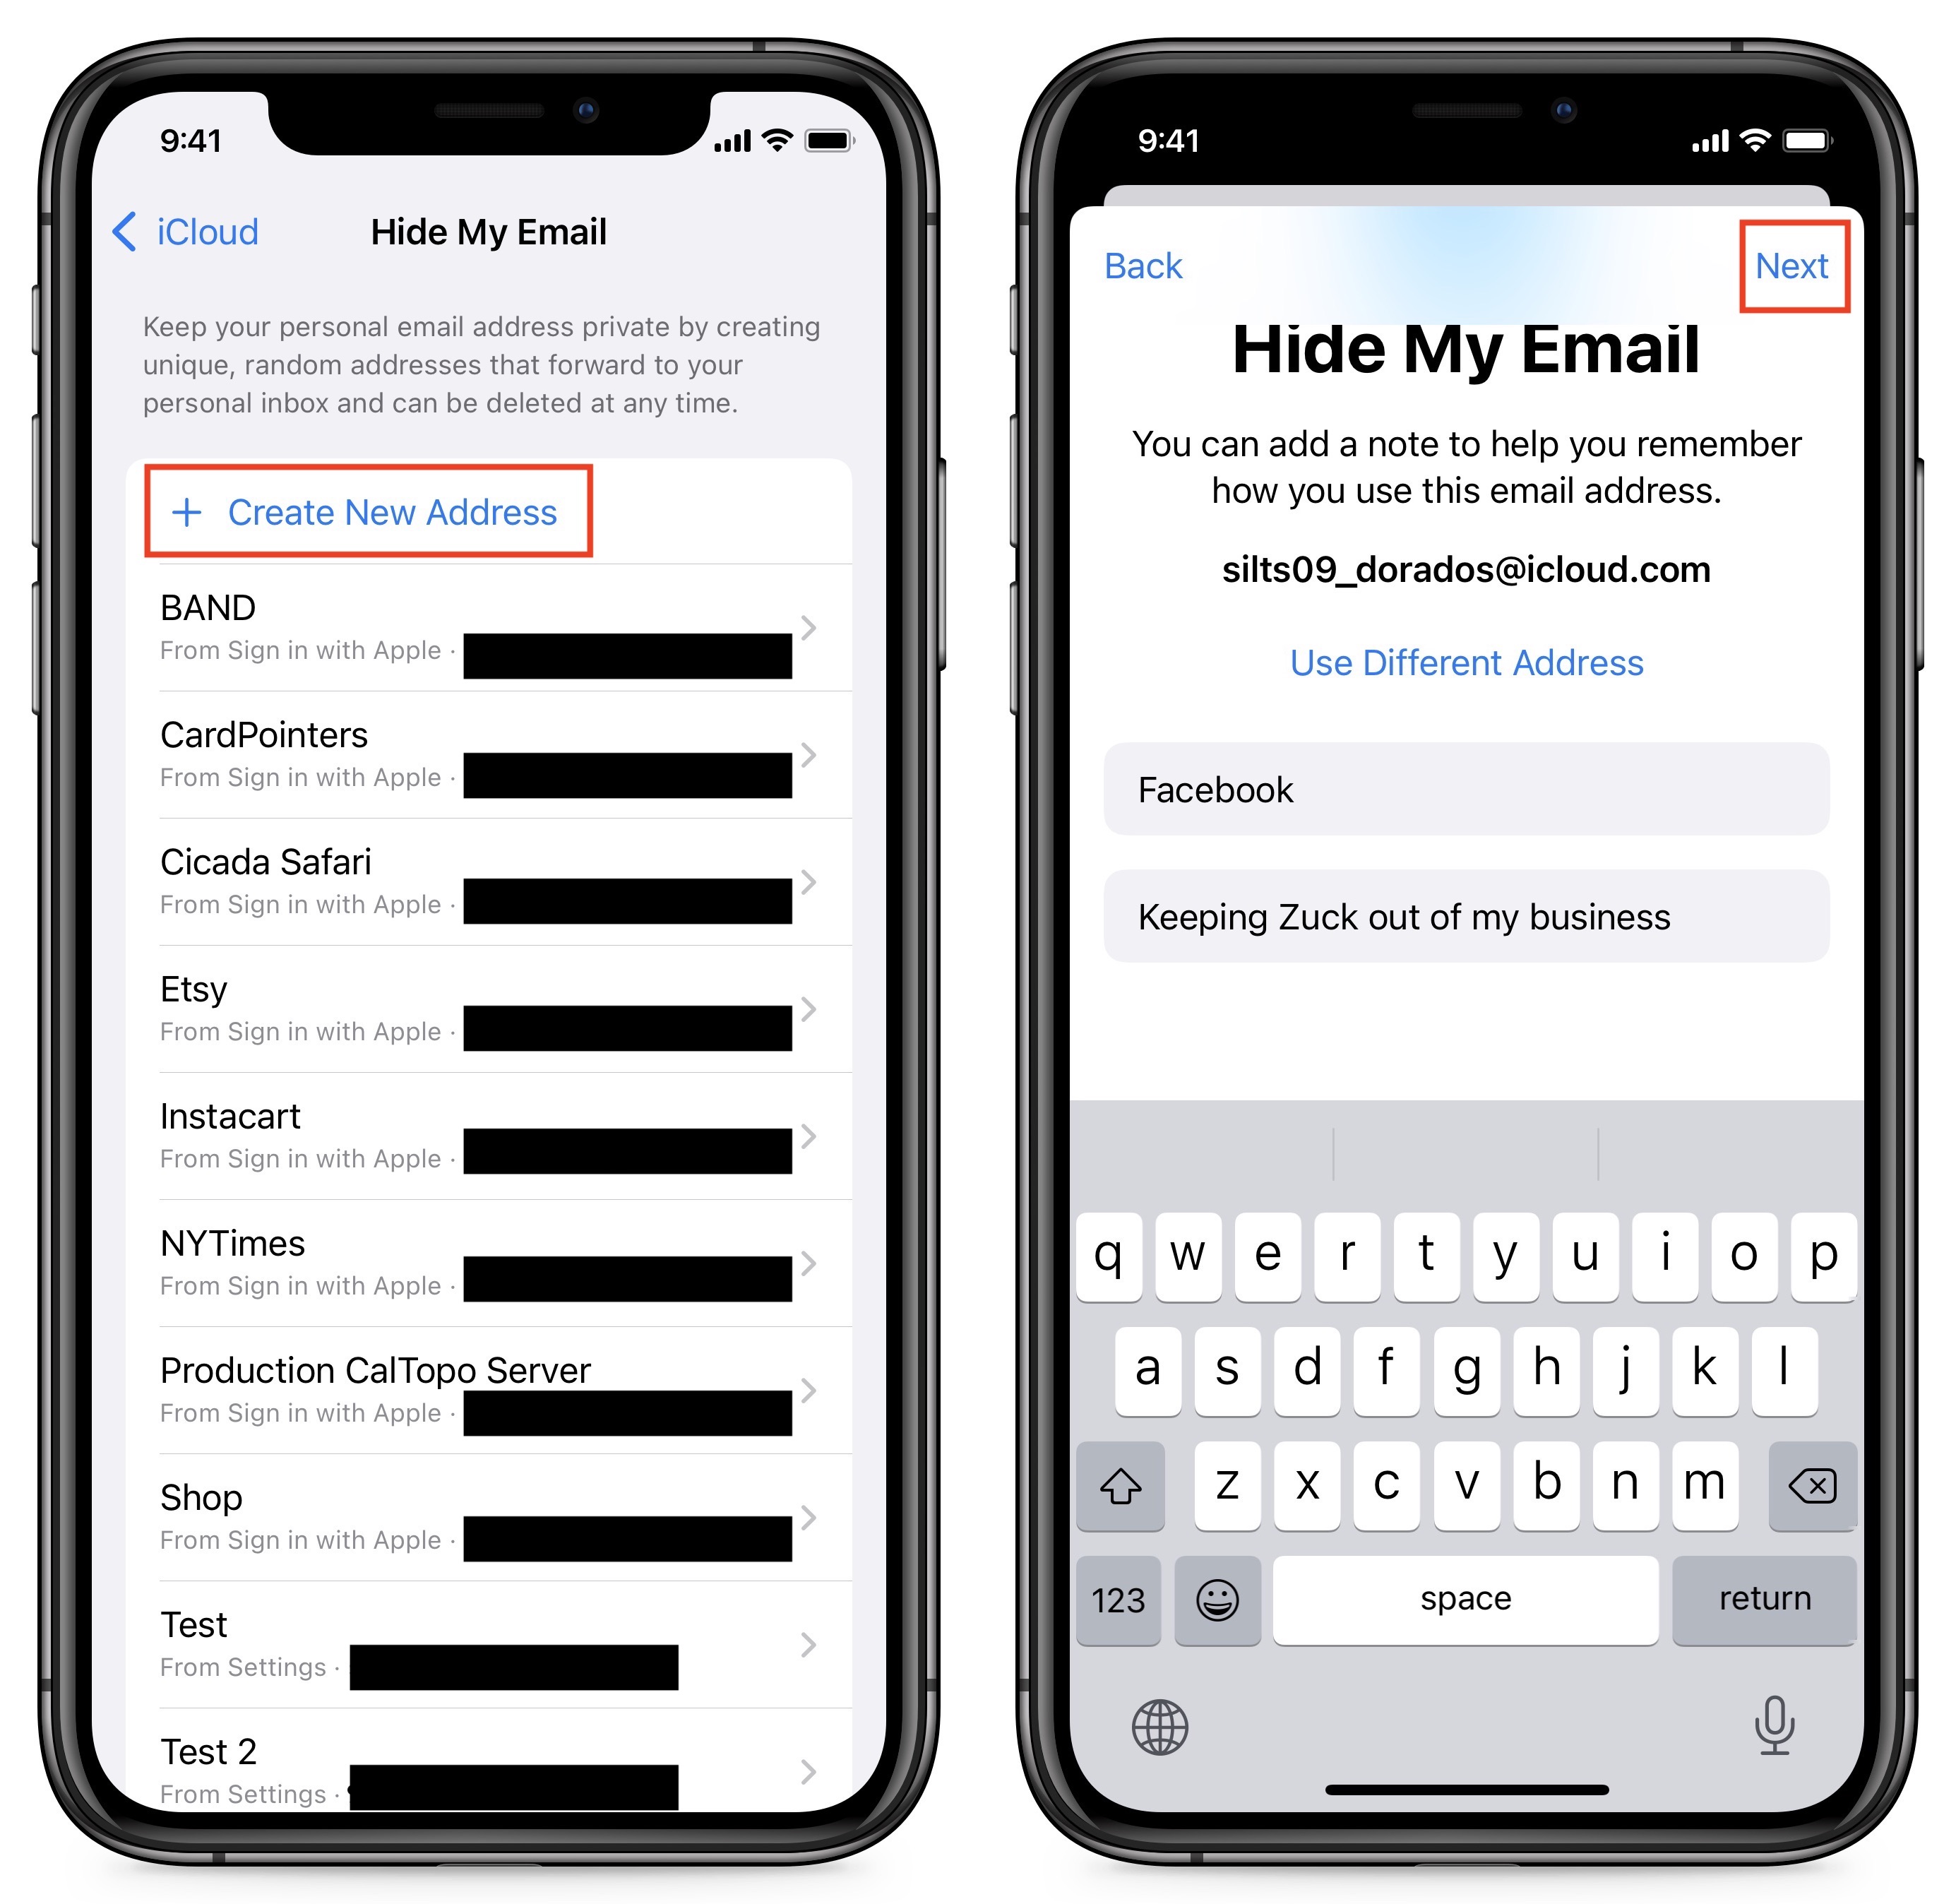
Interestingly, taking a screenshot of the right-hand screen dismisses the Hide My Email panel. I had to make a screen recording and then capture a frame from the video. - Settings app: Another way to create a Hide My Email address is to go to Settings > Your Name > iCloud > Hide My Email and tap Create New Address. You’re presented with a randomly generated email address and have to add a label, such as the name of the site or app in play. There’s also a field for a note. Tap Next and then Done.
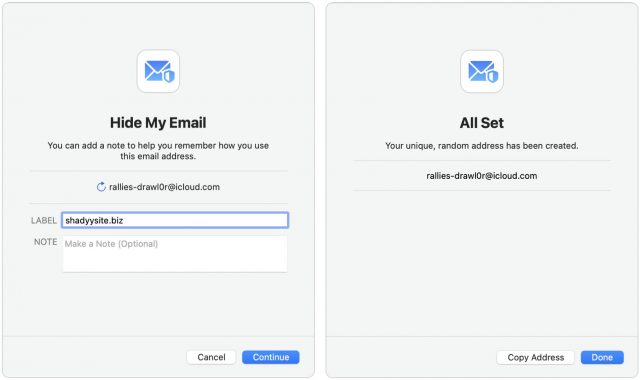
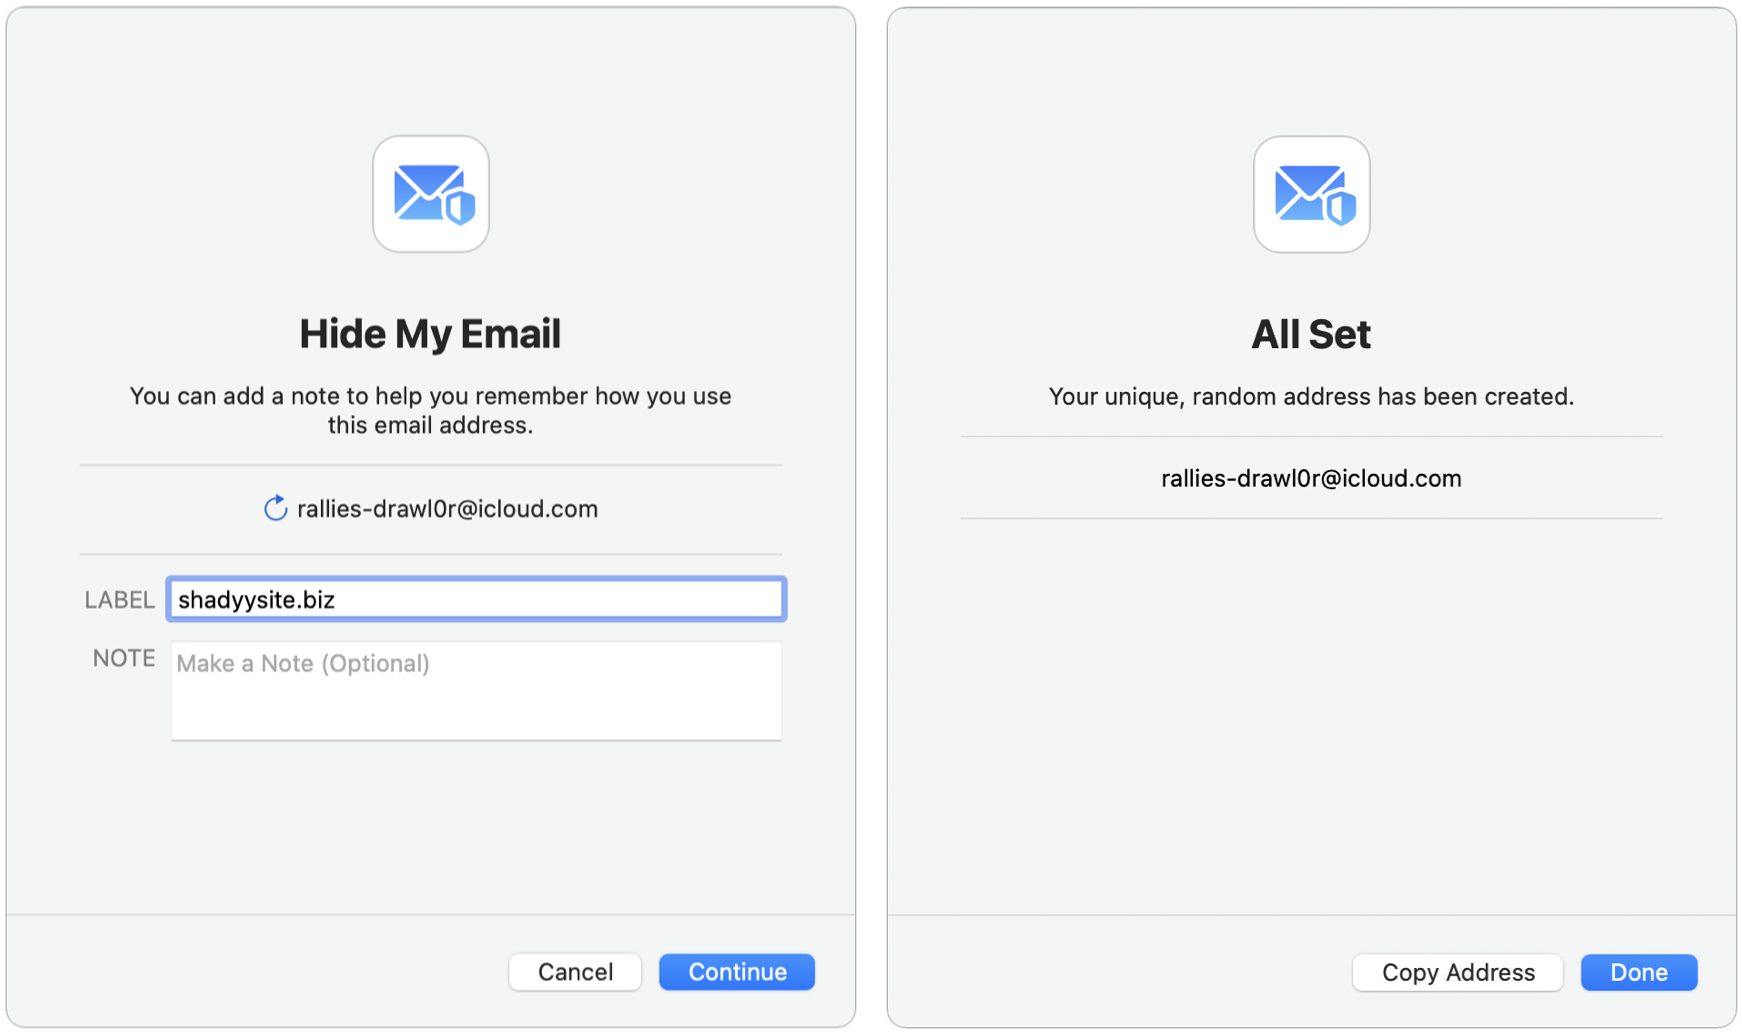
- Monterey: Go to System Preferences > Apple ID > Hide My Email > Options. Click the plus + button, enter a label and an optional note, click Continue, and then either Copy Address to paste it somewhere else right away or Done to finish.
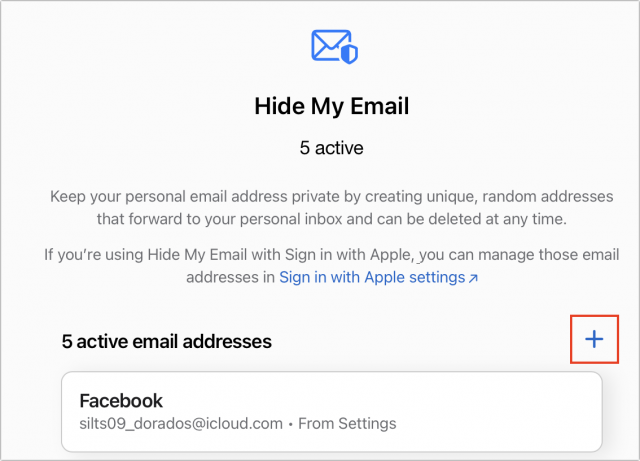
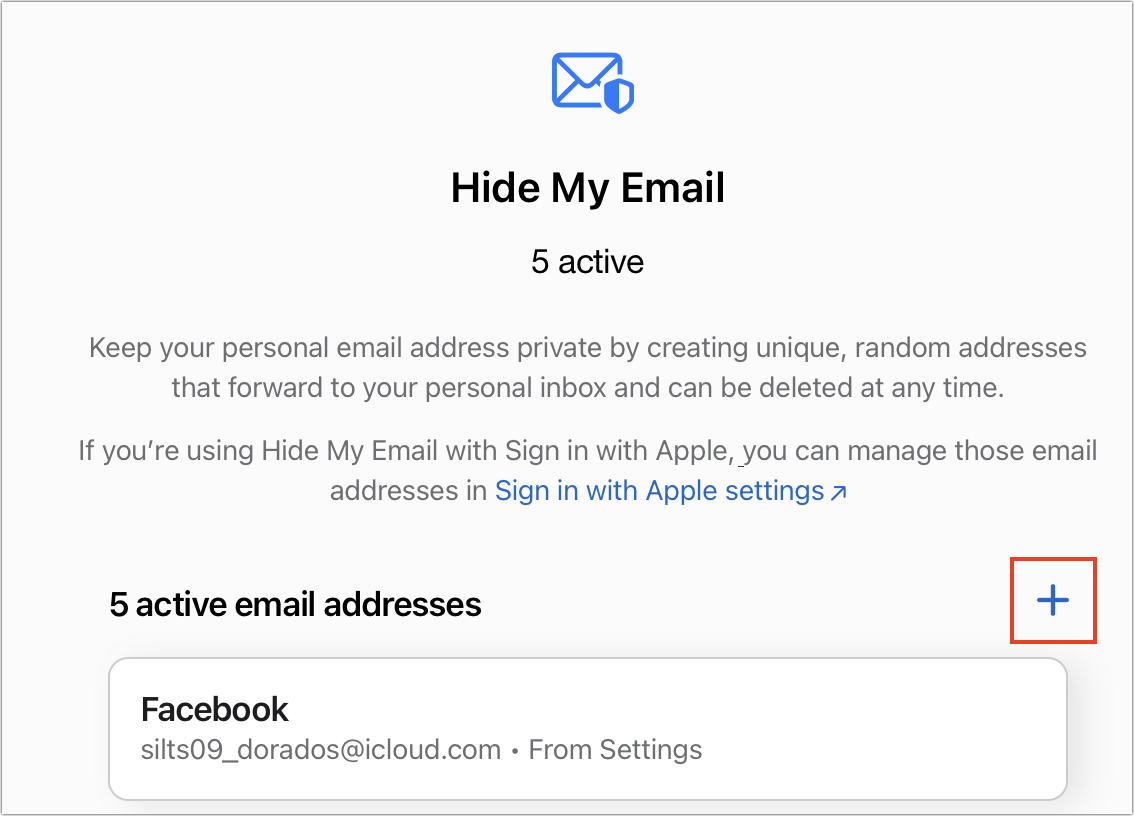
- iCloud.com: You can also create new Hide My Email addresses on iCloud.com, though it’s not as slick. On the main page, click Account Settings under the greeting. Under Hide My Email, click Manage. Click the plus + icon, enter a label, add a note if you like, and click Create Email Address. Note that iCloud.com doesn’t list any email addresses created using Sign in with Apple.
Manage Hide My Email Addresses
You can’t do much with Hide My Email addresses, but there isn’t much you need to do. The interfaces vary by platform, but the functionality is nearly identical, so we’ll focus on iOS 15.
iOS 15 and iPadOS 15
You manage your Hide My Email addresses—including those created by Sign in with Apple—in Settings > Your Name > iCloud > Hide My Email.
- Copy an address: To copy a Hide My Email address, tap its entry on the Hide My Email screen and touch and hold the address to reveal a Copy popover. Tap it to copy the address.
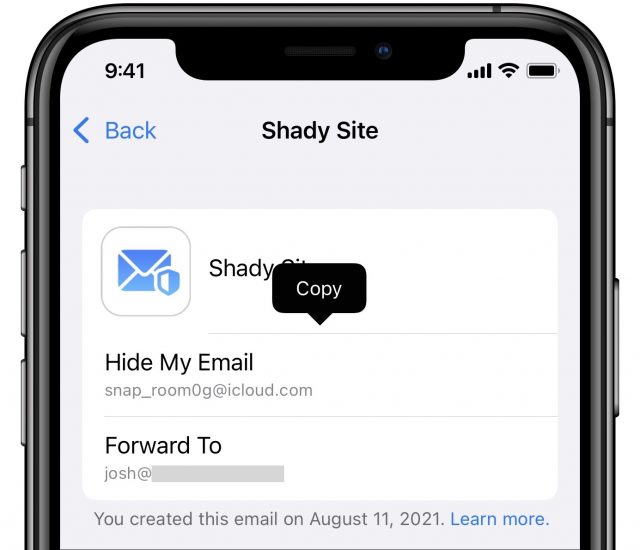

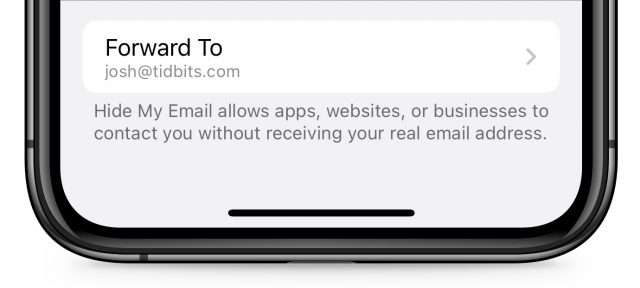
- Change the forwarding address: At the bottom of the Hide My Email settings screen is the Forward To option, which lets you change the email address to which your Hide My Email addresses forward. Choose an address and tap Done. Unfortunately, you can’t enter a specific address here. Instead, it lists every email address you’ve registered with Apple or through the Mail apps. Plus, all Hide My Email addresses must forward to the same address—when you change it, it changes for all of them.

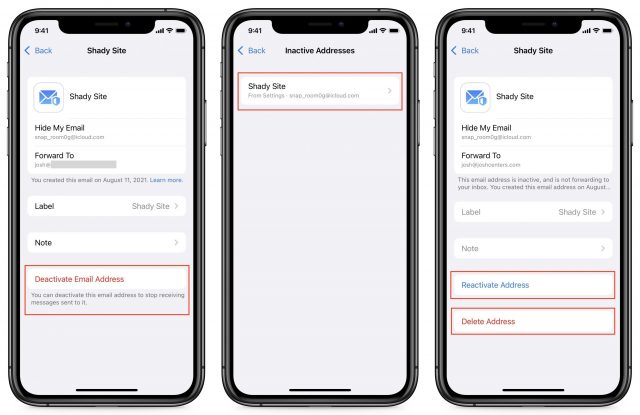
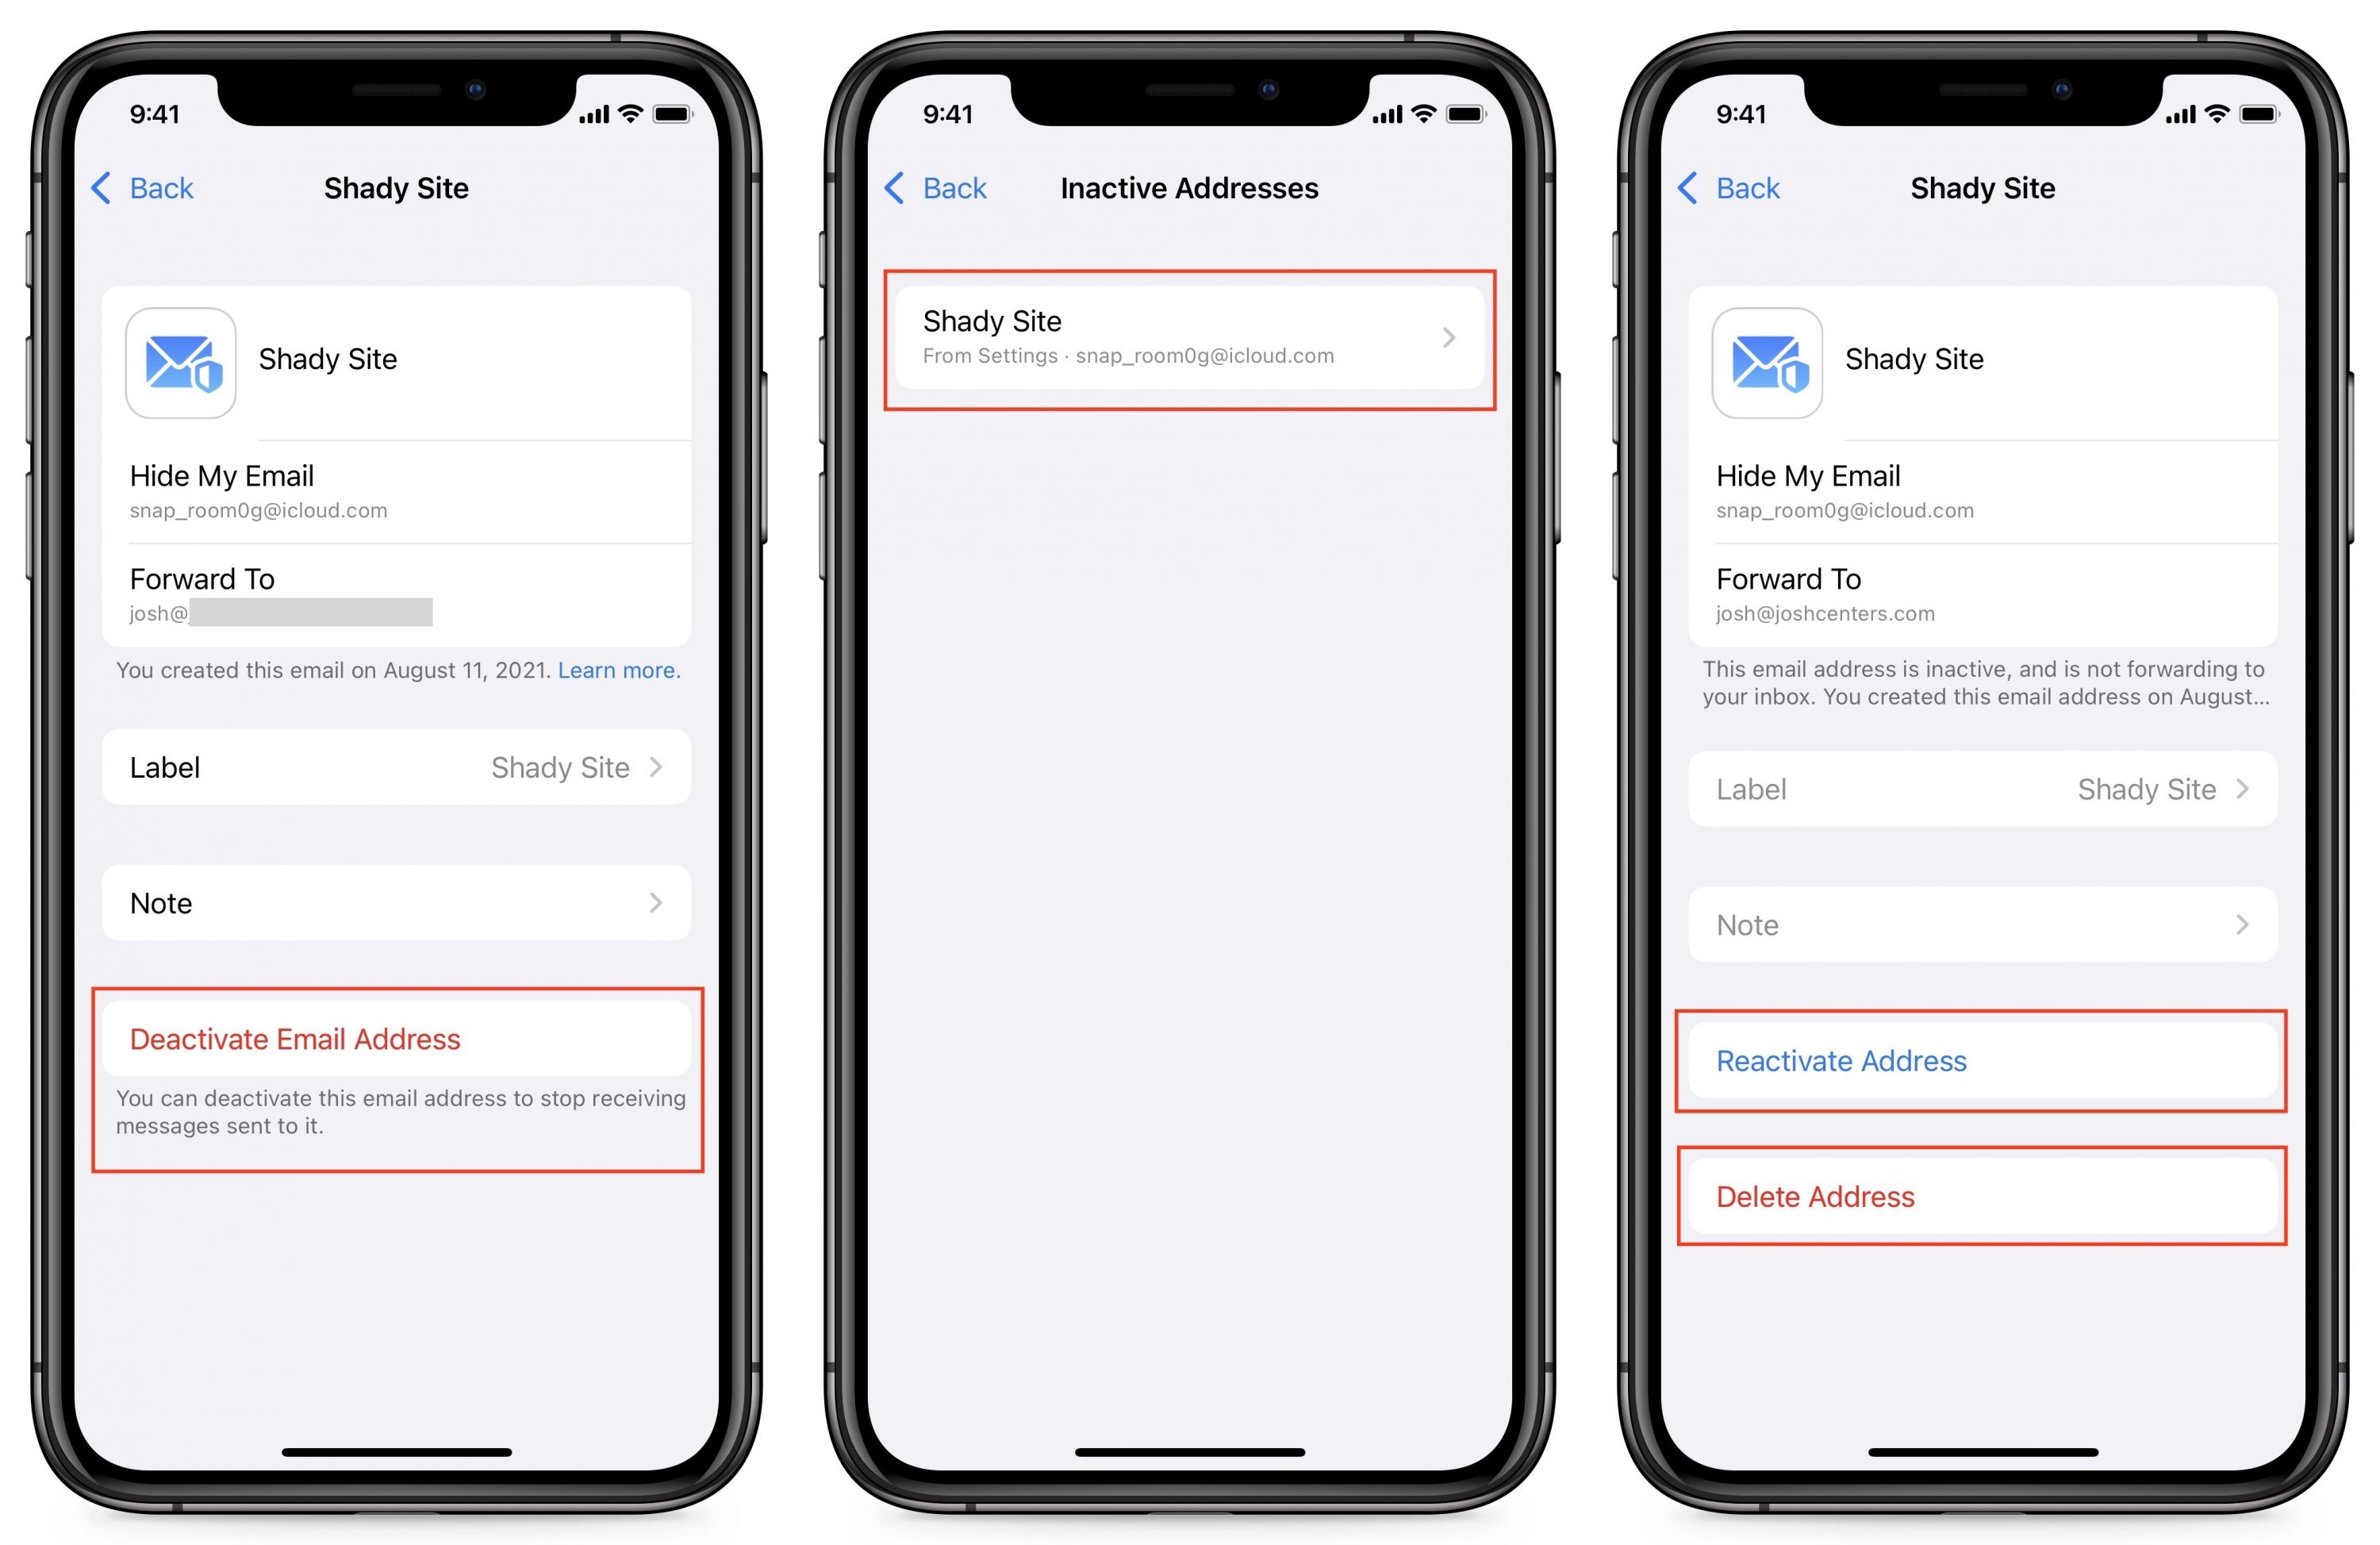
- Deactivate/reactivate/delete an address: Tap an address to see its settings, then tap Deactivate Email Address followed by Deactivate. The email address will still exist, but it will no longer forward mail to your email address. A new Inactive Addresses entry appears in the Hide My Email settings screen that lists your deactivated addresses. When you view an address in the Inactive Addresses screen, you can turn it back on by tapping Reactivate Address or remove it entirely by tapping Delete Address. You can’t deactivate addresses created with Sign in with Apple. Instead, turn off Forward To. And if you want to delete a Sign in with Apple address, read on.
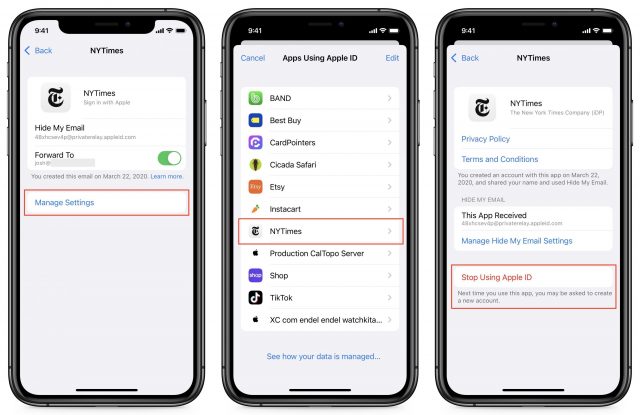
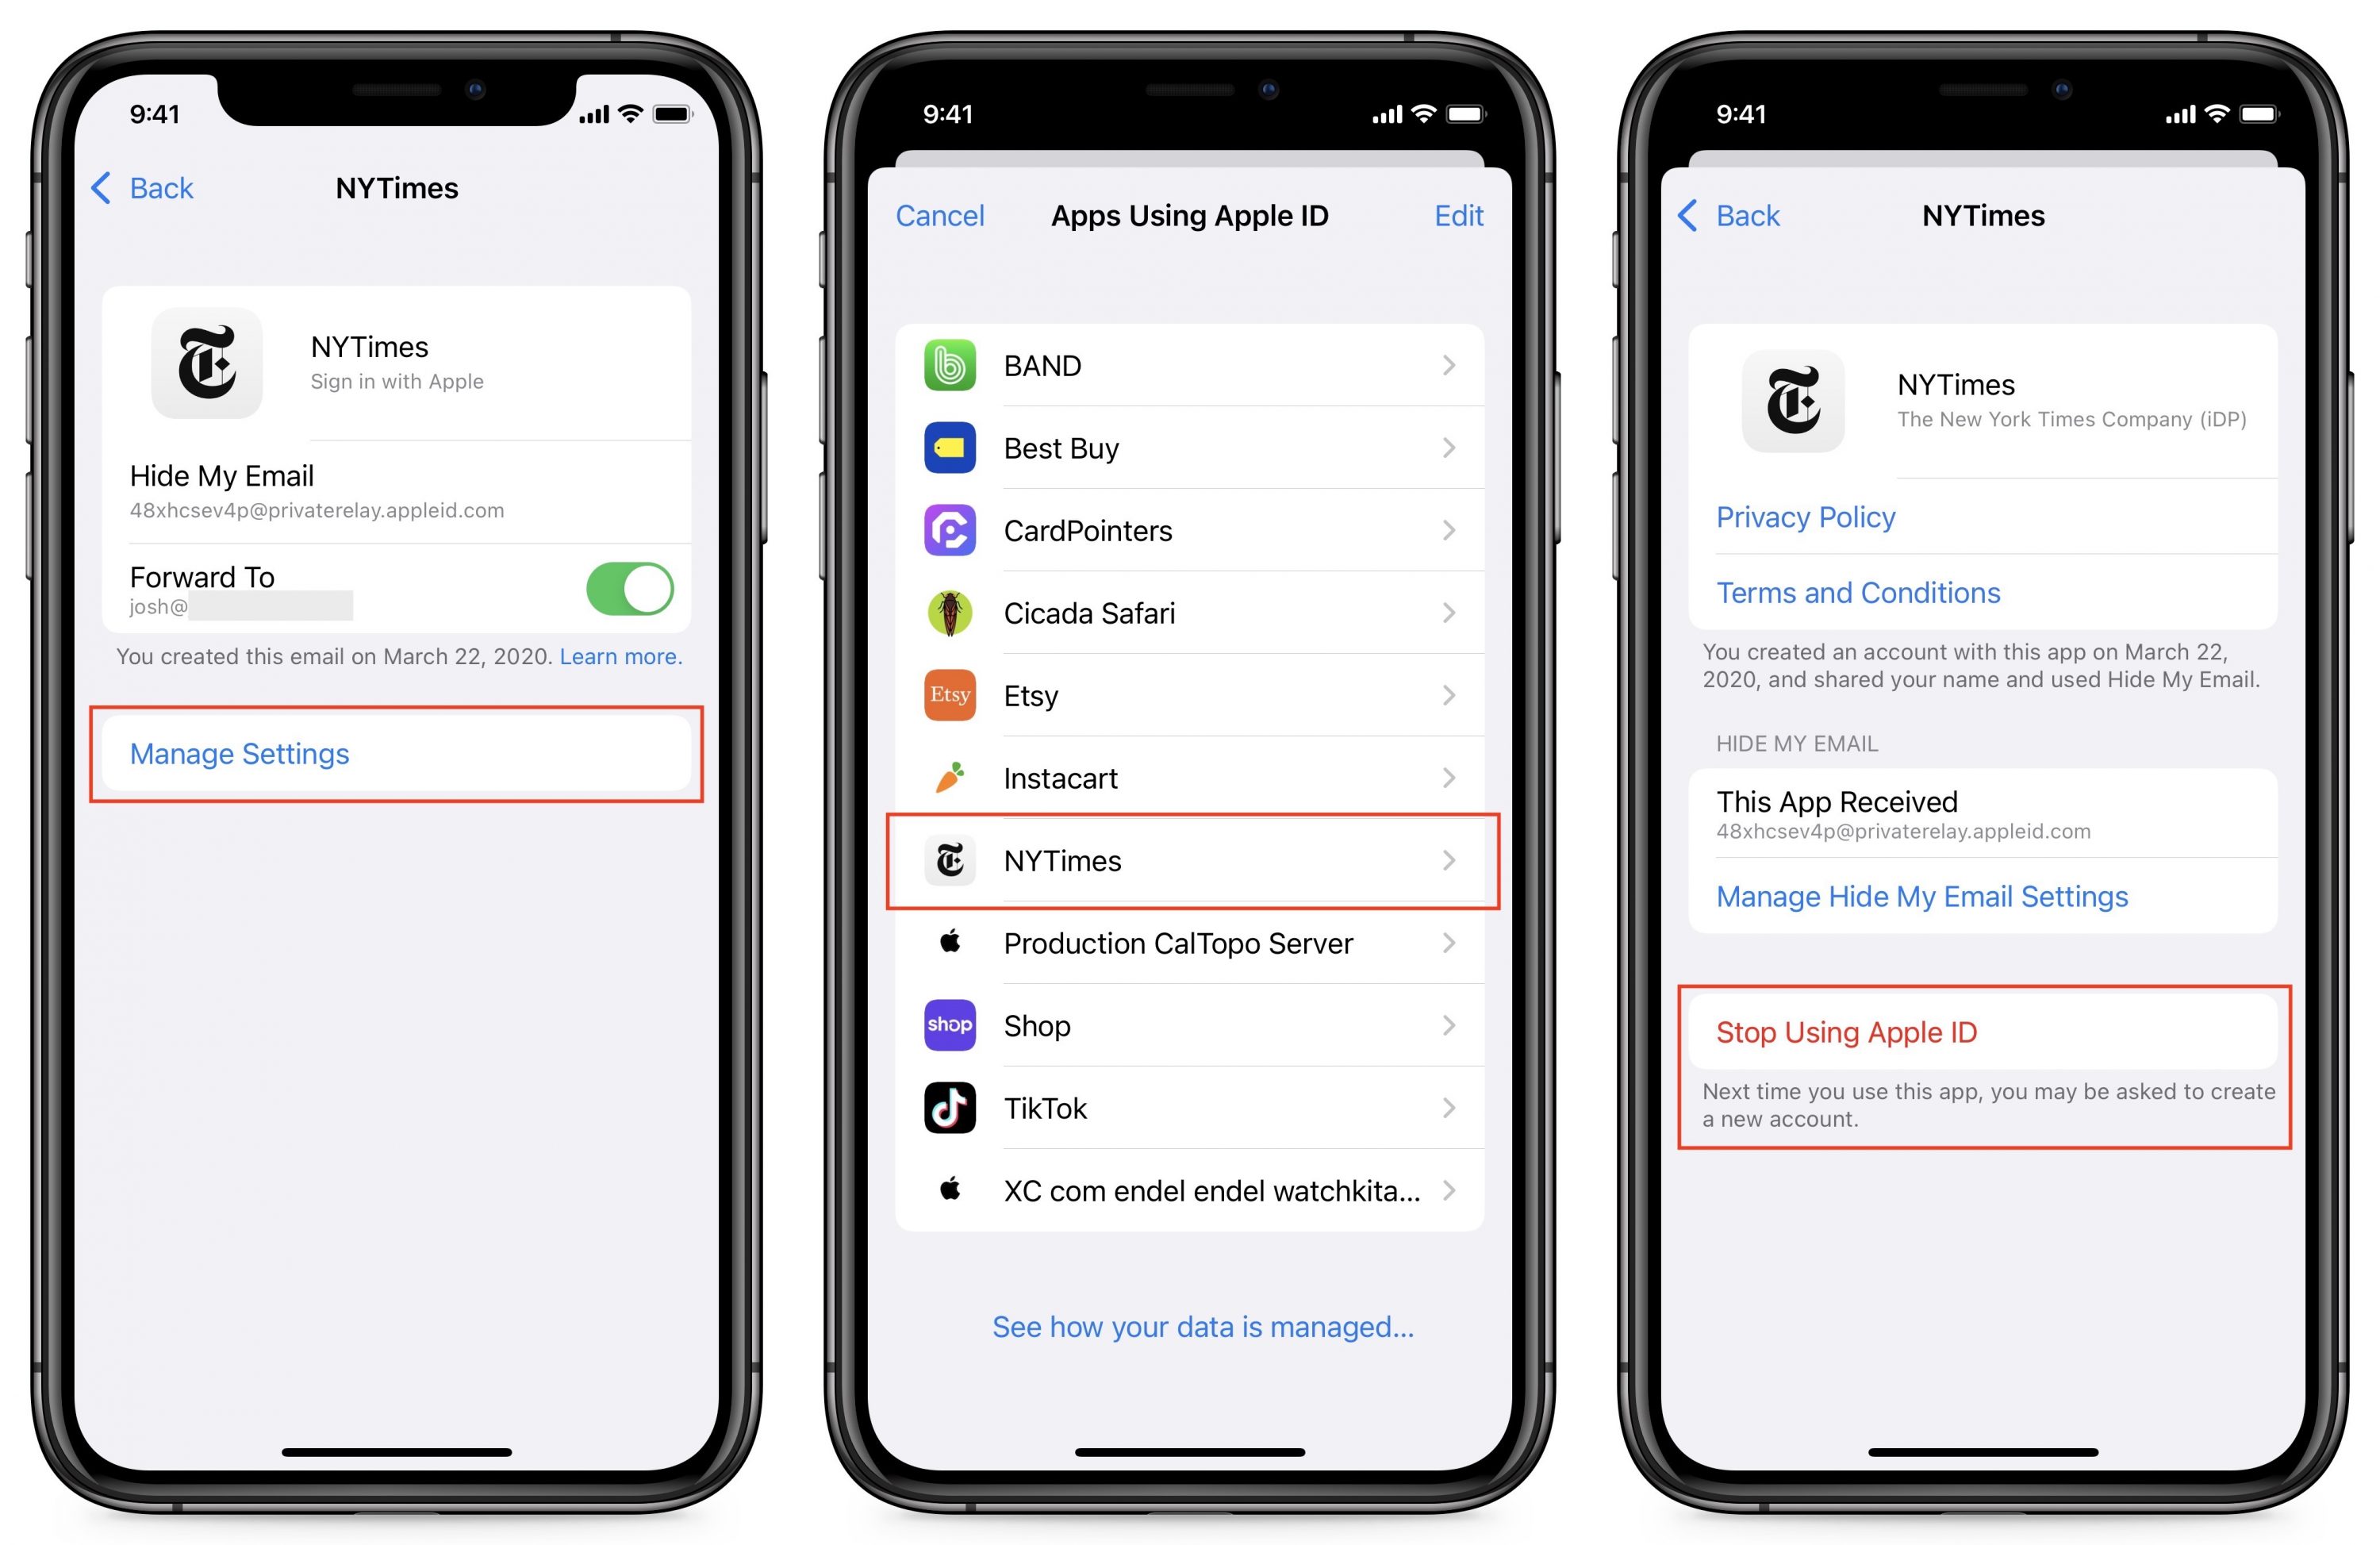
- Remove Sign in with Apple addresses: In the Hide My Email screen, tap a Sign in with Apple address, and tap Manage Settings in its settings screen, which lets you manage all your Sign in with Apple accounts. Select an account and then tap Stop Using Apple ID to delete that account.
The Manage Hide My Email Settings option on the rightmost screen is bizarre. It takes you to another Hide My Email settings screen nested inside the first one. And you can keep navigating down recursively.
Monterey
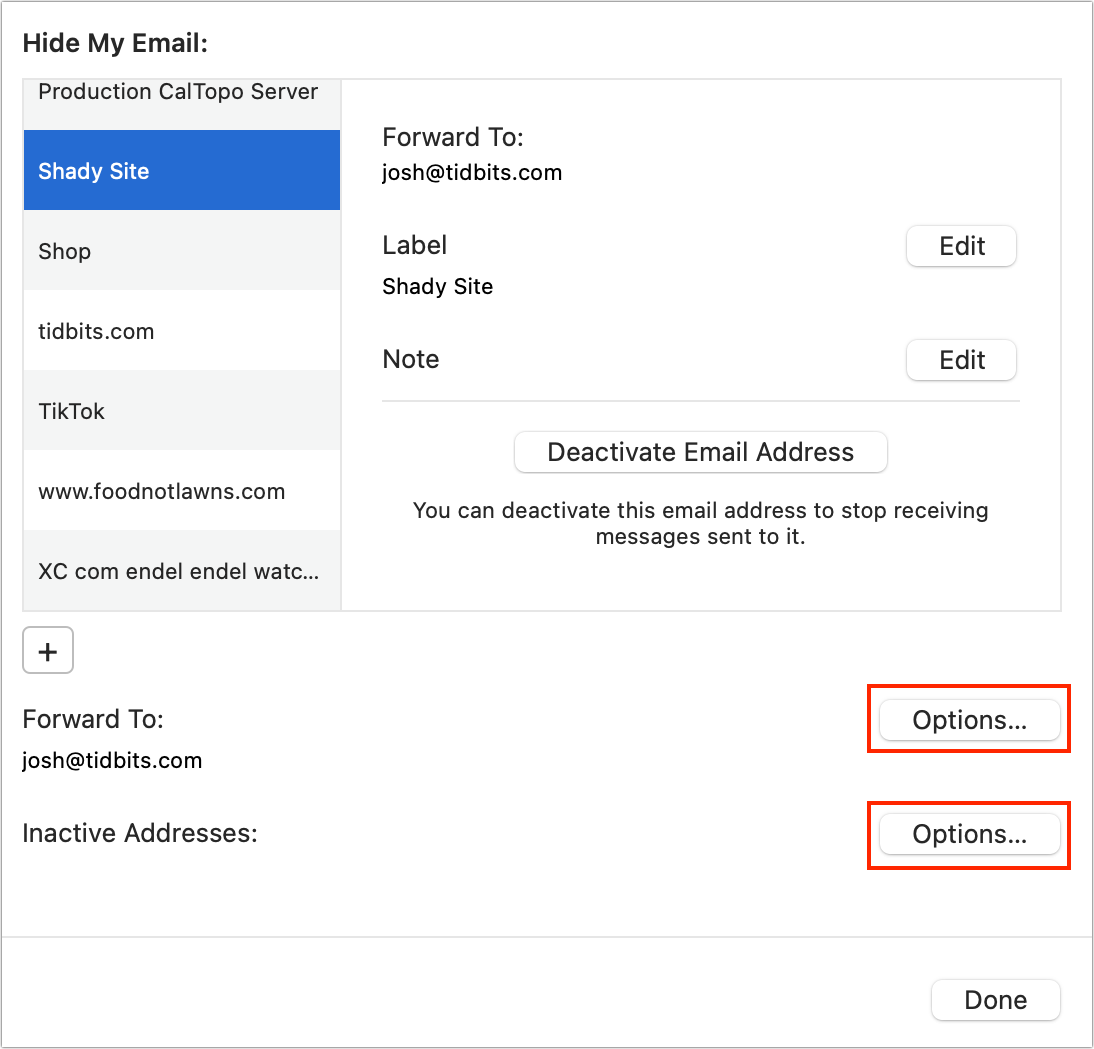
Go to System Preferences > Apple ID > Hide My Email > Options. Monterey also shows email addresses associated with Sign in with Apple.
Just as in iOS 15 and iPadOS 15, you can select an address to see options to copy it or turn it off. Manage Settings lets you manage those Sign in with Apple accounts, and Options buttons next to Forward To and Inactive Addresses lets you manage those.
iCloud.com
On iCloud’s main page, click Account Settings under the greeting. Under Hide My Email, click Manage. Here, you see a set of settings similar to those in iOS and iPadOS. You can choose a forwarding address at the bottom of the window and click an address (again, not one created by Sign in with Apple) to copy or deactivate it. However, you can’t delete an email address from iCloud.com.
Although the interfaces for Hide My Email don’t seem fully baked, the overall functionality should help you cut down on some unwanted email. For more about other new features in iOS 15 and iPadOS 15, check out my Take Control of iOS 15 and iPadOS 15 book.
Contents

Click for special offers to Mac Users Groups members.

Website design by Blue Heron Web Designs

Click the image for information about advertising on this website.