
HomeKit on the Range: Hue Lightstrips
My first step into HomeKit home automation was the Philips Hue light system, and I’ve been a fan ever since (see “Getting Started with the Philips Hue Smart Light Bulbs,” 1 August 2016). Years later, my bulbs are still going strong, and I’ve steadily added to my collection.
Ever since my wife and I moved into our current house, we’ve been frustrated with our kitchen lighting. There’s only a single light fixture, and it’s several feet from the range. Our frustrations deepened when the circuit in our microwave that powers the range bulb burnt out. We tried a few different solutions, but none worked well, so we’ve been cooking in the dark.
But recently, I purchased a Hue Lightstrip set when it was on sale. I paid around $65 for a previous-generation bundle with 2-meter and 1-meter light strips. The current-generation starter kit with just a 1-meter strip runs about $70. However, there are various bundles, different models, etc., so you might find a better deal by shopping around. A 1-meter extensioncosts about $20. Philips also sells an outdoor version that starts at $90.
I have been blown away by the difference it has made in my kitchen. If you’re not familiar with light strips, they’re flat plastic strips lined with LEDs that you stick in place like tape. They’re ideal for under-cabinet lighting.
I had assumed that the Hue Lightstrips wouldn’t be very bright. I was wrong. Was I ever wrong. The first time I plugged them in, at night, while they were still coiled from the package, I immediately had to clamp my eyes shut. Think back to the scene in National Lampoon’s Christmas Vacation when Clark finally gets his lights working and the alarm at the nuclear plant goes off while the Hallelujah Chorus plays in the background. Poetic hyperbole aside, they emit 1600 lumens, or roughly what an old 100-watt incandescent bulb puts out. Seriously, you want to avoid looking directly at them.
In short, I highly recommend the Hue Lightstrips. They’re bright, easy to install, work well with HomeKit, can display all kinds of colors, and aren’t terribly expensive if you can find them on sale. But figuring out what to buy and installing them isn’t entirely trivial. Let me provide some advice and installation pointers.
Clearing Up Version Confusion
First, note that Philips sells both indoor and outdoor versions of the Hue Lightstrips. Make sure you buy the right one for your needs—there’s no reason to pay extra for the outdoor version if it’s going in your kitchen. Plus, the outdoor strips are super thick.
Philips has produced four generations of the Hue Lightstrips, releasing them in 2012, 2015, 2016, and 2019. I have the third-generation Hue Lightstrips, and you can readily find the third and fourth generations. You may even find the second-generation ones on sale in dusty corners of the Internet.
The most notable changes to the Hue Lightstrip happened between the third and fourth generations. The fourth-generation:
- Features a new connector that is incompatible with the previous versions. If you buy extensions or adapters, you need to make sure you’re getting the correct version.
- Can be controlled directly via Bluetooth instead of requiring a hub. I’ve had enough bad experiences with Bluetooth and good ones with the Hue hub that I strongly recommend investing in a Hue hub (a starter kit is usually the most cost-effective way to acquire one).
- Has an official connector to rejoin two cut ends. While it’s nice that Philips is addressing the fact that people like to cut and reattach their lights, solutions for this already exist.
How does cutting, extending, and reconnecting work? Let me try to clear that up.
Understanding Cutting, Reconnecting, and Extending Strips
Until I bought Hue Lightstrips for myself, I had no idea how these light strips could be modified. Until the latest generation, here’s how it worked:
- The main strip was permanently connected to the power supply.
- The end of the main strip had a female connector.
- You could purchase additional lengths of lights and plug them into the main strip.
- You could also buy unlit extensions in various lengths from Philips and third parties.
- You could trim the end of a light strip at marked cutting points to make it fit, but you couldn’t reattach the cut end.
The fourth-generation changes the first and last facts in that list: you can now disconnect the main strip from the power supply, and you can rejoin cut ends with an official connector. However, Litcessory beat Philips to the punch with a cut-end connector for previous generations, with one caveat: the Litcessory connector requires that you cut in a slightly different place than where Philips tells you to cut. If all else fails, you can reattach the strips yourself if you’re handy with a soldering iron.
Installation Considerations
Hue Lightstrips are simple to install: clean the surface, peel off the backing, and stick them where you want them. But you want to do a little planning first to make sure that things don’t look weird. Also, removing them after installation will be difficult; you want to get it right the first time.
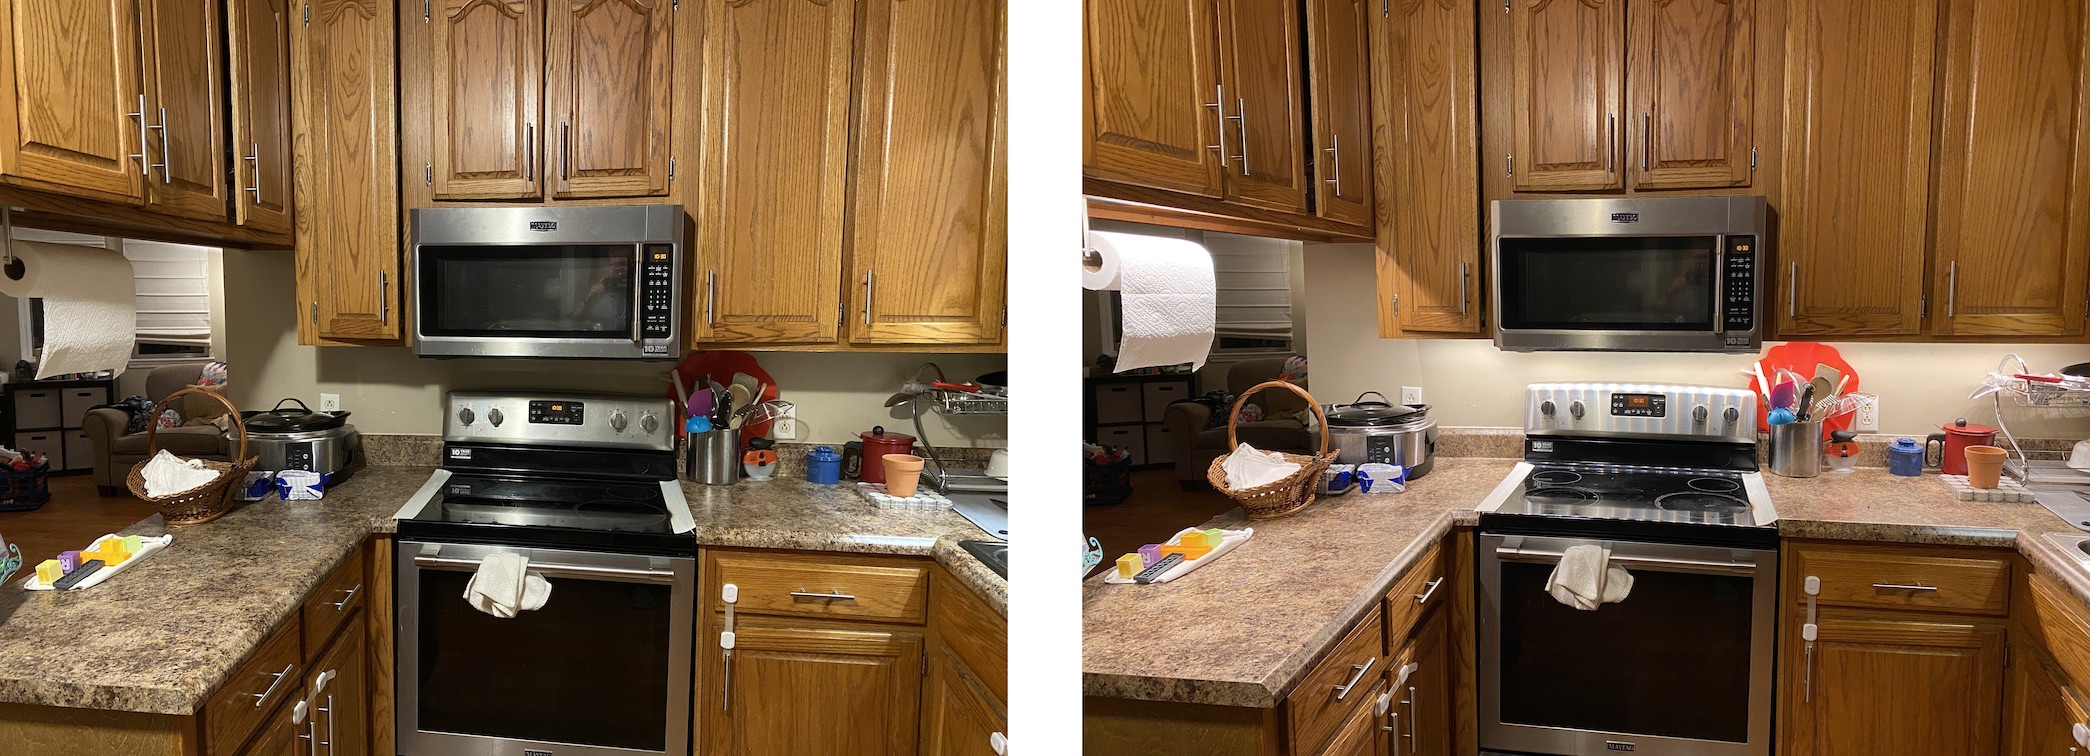
My kit came with a 2-meter Hue Lightstrip plus a bonus 1-meter Lightstrip, a total that roughly corresponded to the length of my cabinets. Thankfully my kitchen has an outlet in a corner under the cabinets in question.
Before peeling the backing off, my wife and I held up the lights roughly where we wanted them, with the lights turned on so we could see how the light looked in various positions. We wanted to light a pair of separated cabinets, so we needed an unlit extension cable to bridge them. I made sure to leave enough clearance between the end of the light strip and the cabinet to plug in the inflexible extension.

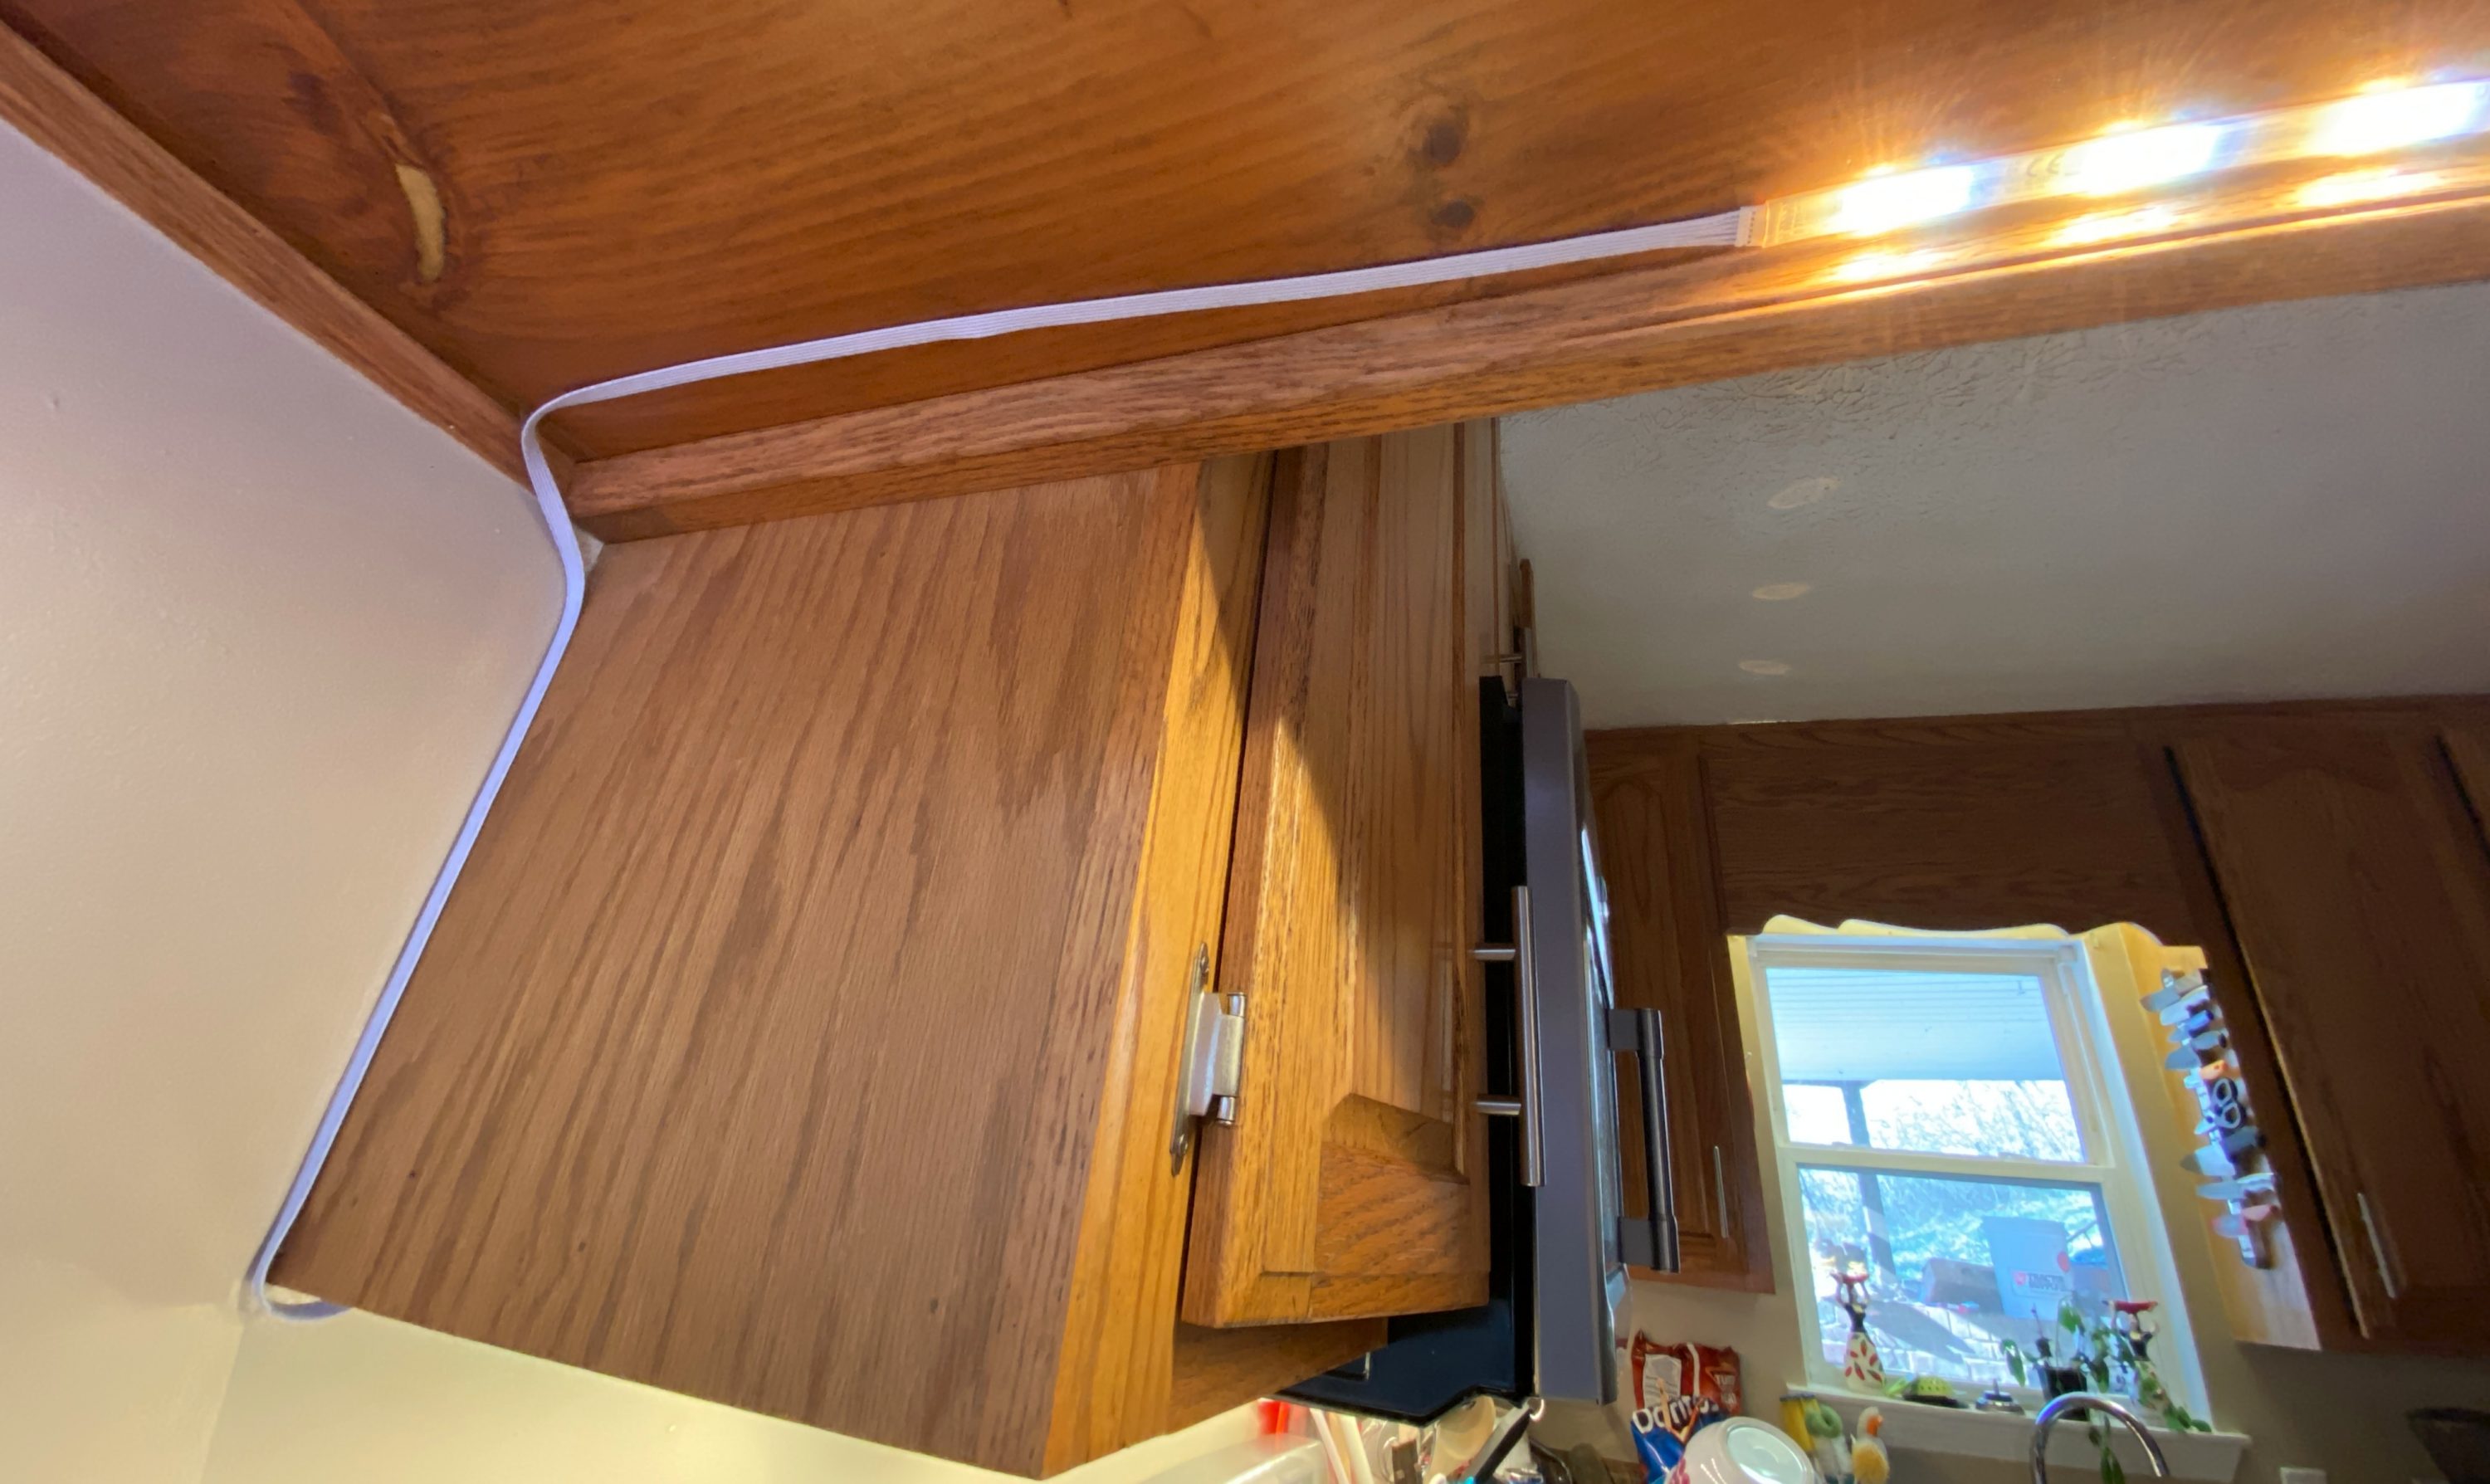
I had stressed about running the Hue Lightstrip under the microwave and thus over the range, due to steam, oil, and other nastiness from cooking. However, my microwave won’t power even a lightbulb anymore, so I needed some light in the area. It’s not ideal, but it’s working fine so far, apart from the light strip peeling away from the bottom of the microwave a bit. People with a light under their over-the-range microwave usually route the light strip’s power connection through the cabinets, over the range, and back out the other side.
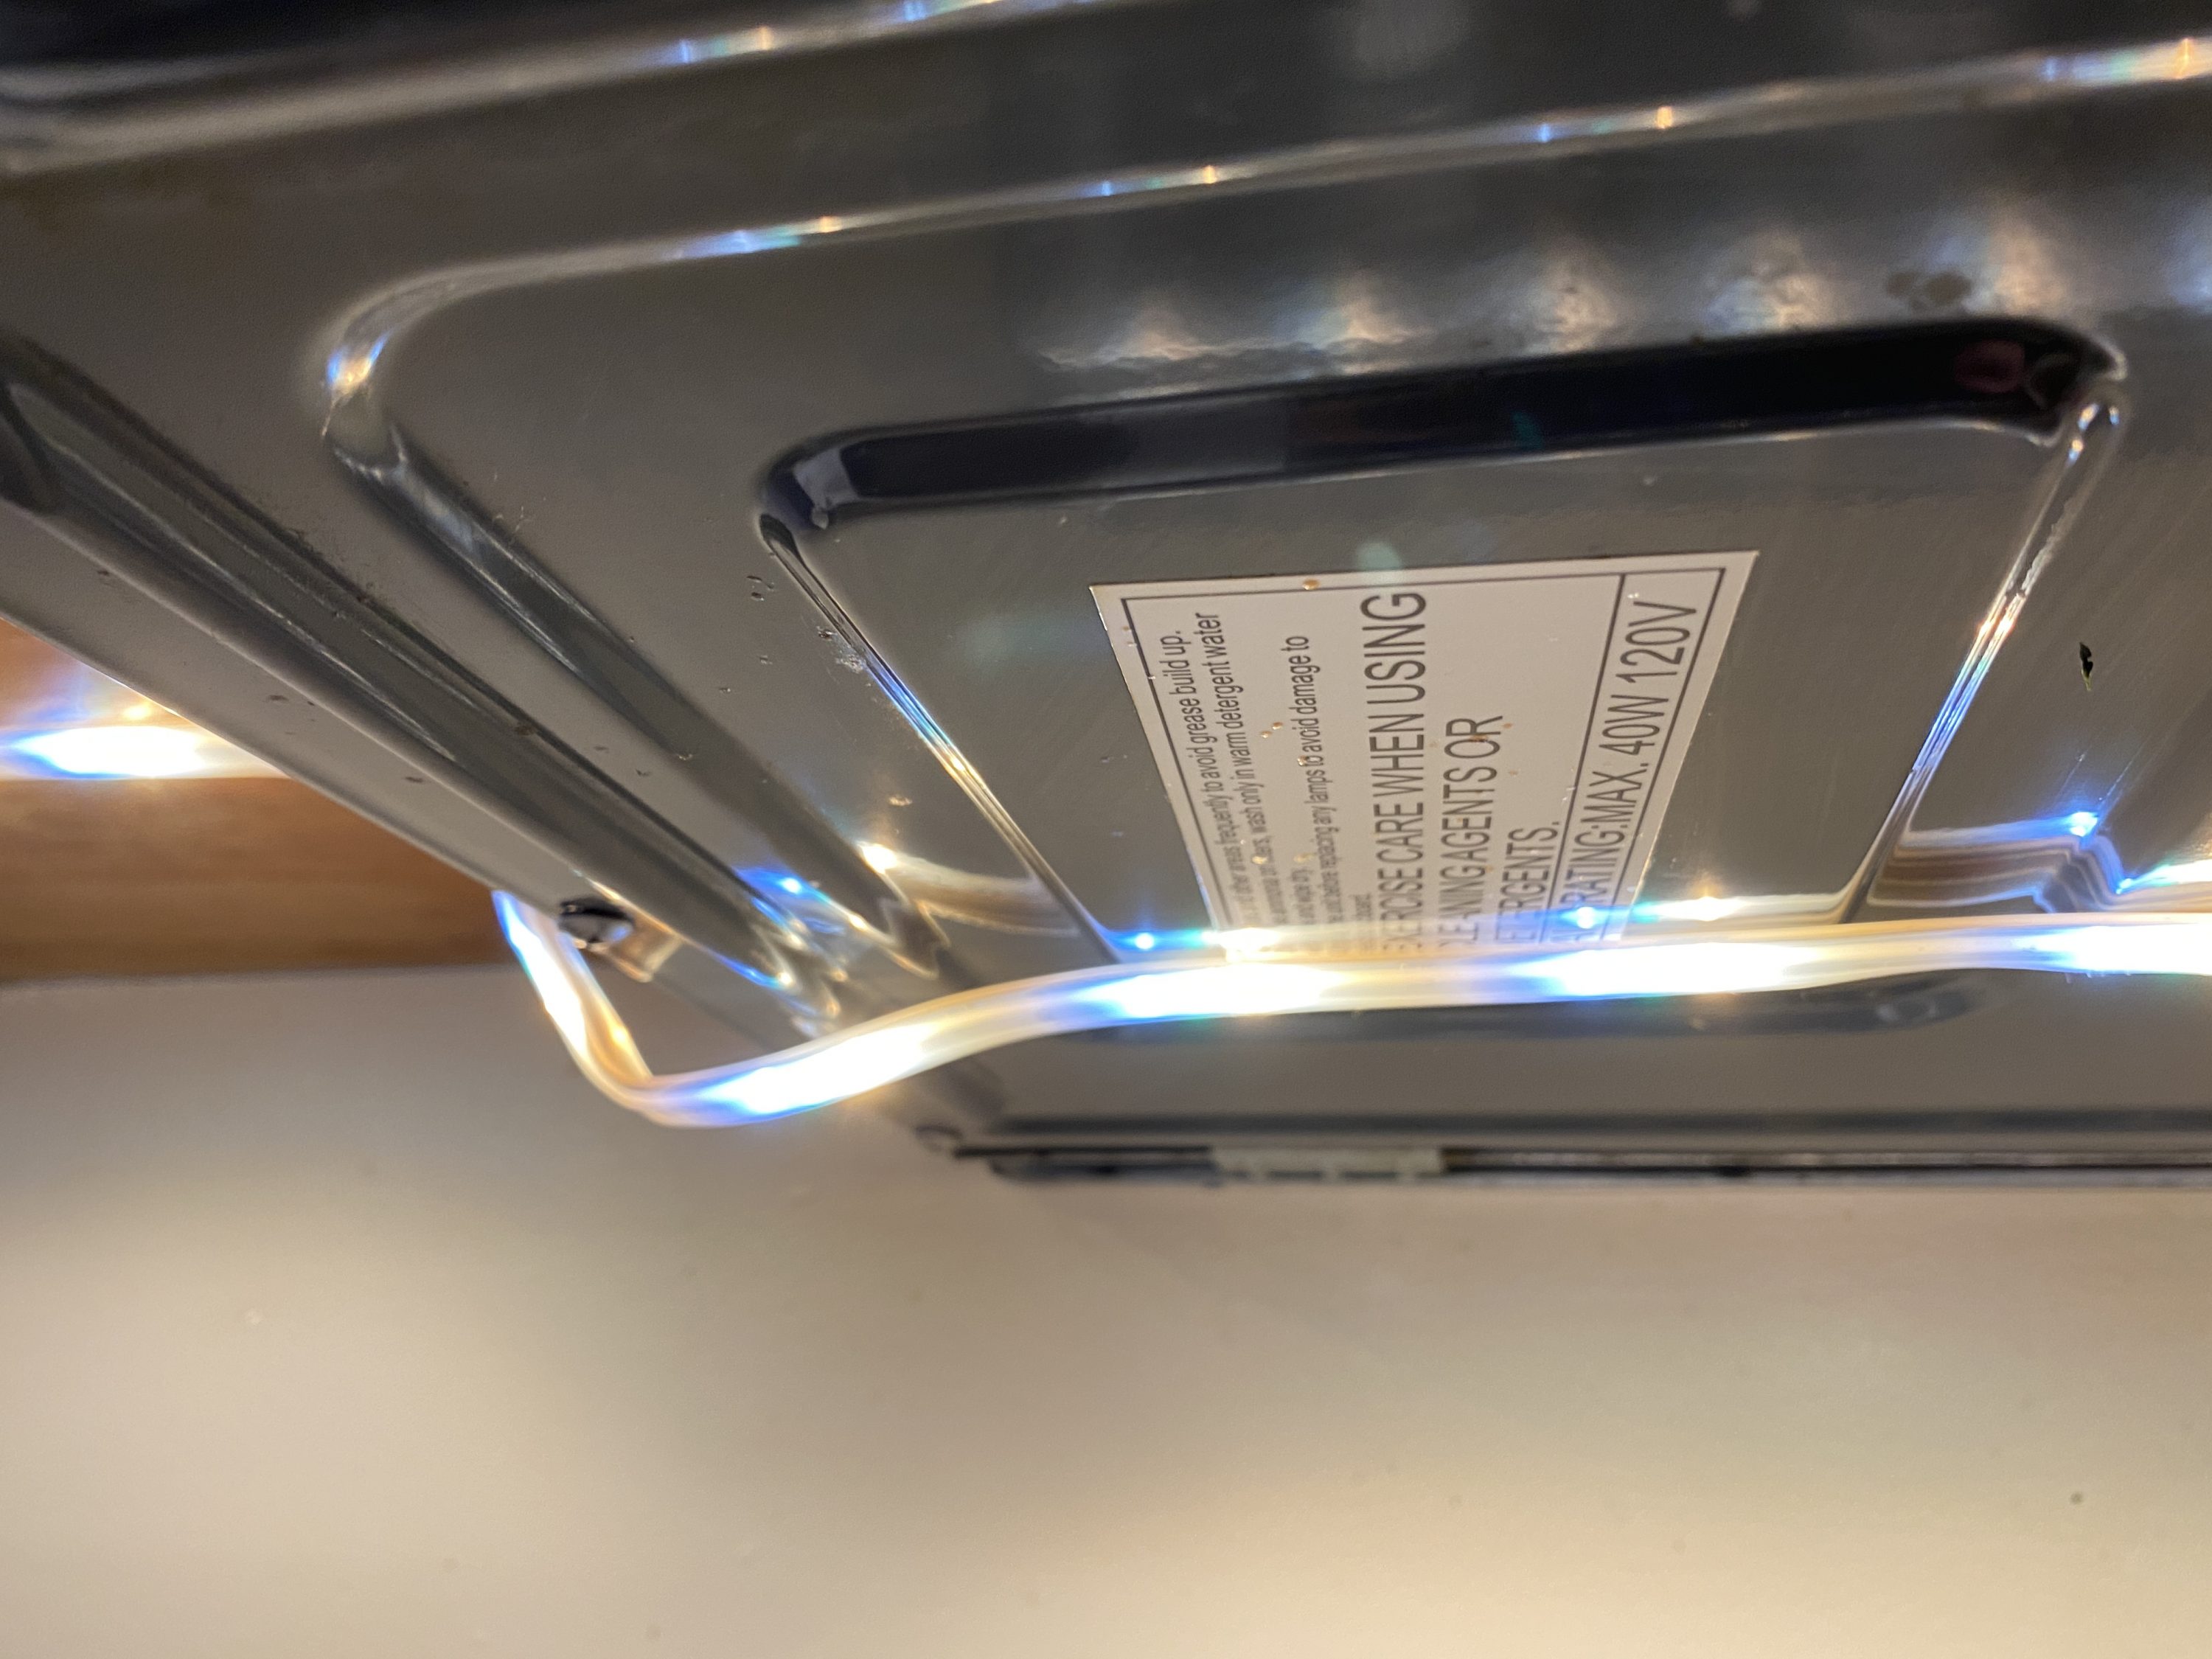
The power supply also has an adhesive back, so I stuck it under a cabinet. I rolled up the excess power cable and held it in place with masking tape, a temporary solution that is now failing.
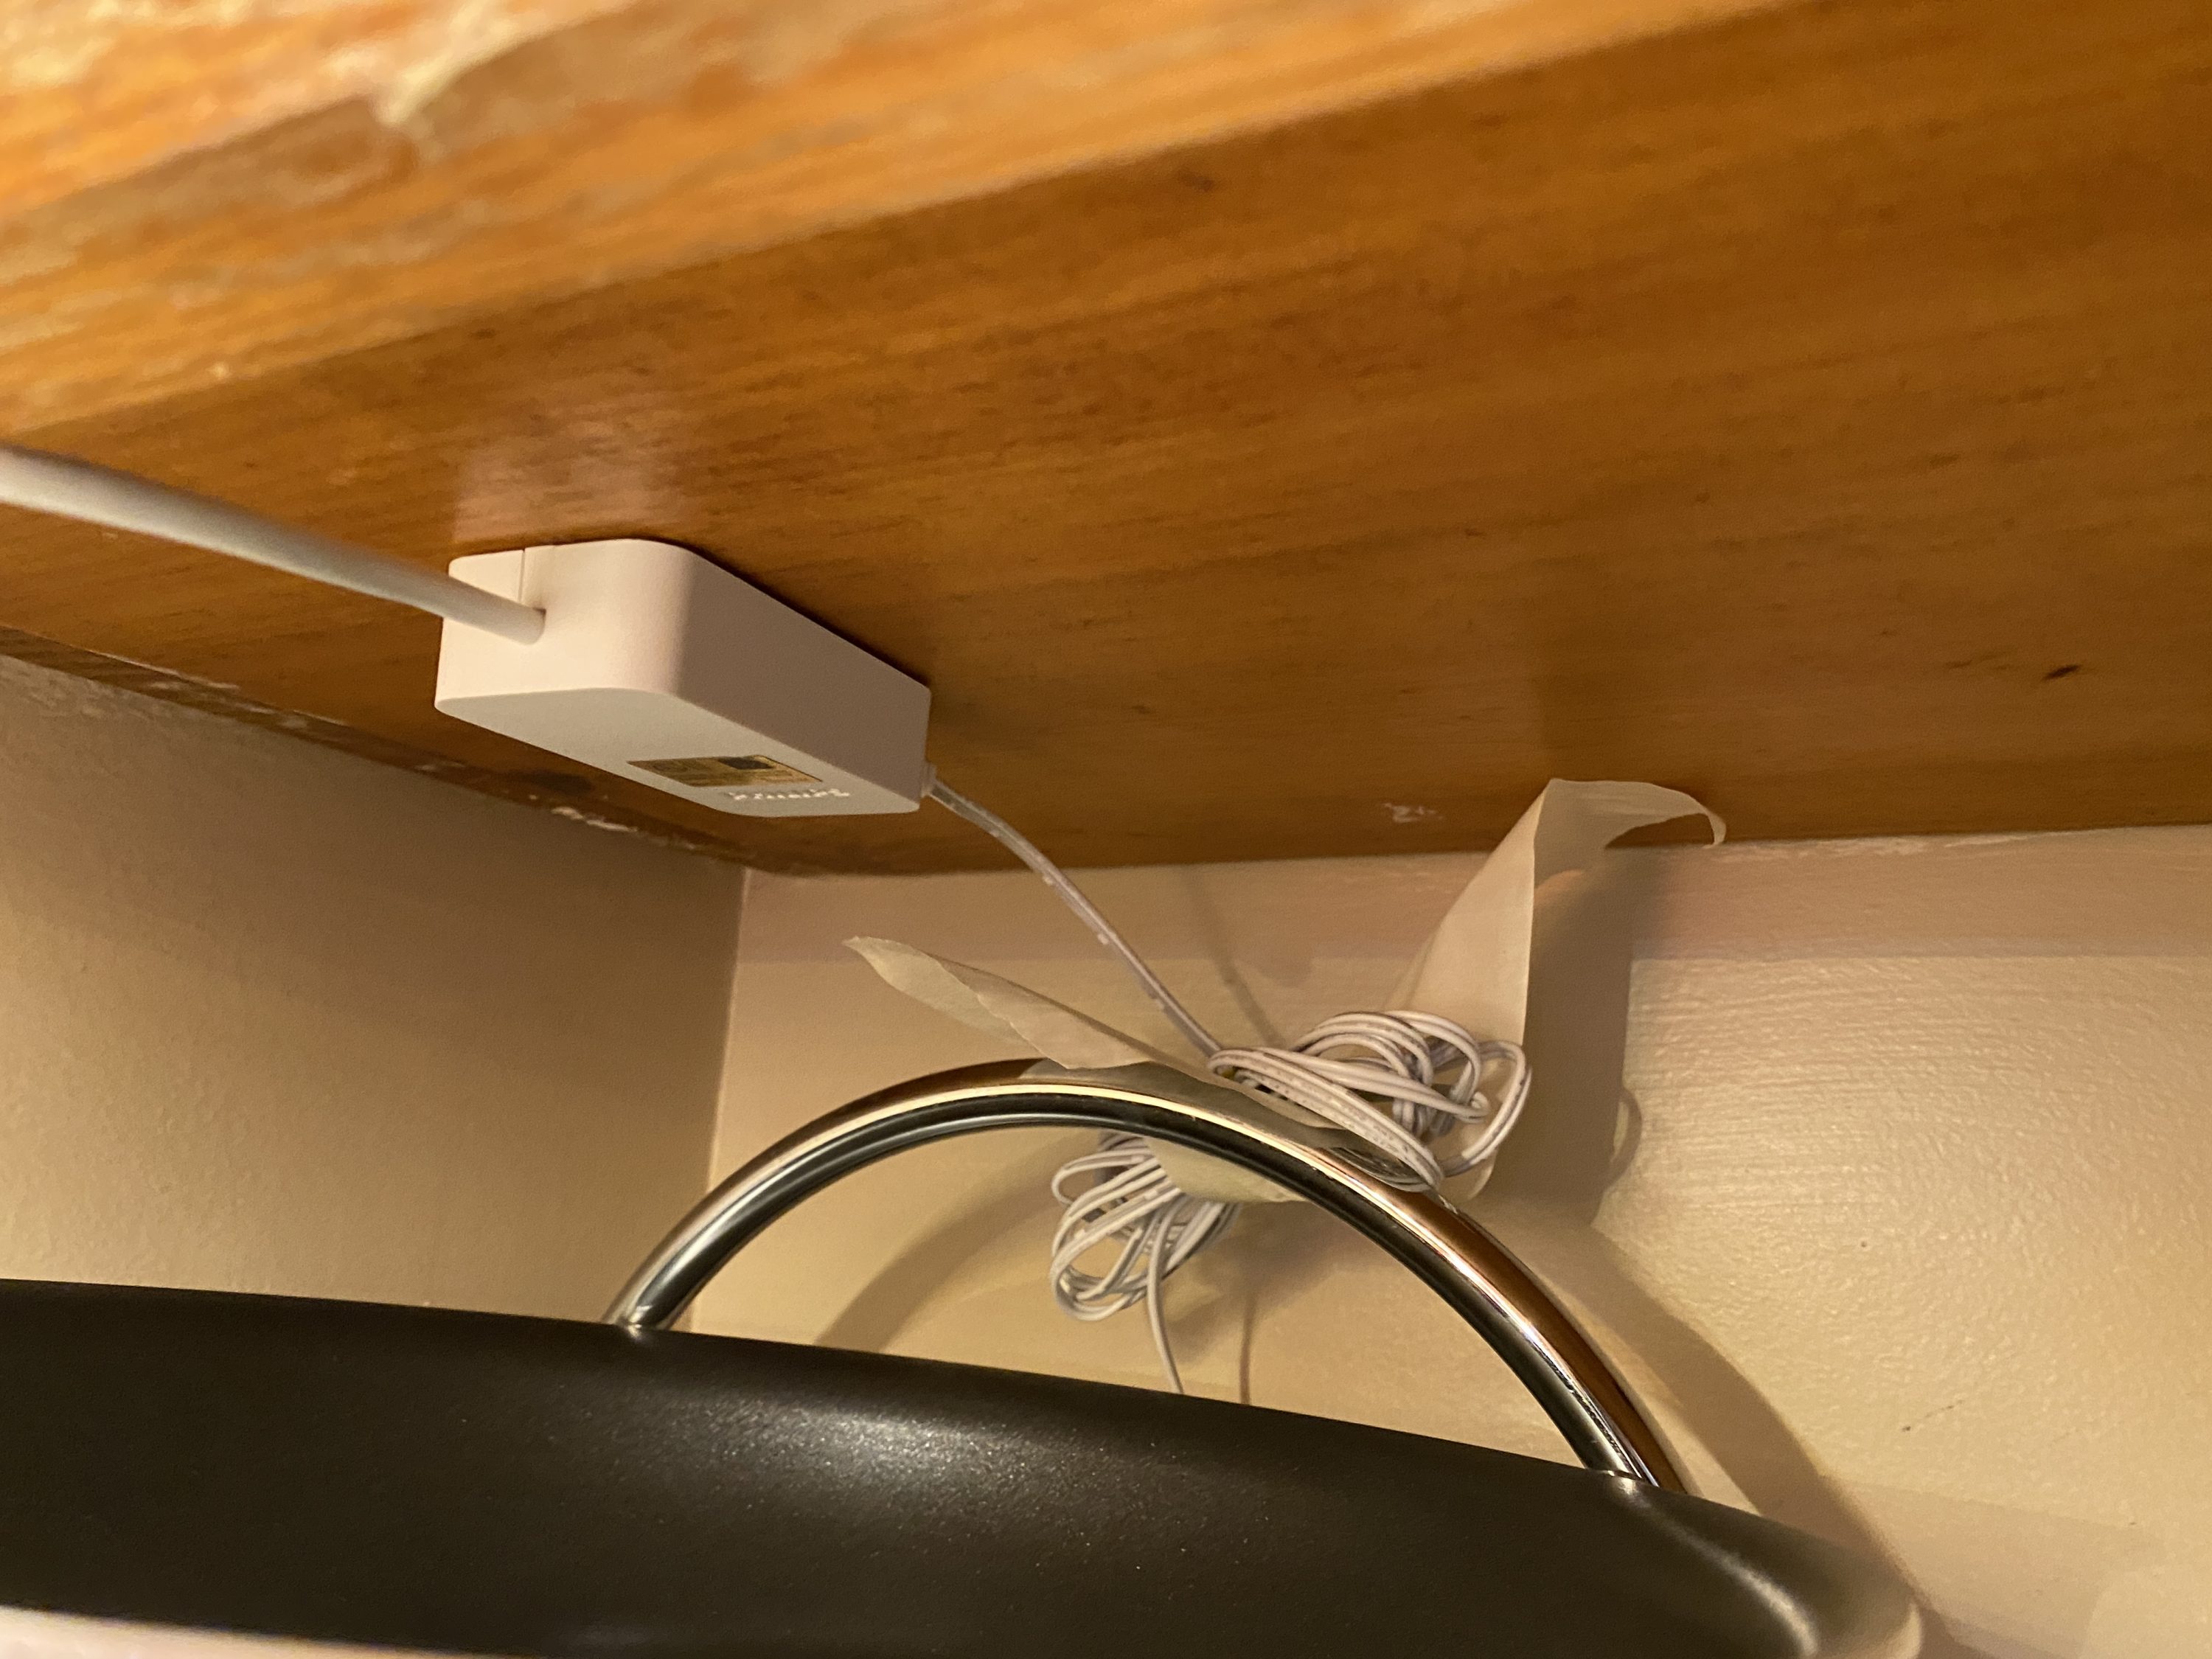
Once the first light strip was in place, I had to figure out how to connect the second one to it. Philips included a tiny extension cable in the box, but I needed quite a bit more. Thankfully, Litcessory sells unlit extension cables of various lengths. I measured out where to put the second strip, and once the extension arrived, I stuck it under the cabinet (the extension cable has an adhesive back too).

Using the Hue Lightstrips
The Hue Lightstrips work like any other smart bulb. In the Home app, I named them Cabinet so that I can tell Siri “turn on cabinet.” They also support color changes, so I could turn them orange, blue, green, or whatever. I never use that feature because colored lights give my wife a headache. However, I will note that the green color looks good. Earlier Hue bulbs produced a weak, yellowish green, but this Hue Lightstrip emits a true green.
What’s important is the considerable improvement the Hue Lightstrip made to my kitchen. Not only is the work area better lit, but the extra light makes the entire kitchen seem more spacious. Cooking is much easier and more pleasant. If I’d realized how much of an improvement such a simple change was going to make, I would have done it years ago.
If you’re suffering with a poorly lit spot in your house, especially under cabinets, try the Hue Lightstrips. The fourth-generation does not require a hub, so you can try them out without investing in the whole system, but if you like them, I encourage you to get a starter set with some bulbs and the Hue hub.
Of all my HomeKit accessories, the Hue bulbs have been the most reliable, and I believe it’s because they have a dedicated hub and don’t need to phone home to a cloud service. Hue is a bit of an investment, but it’s worth it.
Contents
- New Members
- The Digital Right to Repair Coalition’s CES “Worst in Show”
- Signal Provides Secure Cross-Platform Replacement for WhatsApp
- Keep the iPhone 12 and Other Magnet-Bearing Consumer Electronics Away from Implanted Medical Devices
- HomeKit on the Range: Hue Lightstrips
- CES 2021: Tech Trends to Watch
- CES 2021: Family Firewalls, Flying Cars, and Creepy Pet Robots
- Apple Weathers the Storm to Shatter Records in Q1 2021