The speakers in your iPhone or Mac likely sound weak compared to your stereo system. But how do you get the music from your device to those speakers? AirPlay is Apple’s super-cool technology that enables you to stream audio from an Apple device to your speakers over Wi-Fi. But the stereo system to which you’re streaming needs to support AirPlay for that to work.
One way to add music streaming support to such a system would be to upgrade its amplifier to one that supports AirPlay—something like this Denon DRA-800H. If you’re buying new, make sure you get one with AirPlay 2. But that’s a pricey solution for being able to play music wirelessly from your Apple devices through your best-sounding speakers.
A cheaper solution would be to use one of Apple’s now-obsolete AirPort Express base stations. It connects to your devices over Wi-Fi and to your stereo through a standard headphone jack. The second-generation AirPort Express 802.11n with the version 7.8 firmware update even supports AirPlay 2, but modern Macs, iPhones, and iPads can still stream even to older AirPort Express models that support only AirTunes, the audio-only predecessor to AirPlay. If you can find one, it will do the job quite well—you’ll just need a copy of AirPort Utility for macOS or iOS to configure it. In fact, I was using an AirPort Express for years, until it died a few months ago, leaving me scrambling for a new solution. I could have tried to replace it with another, but I recalled that I still had a second-generation Apple TV that could step into the breach. With a little effort, I got it working beautifully.
So if you’re interested in bringing your classic stereo system into the modern music streaming world without spending much, you could look for a used second-generation AirPort Express. Or you could do what I did, and press an old Apple TV into service. I did this because I had the Apple TV in the closet, making this project a fun alternative to an AirPort Express. I had even lost the Apple TV remote; I’ll explain briefly how to work around that problem in the steps below.
Parts List
Here are the parts you will need:
- Second- or third-generation Apple TV: You’ll need a power cord; a remote is helpful but not essential.
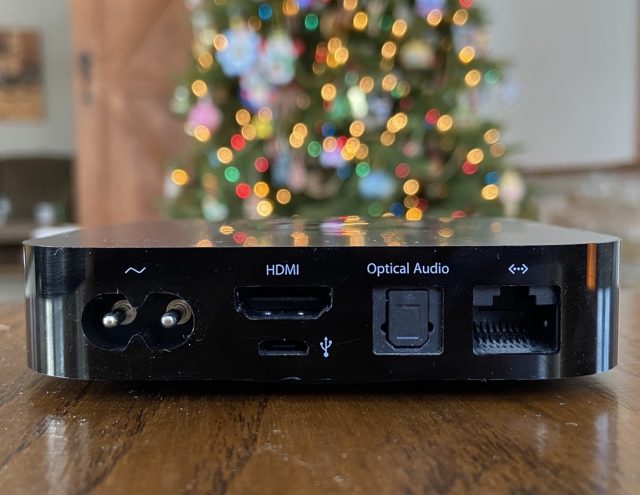
Ports for the second-generation Apple TV - TOSLINK Digital-to-Analog (D/A) Converter: This is the magical gadget that connects your Apple TV to your stereo, converting digital audio to analog. I got this Easycel model recently for $13, but if it’s unavailable, there are others that should work, such as this Techole unit. The converter should accept a TOSLINK (or “optical”) audio input (digital) and deliver a pair of RCA stereo outputs (analog). Make sure it includes a TOSLINK (“optical”) cable; if not, you’ll have to buy one separately.
- Pair of RCA Cables: You probably have some of these cables sitting around—cable TV providers often handed them out in the days before TVs supported HDMI, and many people have extras for connecting stereo gear. You only need two and while standard practice suggests using red and white for audio, the colors don’t matter. Otherwise, you can grab an inexpensive pair online.
- HDMI Cable: You’ll need this cable to connect the Apple TV to your TV, but it’s necessary only while you’re setting up the Apple TV for the first time.
Step by Step Instructions
Without further ado, here are the steps to AirPlay-enable your classic stereo system with an old Apple TV. First, let’s run through setting up the Apple TV, after which we’ll connect it to your stereo with the TOSLINK digital-to-analog converter.
- Plug the Apple TV in near your TV and connect the two using the HDMI cable. Remember to change the input on your TV. If you don’t have a remote, but you do have a Bluetooth keyboard, you can still do the necessary configuration. Put the keyboard into pairing mode and then go to Settings > General > Bluetooth and choose the keyboard. You can now use the arrows to navigate around the Apple TV interface in lieu of the remote; press Return to make selections and Escape to go back.
- If your Apple TV was previously restored to factory settings, you should see a screen asking you to select your language. In that case, follow the on-screen instructions. Otherwise, you should see the normal home screen.
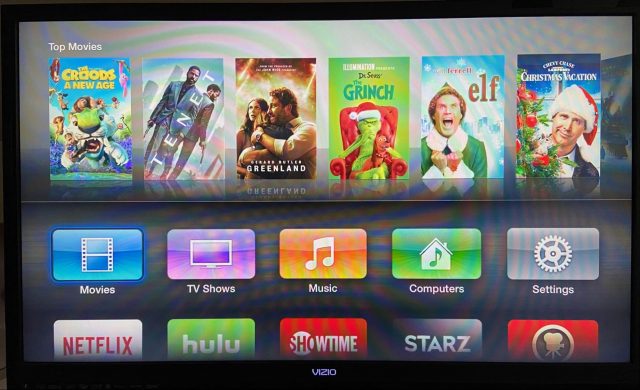
- If you want to start with a predictable baseline, navigate to Settings > General > Reset and select Reset All Settings.
- Navigate to Settings > General > Network, select a Wi-Fi network, and enter the password (the keyboard will come in handy here).
- In Settings > General > Name, enter a name that reflects where the speakers will be located.
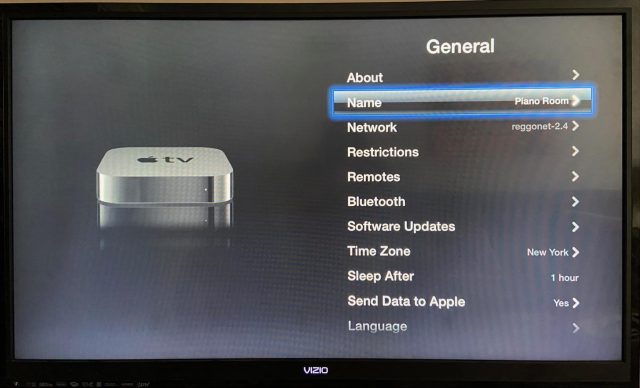
“Piano Room” is really just my repurposed living room; don’t assume I’m living in a mansion! - In Settings > General > Time Zone, set the time zone. I’m not sure if this matters, but it’s usually a good idea.
- Disable the screen saver by navigating to Settings > Screen Saver > Start After > Never. Again, I’m not sure if this matters, but I see no reason why the device should be burning CPU, memory, and possibly network bandwidth trying to display a screen saver that no one will ever see.
- Leave all audio settings at their default values.
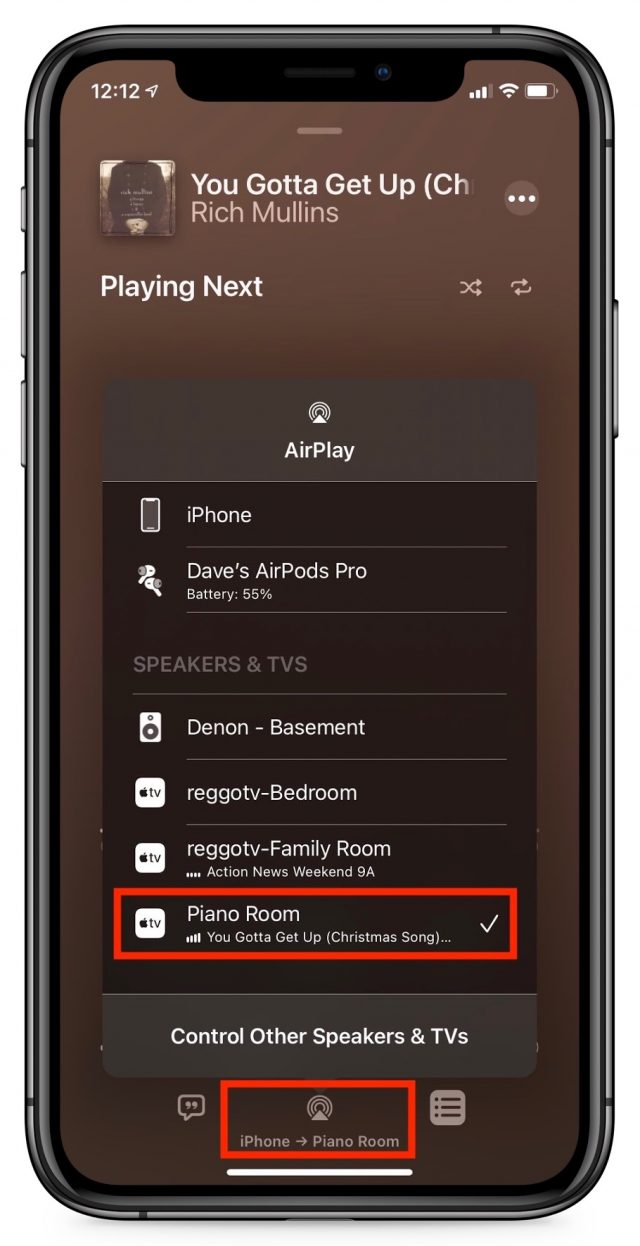 At this point, you should be all set to stream audio! Test to make sure AirPlay is working by trying to stream some audio from your iPhone to the TV your Apple TV is currently connected to. Open the Music app, play a song, tap the AirPlay icon, and tap your newly created AirPlay destination.#
If anything doesn’t work, back up and troubleshoot before proceeding. Once you unplug the Apple TV from the TV screen, it will be harder to troubleshoot.
Now we’re in the home stretch! Next, we’ll connect the Apple TV to your stereo in a few quick steps:
- Disconnect the HDMI cable from the Apple TV; you won’t need it again. Unplug your Apple TV, and relocate it close to the amplifier driving the speakers you are upgrading with AirPlay support. Plug the Apple TV in to power it up.
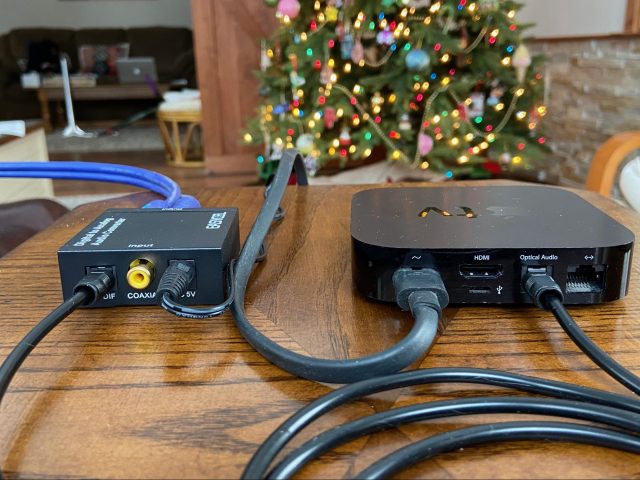
- Plug in your digital-to-analog converter, and connect it to the Apple TV using the TOSLINK cable. The TOSLINK port (labeled SPDIF on my device, which technically also refers to the coaxial port next to it), is the D-shaped port with a flap to keep dust out. If you peek inside, you’ll see a red light. Fiber optics, baby!
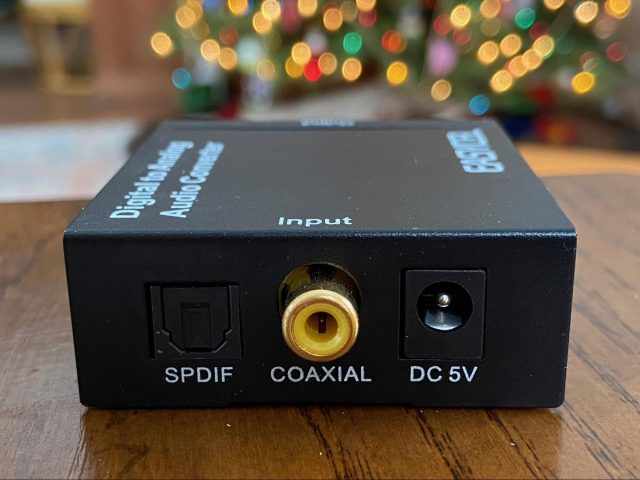
- Connect your RCA cables to the red and white (L/R) ports of the digital-to-analog converter and into your stereo amplifier, perhaps in a CD, AUX, or Tape input. Don’t use Phono inputs! Those are designed to work only with record players.
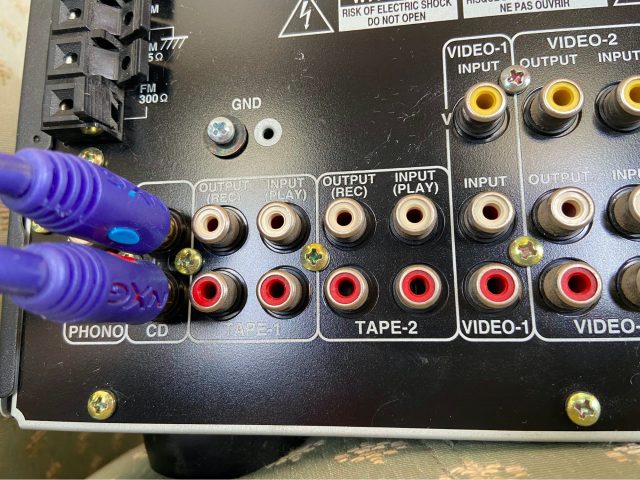
- Change the input on your amplifier to whatever you chose to plug the RCA cables into.
When you’re all done, your connections should look something like this photo.
Finally, go back to the Music app and try the streaming test again, noting that you may have to reselect the AirPlay destination. (Remember that you should always start with the volume down low to prevent damage to your speakers and your ears.) You should hear your iPhone playing back through your stereo! This AirPlay destination will be visible everywhere on your Wi-Fi network, including all your iPhones, iPads, and Macs. Even guests will be able to use it if they have access to your Wi-Fi.
A Few Techie Notes
Given that we’re talking about older hardware, there are a few technical details that might raise additional questions.
- What do I lose by not having AirPlay 2? The second- and third-generation Apple TV support AirPlay, but not the newer AirPlay 2. The main downside there is that they cannot participate in a multi-speaker destination, such as having all the speakers in your house play the same music in sync. For that, you would need to modify these steps to use an Apple TV HD or Apple TV 4K. While I’ve always been intrigued by this multi-room feature, I’ve never found a practical use for it.
- What would be different if I want to use a current Apple TV? The third-generation Apple TV is the last model to include the TOSLINK/optical audio port. If you want to use a current Apple TV model for this project, you will need a different digital-to-analog converter that accepts HDMI as an input, such as this AGPtek unit. The rest of the steps should be similar.
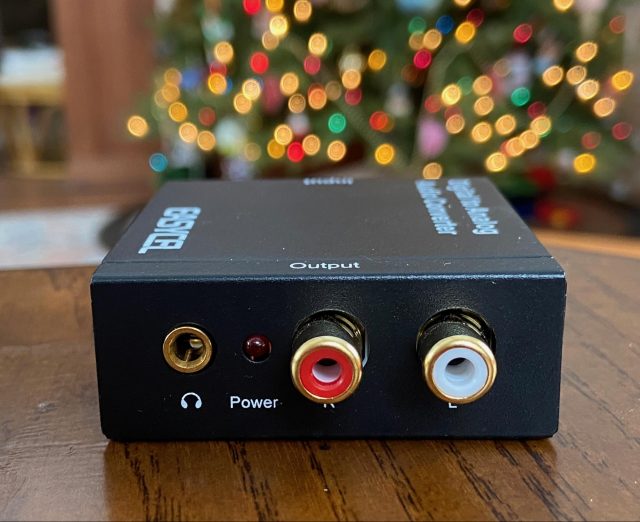
- Why can’t I use the headphone jack? You might be tempted to use the headphone output on the digital-to-analog converter rather than the RCA outputs (the red and white jacks in the photo below). Resist the temptation. While some headphone output jacks are capable of driving a line-level device like your amplifier, most are good only for headphones and will sound lousy when connected to an amplifier. (That said, the headphone output on the old AirPort Express drove a line-level device quite well.)
Congratulations! For the price of a Secret Santa gift, you just modernized your old stereo, and now you and your family have a great new way to enjoy music in your home! Let us know in the comments how you make out with this or other creative AirPlay-related projects!
Contents
- The Role of Bootable Duplicates in a Modern Backup Strategy
- How to Manage Breathe Notifications on the Apple Watch
- Ensure Sufficient Free Space before Upgrading to Big Sur
- BlastDoor Hardens iMessage Against Malware Assaults
- Apple Platform Security Guide Reveals Focus on Vertical Integration
- Add AirPlay to Your Classic Stereo with an Old Apple TV
- New Members
